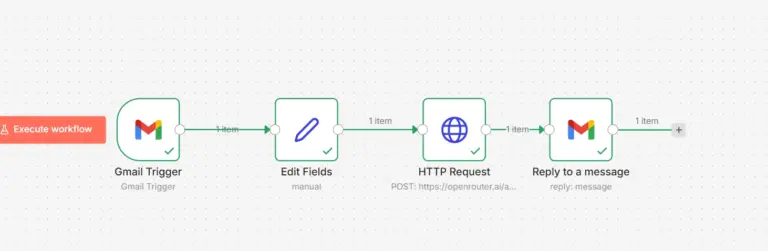
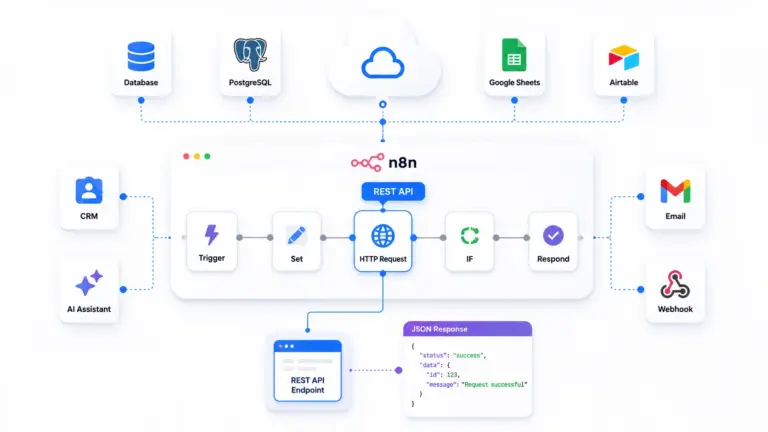
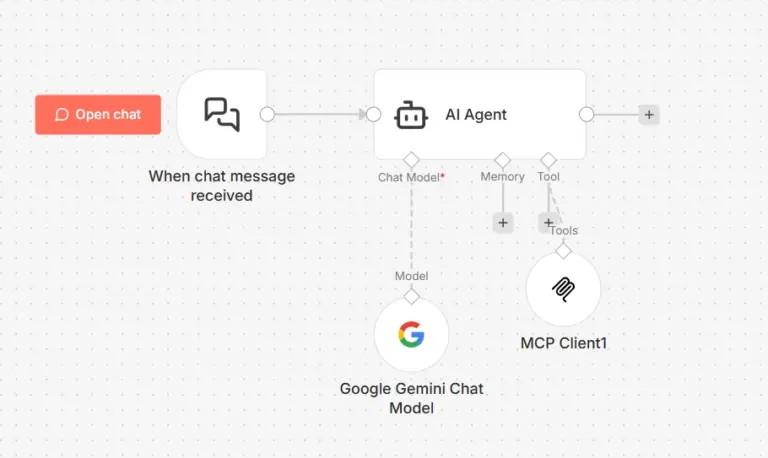
Your email inbox shouldn’t be your notification center for every automation that runs. Between spam filters, delayed deliveries, and cluttered folders, email fails as a reliable real-time alert system. This is where Telegram bots connected to n8n workflows offer a superior solution.
Telegram app is a secure, cloud-based messaging app known for fast delivery and API support. n8n automation is an open-source automation platform that lets you build sophisticated workflows connecting hundreds of services without writing code. When combined, they create an instant notification system that delivers automation alerts directly to your phone within seconds.
This guide walks you through creating a Telegram bot using BotFather, obtaining necessary credentials, finding your unique Chat ID, and connecting everything to n8n for instant workflow messages.
What You’ll Need
Before starting, ensure you have:
Required Tools:
- Telegram app installed on your phone or desktop (free, available on iOS, Android, Windows, Mac, Linux)
- n8n account – either self-hosted locally or cloud-hosted at n8n.io (free tier available)
No coding knowledge required. This tutorial uses only point-and-click interfaces and simple copy-paste operations.
Step 1: Creating Your Telegram Bot with BotFather
BotFather is Telegram’s official bot creation tool. It’s essentially a bot that creates other bots meta, but brilliantly simple.
Finding BotFather
- Open Telegram on your device
- Search for “@BotFather” in the search bar at the top
- Click on the verified BotFather account (it will have a blue checkmark)
- Click “Start” to initiate conversation with BotFather
You’ll see a welcome message listing available commands. BotFather communicates entirely through text commands.
Creating Your New Bot
- Type
/newbotand send the message
BotFather responds asking for a display name for your bot.
- Choose a display name – This is what users see (example: “Ucartz Notifications”)
The display name can be anything it doesn’t need to be unique across Telegram.
- Choose a username – This must be unique and end with “bot”
If your chosen username is already taken, BotFather will tell you immediately. Keep trying variations until you find an available one.
Receiving Your API Token
- BotFather confirms creation and provides critical information:

- Copy the API token (the long string of numbers and letters)
This token is your bot’s password. Anyone with this token can send messages through your bot, so keep it secure. Don’t share it publicly or commit it to public repositories.
Important: Your bot is now created but not yet active. It remains dormant until you send it a message (we’ll do this in Step 3).
Step 2: Setting Up n8n Credentials for Telegram
Now that you have your bot and API token, you need to tell n8n how to communicate with it.
Adding Telegram Credentials in n8n
- Log into your n8n account (n8n.io or your self-hosted instance)
- Navigate to Credentials – Look for the credentials menu (usually in the left sidebar or top menu)
- Click “Add Credential” or the “+” button
- Search for “Telegram” in the credential type search box
- Select “Telegram API” from the results
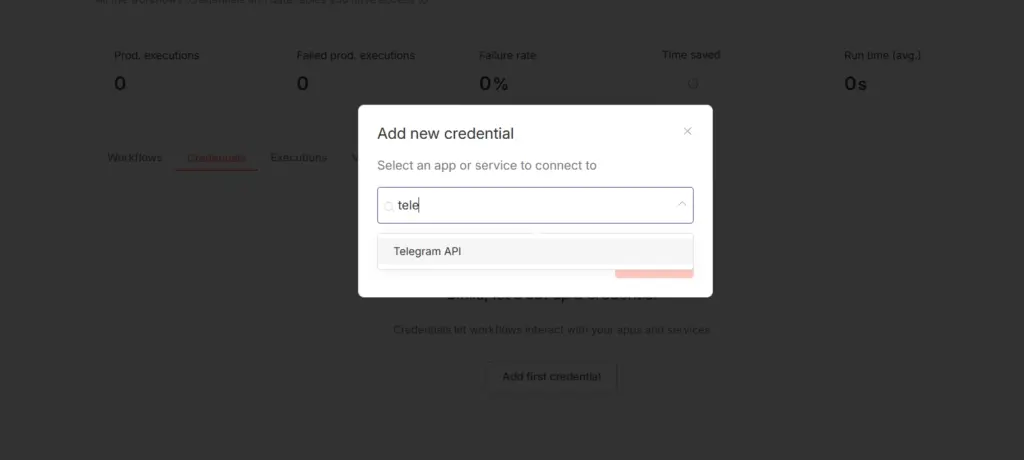
You’ll see a simple form with one field: “Access Token”
- Paste your API token (the one BotFather provided) into the “Access Token” field
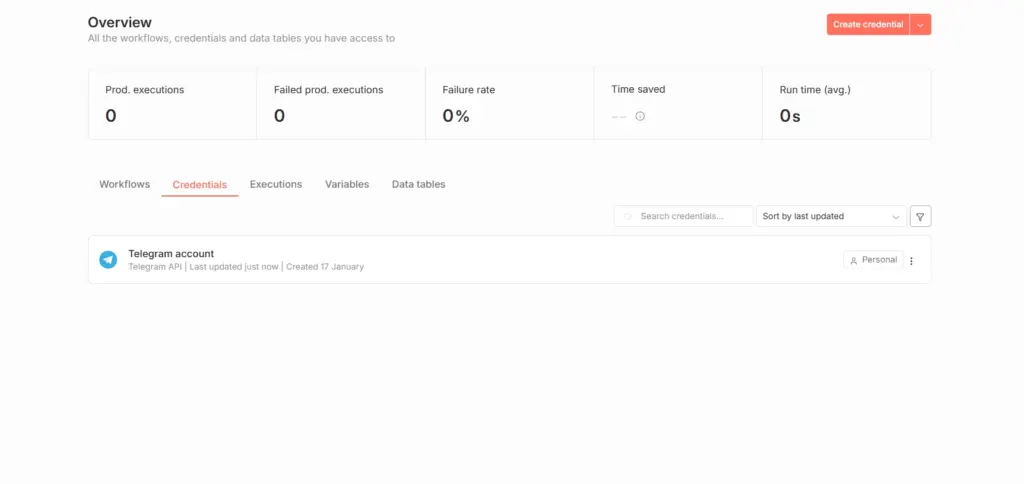
- Name your credential something memorable like “My Telegram Bot” or “Workflow Notifications Bot”
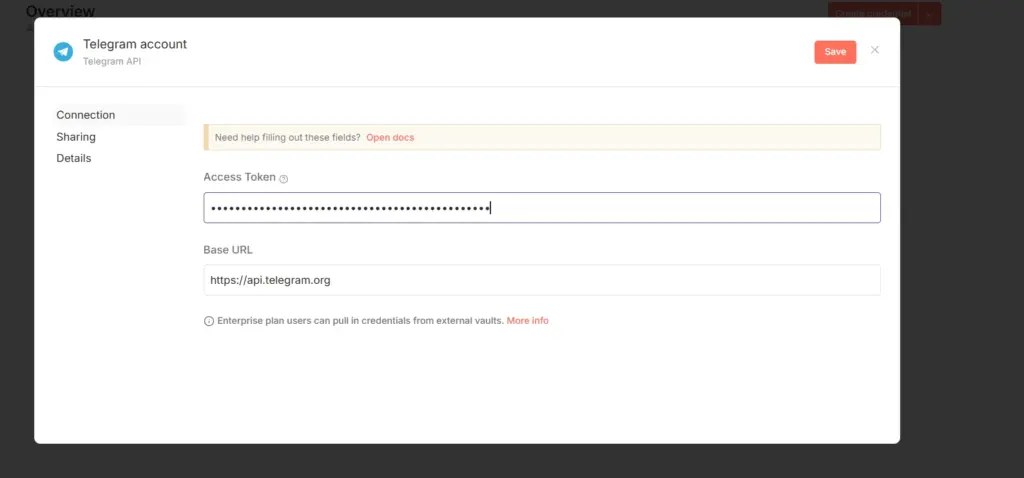
This name is just for your reference within n8n it doesn’t affect functionality.
- Click “Save” or “Create”
- Test the connection – n8n will attempt to verify the token is valid
Step 3: Finding Your Telegram Chat ID
This is the trickiest step but absolutely necessary. Your Chat ID is a unique number that identifies where messages should be sent. Without it, your bot doesn’t know which Telegram conversation to send notifications to.
Initializing Your Bot
Before you can find your Chat ID, you must send your bot at least one message. This “wakes up” the bot and creates a chat history.
- Open Telegram and search for your bot’s username (the one ending in “bot” that you created)
- Click on your bot in the search results
- Click “Start” at the bottom of the screen
- Send any message to your bot – “Hello”, “Hey Ucartz”, or “Test” all work
Your bot won’t respond (we haven’t programmed it to do anything yet), but this message creates the necessary connection.This is add in the setting of telegram API.
Retrieving Your Chat ID via API
Now comes the technical part but it’s just copy-paste-find.
- Construct the getUpdates URL using this format:
https://api.telegram.org/bot[YOUR_API_TOKEN]/getUpdatesReplace [YOUR_API_TOKEN] with your actual token from BotFather.
Example: If your token is 1234567890:ABCdefGHIjklMNOpqrsTUVwxyz123456789, your URL becomes:
https://api.telegram.org/bot1234567890:ABCdefGHIjklMNOpqrsTUVwxyz123456789/getUpdates- Copy this URL and paste it into your web browser’s address bar
- Press Enter
You’ll see a wall of JSON data don’t panic, you only need one number from it.
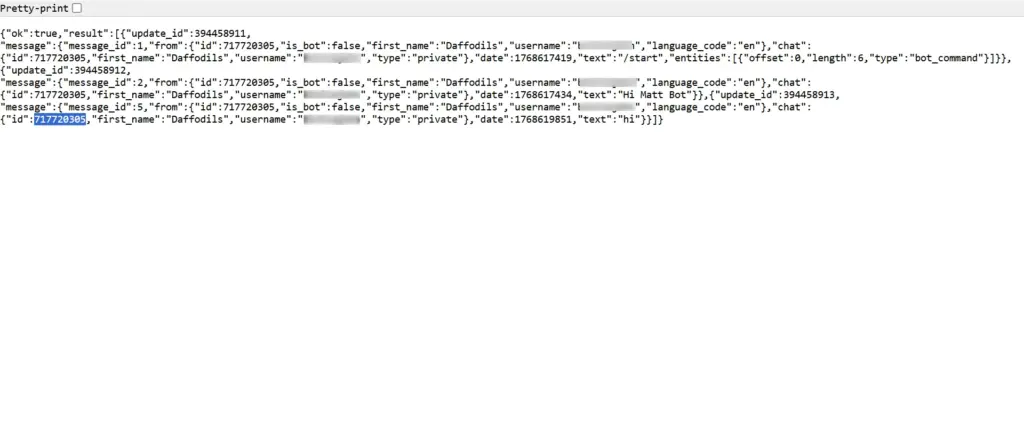
Finding the ID in JSON Response
- Look for the “chat” section within the JSON data
It looks something like this:
{
  "ok": true,
  "result": [
    {
      "update_id": 123456789,
      "message": {
        "message_id": 1,
        "from": {
          "id": 987654321,
          "is_bot": false,
          "first_name": "Your Name"
        },
        "chat": {
          "id": 987654321,
          "first_name": "Your Name",
          "type": "private"
        },
        "date": 1640000000,
        "text": "Hey Ucartz"
      }
    }
  ]
}
9. Find the “id” field inside the “chat” object
In the example above, the Chat ID is 717720305
This is typically a 9-10 digit number. It might be positive or negative depending on whether it’s a private chat (positive) or group chat (negative).
10. Copy this number – This is your Chat ID
Troubleshooting: If you see empty results `{“ok”:true,”result”:[]}`, it means:
– You haven’t sent a message to your bot yet (go back and send one)
– You’re using the wrong API token
– Several hours have passed since your message (send a fresh one)
Build the Workflow Node
- Add Telegram Node: In your workflow, add a Telegram node.
- Select Action: Set the Resource to
Messageand the Operation toSend Message.
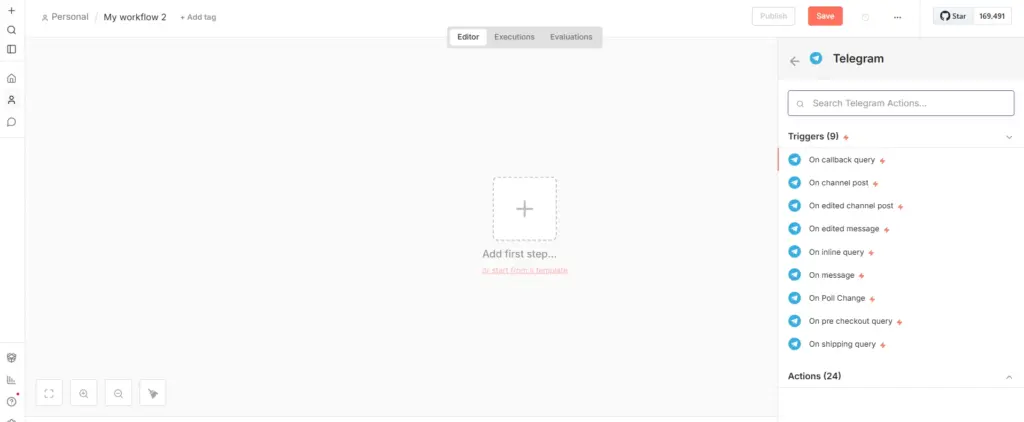
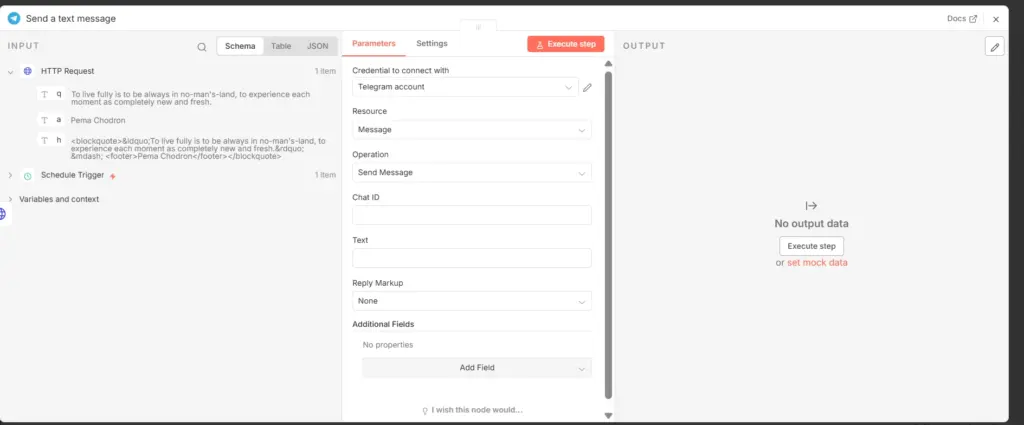
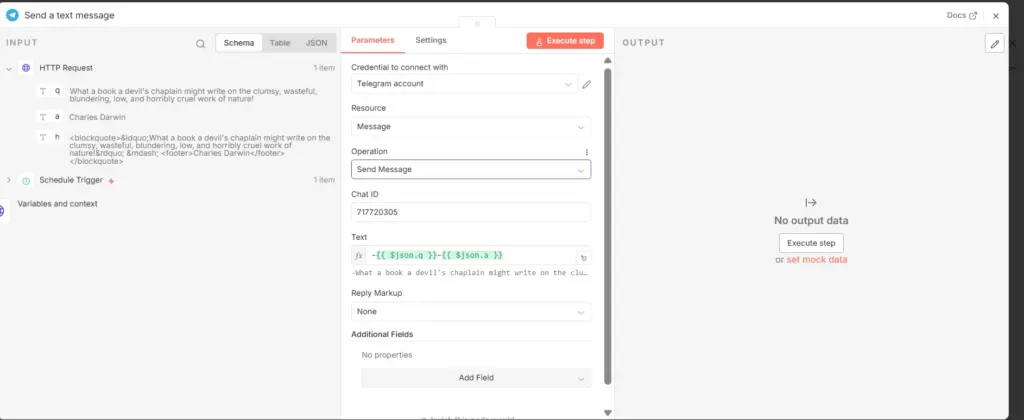
- Enter Chat ID: Paste the number you found in Part 3 into the Chat ID field.
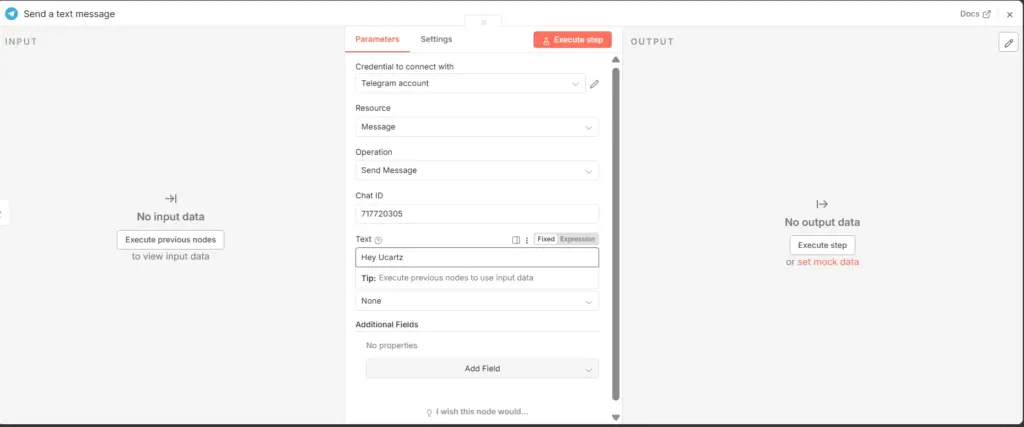
- Add Text: Type your message (for your project, this is where you will use the expression from the HTTP Request node).
- Test: Click Execute Step to see the message pop up on your phone
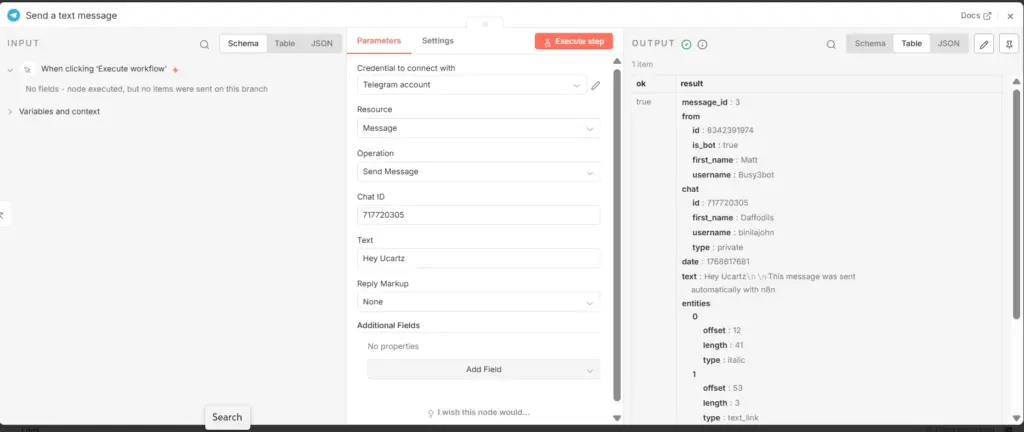
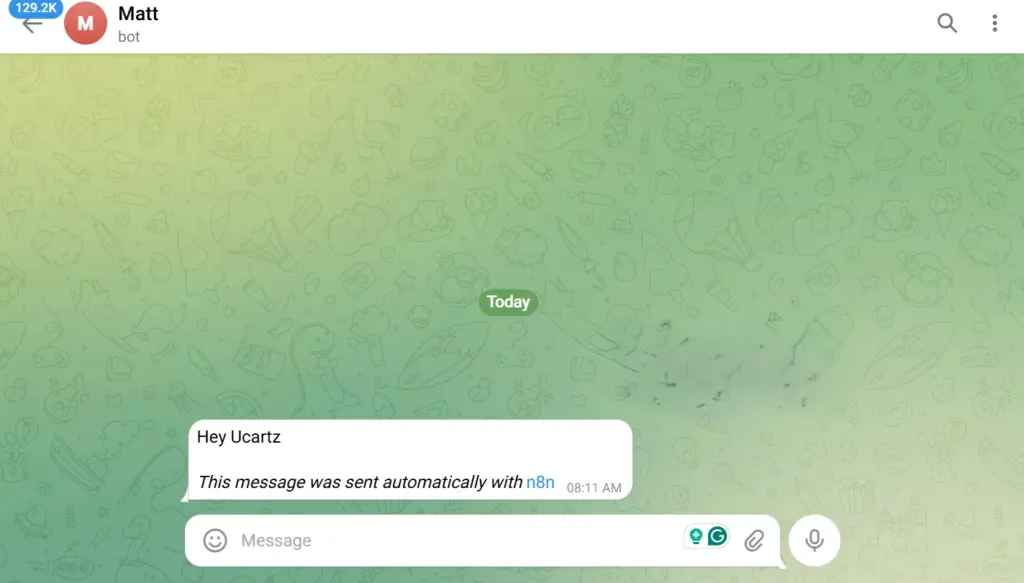
Step 4: Creating Your First n8n Workflow with Telegram Notifications
Now you have everything needed to send messages from n8n to your Telegram bot.
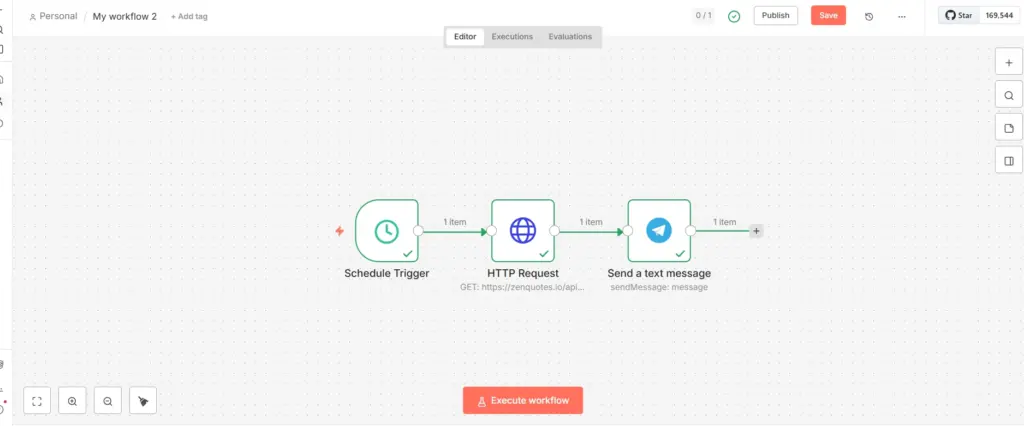
Set the Alarm (Schedule Trigger)
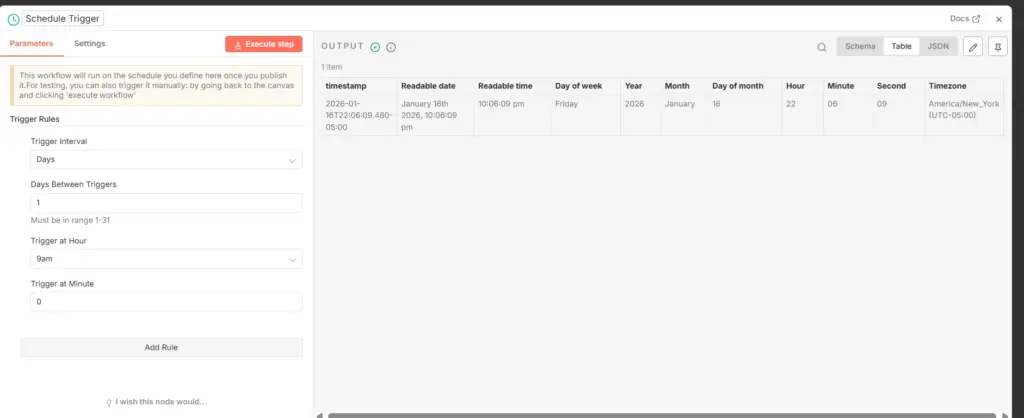
- Open n8n on your laptop and create a New Workflow.
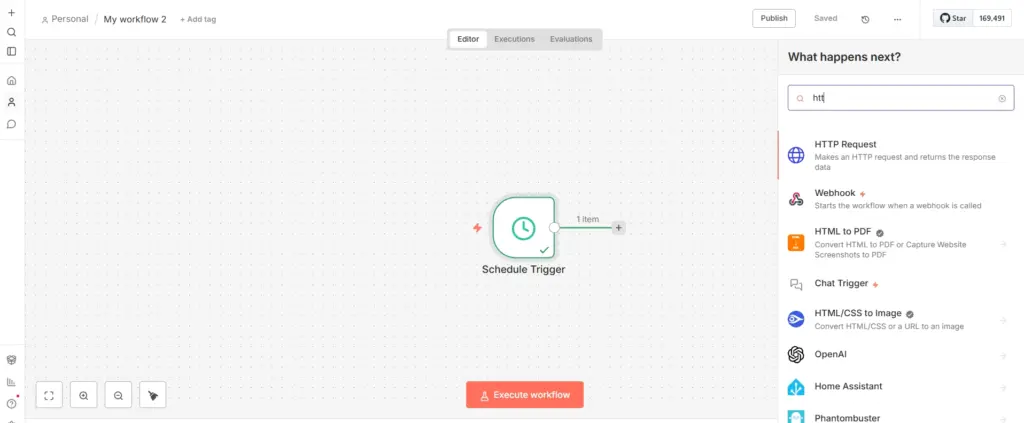
- Click the + button and search for the Schedule Trigger node.
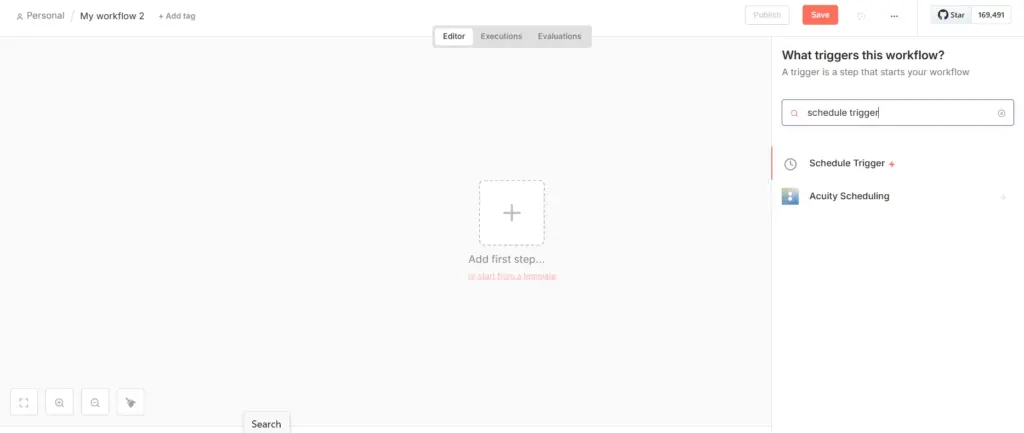
- Set the Trigger Interval to “Days.”
- Pick a time (e.g., 08:00) when you want your motivation to arrive.
Fetch the Quote (HTTP Request)
- Add a new node after the trigger and search for HTTP Request.
- Set the Method to
GET. - Paste this URL into the URL
zenquotes(This is a free API that doesn’t require a password or key).
- Click Execute Node. You should see a JSON response with a “q” (quote) and “a” (author).
Send to Telegram
- Add the Telegram Node at the end.
- Credentials: Click “Create New Credential” and paste the Bot Token you got from BotFather.
- Chat ID: You need to tell the bot where to send the message.
- Open your bot in Telegram and send it a quick message (like “Hi”).
- In n8n, change the Telegram Operation to “getUpdates” and run it. Look for the
idunder thechatsection.
https://api.telegram.org/bot1234567890:ABCdefGHIjklMNOpqrsTUVwxyz123456789/getUpdates- Copy that number and switch the Operation back to SendMessage. Paste that number into the Chat ID field.
- Text: Click the gears next to the Text field and select Add Expression.
- In the variable selector on the left, navigate to:
Nodes > HTTP Request > Output Data > JSON > [0] > q. - Type a dash
-and then select thea(author) variable. It should look like:{{ $json[0].q }} - {{ $json[0].a }}.
- In the variable selector on the left, navigate to:
Testing Your Setup
9. Click “Execute Node” or “Test Step”
10. Check your Telegram app
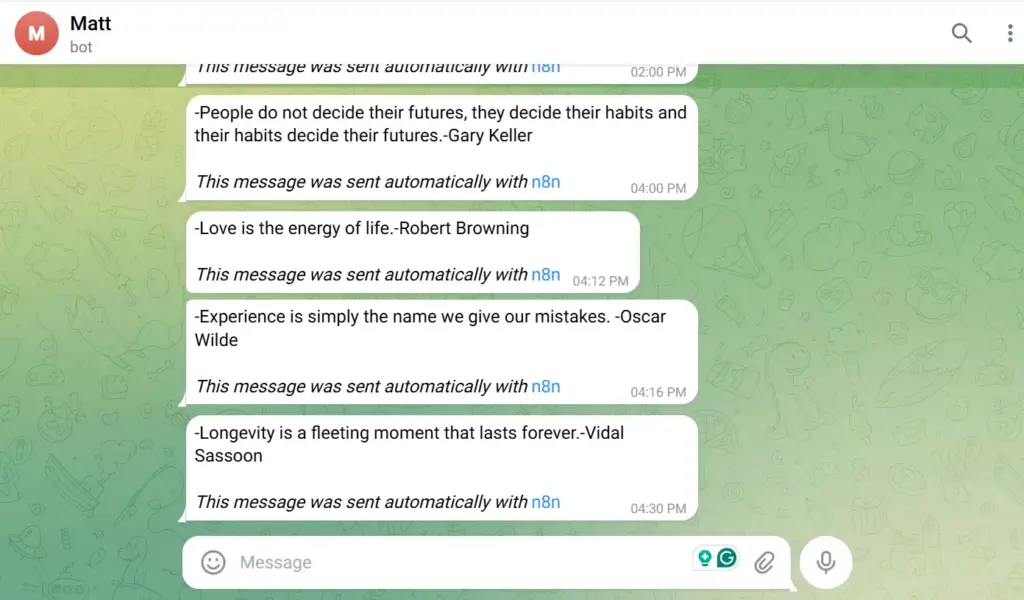
Within 1-2 seconds, you should receive the message in your Telegram conversation with your bot.
Success! You’ve just sent your first automated notification via Telegram.
Saving Your Workflow
11. Give your workflow a name- Click on “My Workflow” at the top and rename it to something descriptive like “Telegram Notification Test”
12. Click “Save”
Your workflow is now saved and can be activated, duplicated, or modified anytime.
Practical Use Cases for Telegram and n8n Notifications
Now that your setup works, here are powerful ways to use it:
Workflow Completion Alerts
Add a Telegram node as the final step in any workflow to get notified when it completes:
Error Notifications
Create error-handling branches that notify you when something fails:
– “Error: API request failed after 3 retries”
– “Warning: Database connection timeout”
– “Critical: Payment processing failed for order #1234”
Real-Time Lead Alerts
Connect form submissions or CRM updates to instant notifications:
– “New lead: John Smith from Acme Corp – interested in Enterprise plan”
– “Hot lead: Sarah Johnson requested demo for tomorrow”
– “High-value prospect: Company size 500+, budget confirmed”
System Monitoring
Set up scheduled workflows that check system health and notify on issues:
– “Website down – responding with 500 error”
– “Server CPU usage above 90% for 5 minutes”
– “SSL certificate expires in 7 days”
Sales & Revenue Updates
Get real-time updates on business metrics:
– “New sale: $497 from customer in Germany”
– “Daily revenue: $2,340 (23% above yesterday)”
– “Monthly recurring revenue hit $50,000”
Keeping Email Clean
Instead of routing every automation notification through email (which gets lost, filtered, or delayed), send it to Telegram. Your email stays clean for human communication, while Telegram becomes your automation command center.
Troubleshooting Common Issues
1.”Forbidden: bot was blocked by the user”
Problem: You blocked your bot at some point in Telegram.
Solution: Search for your bot in Telegram, open the conversation, and click “Unblock” or “Restart.”
2.”Chat not found”
Problem: Incorrect Chat ID or Chat ID hasn’t been initialized.
Solution:
- Send a fresh message to your bot
- Use the getUpdates URL again to find the correct Chat ID
- Make sure you’re copying the ID from the “chat” object, not the “from” object
3.”Unauthorized”
Problem: Invalid or expired API token.
Solution:
- Go back to BotFather in Telegram
- Type
/mybots - Select your bot
- Select “API Token”
- Copy the current token and update your n8n credential
4. Messages Not Arriving
Problem: Messages sent but not received in Telegram.
Solution:
- Check Telegram is running and you’re logged in
- Check the bot conversation hasn’t been archived or muted
- Verify you’re checking the correct Telegram account (if you have multiple)
- Send a test message directly to the bot to verify the conversation is active
5. JSON Parsing Errors
Problem: Error when trying to use dynamic data in messages.
Solution:
- Verify the data exists in previous nodes using the “Execute Previous Nodes” option
- Check your expression syntax is correct:
{{$json.fieldname}} - Use the Expression Editor (click the “=” icon) for help with syntax
6. Trigger Settings
I had the issue of timing issue.So the trigger was not happening.If your Schedule Trigger isn’t firing at the right time on your laptop, it’s almost always caused by one of three things: Workflow Settings, Laptop Sleep Mode, or a Missing Publish.
Here is the checklist to sort this out once and for all:
1. Set the Workflow Timezone (Crucial) Even if you changed the “Global” n8n settings, you must verify the specific workflow’s timezone.
- Open your workflow.
- Click the Three Dots (⋮) in the top-right corner.
- Select Settings.
- Check the Timezone field. It should be
Asia/Kolkata(for Indian Standard Time). - Action: If it was something else, change it, save, and then click Publish again to update the internal clock.
2. The “Active” Workflow Requirement: A schedule trigger only works if the workflow is Published/Active.
- Look at the top right of your screen. Does it say “Published” in a green box?
- If it says “Draft,” your schedule will never run. You must click the Publish button.
3. The “Laptop Sleep” Problem This is the most common reason for beginners.
- The Issue: When you close your laptop lid or it goes into “Sleep Mode,” your computer’s brain pauses. n8n cannot “see” the time or run nodes while the computer is sleeping.
- The Test: Try setting a schedule for 2 minutes from now and keep your laptop screen on. If it works, then you know the logic is correct, and the previous failure was likely due to the laptop being asleep at the scheduled hour.
Security Considerations
Protecting Your API Token
Your bot’s API token is sensitive. Anyone with this token can:
- Send messages as your bot
- Access chat information
- Potentially read messages sent to your bot
Best practices:
- Never commit tokens to public Git repositories
- Don’t share tokens in screenshots or documentation
- Rotate tokens periodically (generate new ones in BotFather)
- Use environment variables in self-hosted n8n instead of hardcoding tokens
Limiting Bot Access
By default, your bot can be found and messaged by anyone on Telegram. This is usually fine for notification bots since they only send messages, not receive commands.
If you want stricter control:
- Don’t publish your bot username publicly
- Implement command authentication if your bot processes incoming messages
- Monitor the bot’s activity through BotFather’s analytics
Data in Notifications
Be careful what information you include in Telegram messages:
- Avoid: Full credit card numbers, passwords, API keys
- Safe: Names, email addresses, order IDs, status updates
- Consider: Whether messages contain sensitive business data that shouldn’t be on a personal device
Telegram messages are encrypted in transit but stored on Telegram’s servers. For highly sensitive data, consider alternative notification methods or encrypt data before sending.
Next Steps
Once comfortable with basic Telegram notifications, explore:
Two-Way Communication
Set up workflows that listen for messages sent to your bot:
- Use the Telegram Trigger node in n8n
- Configure it to listen for specific commands like
/statusor/report - Build workflows that respond with requested information
Scheduled Reports
Combine Telegram with Schedule nodes:
- Daily summary at 9 AM
- Weekly metrics every Monday
- Monthly reports on the 1st of each month
Integration with Other Services
Connect Telegram notifications to:
- Google Sheets: “New row added with high-priority flag”
- Stripe: “Payment received: $X from customer Y”
- GitHub: “New issue created in repository Z”
- Airtable: “Record moved to ‘Ready for Review’ status”
Building Notification Preferences
Create workflows that check user preferences before sending:
- Quiet hours (no notifications 10 PM – 8 AM)
- Priority filtering (only send urgent alerts)
- Grouped summaries (batch low-priority notifications hourly)
Conclusion
Creating a Telegram bot and connecting it to n8n transforms how you monitor and interact with automated workflows. Instead of hunting through email folders or checking dashboards manually, critical information arrives instantly on the device always in your pocket.
The setup takes 10 minutes. The value compounds daily. Every workflow you build from now on can include instant, reliable notifications that actually reach you when they matter.
Your inbox stays clean. Your awareness stays sharp. Your automations become truly hands-off because you trust you’ll know immediately if anything needs attention.
Start with one workflow. Add a Telegram notification to the end. Watch it arrive on your phone. Then add it to another workflow. And another. Before long, Telegram becomes your automation command center.
Now you have it working