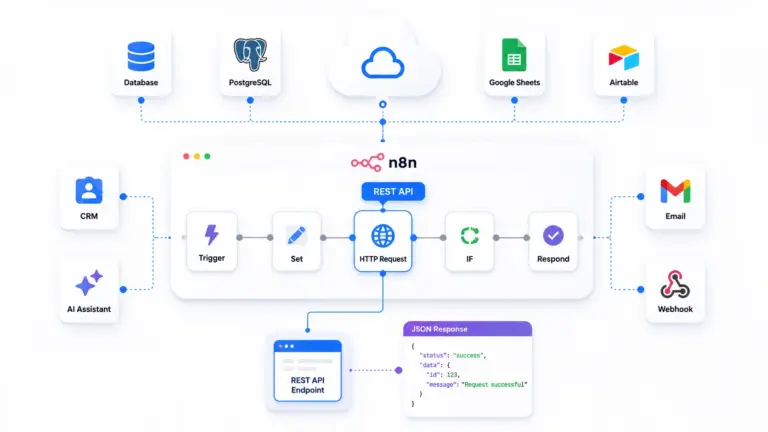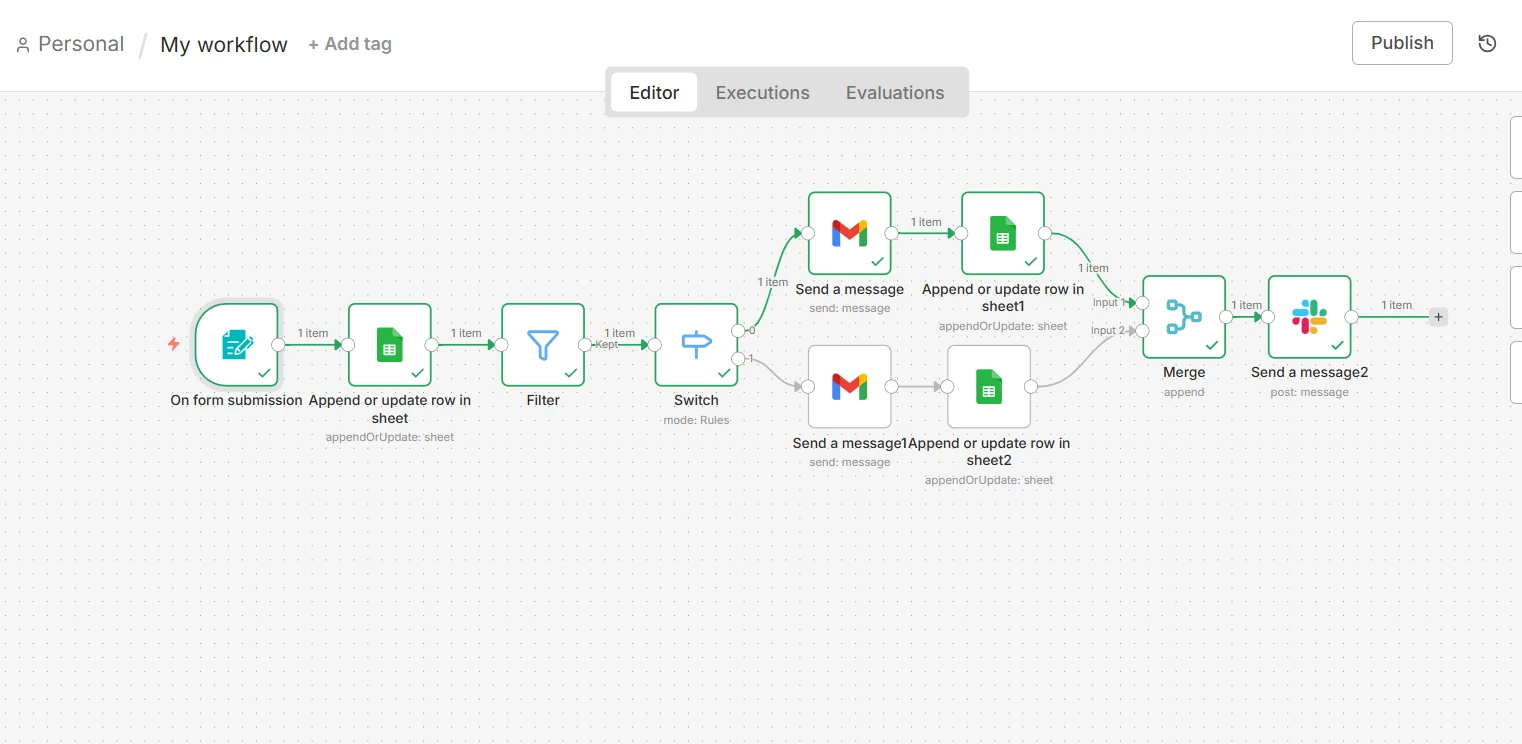

Automation looks simple in diagrams.
In reality, beginners hit issues like missing data, silent Slack nodes, confusing Merge behavior, and overwritten fields.
To build a reliable n8n workflow automation from Form to Slack, design your workflow with proper data flow management by using the Merge node to combine paths. Reference original data nodes (like Google Sheets) in your Slack notification to prevent silent failures and missing information. This guide documents a real n8n workflow built step by step, including the exact problems faced and how to fix them properly.
If you are new to n8n and want to move from “it runs” to “it works reliably”, this is for you.
What We Are Building
We will build a practical lead-handling automation:
- A Form captures user details
- Data is saved to Google Sheets
- A Filter removes unwanted leads
- A Switch routes leads by occupation
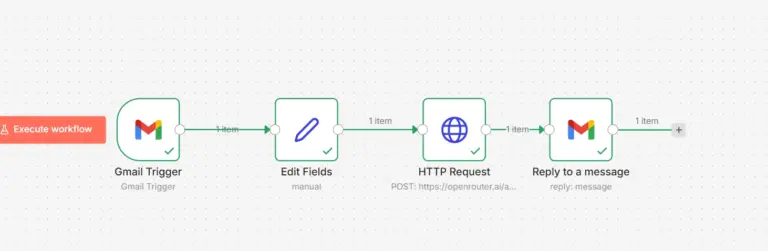
- Different emails are sent using Gmail
- A Slack messaging notification confirms the action
This mirrors a real business workflow, not a demo.
Final Workflow Overview
Form
↓
Google Sheets (Append / Update)
↓
Filter (Remove unwanted leads)
↓
Switch (Employed / Freelancer)
↓ ↓
Gmail A Gmail B
\ /
Google Sheets (Append / Update)
↓
Merge
↓
Slack Notification
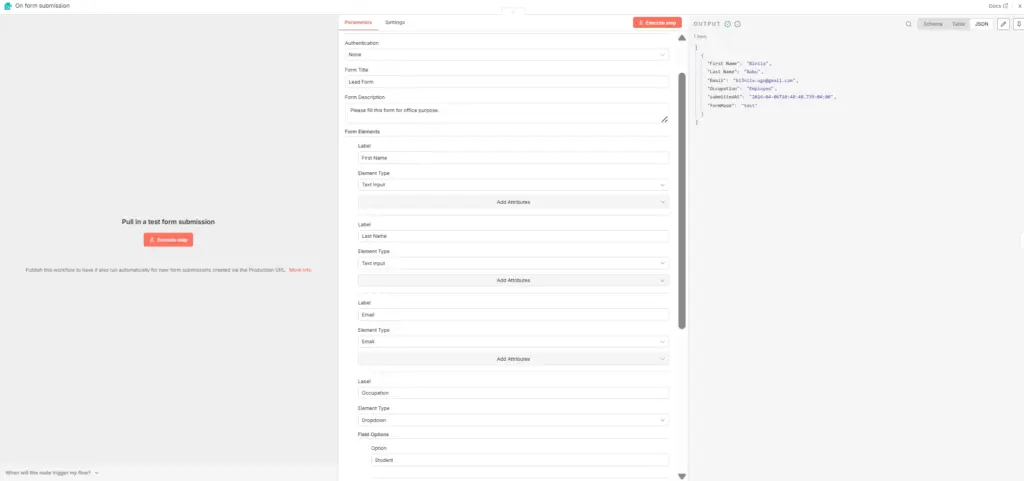
Step 1: The Trigger (n8n Form Node)
This node acts as your landing page.
- Add Node: Search for “n8n Form Trigger”.
- Form Details: Give it a Title (e.g., “Lead Generation Form”) and a Description.
- Add Form Elements:
- Field 1: Label: “First Name” | Type: Text.
- Field 2: Label: “Last Name” | Type: Text.
- Field 3: Label: “Email” | Type: Email.
- Field 4: Label: “Occupation” | Type: Dropdown.
- Dropdown Options: Add “Unemployed”, “Employed”, and “Freelancer”.
- Test: Click “Test Step,” fill out the form, and Pin the output.
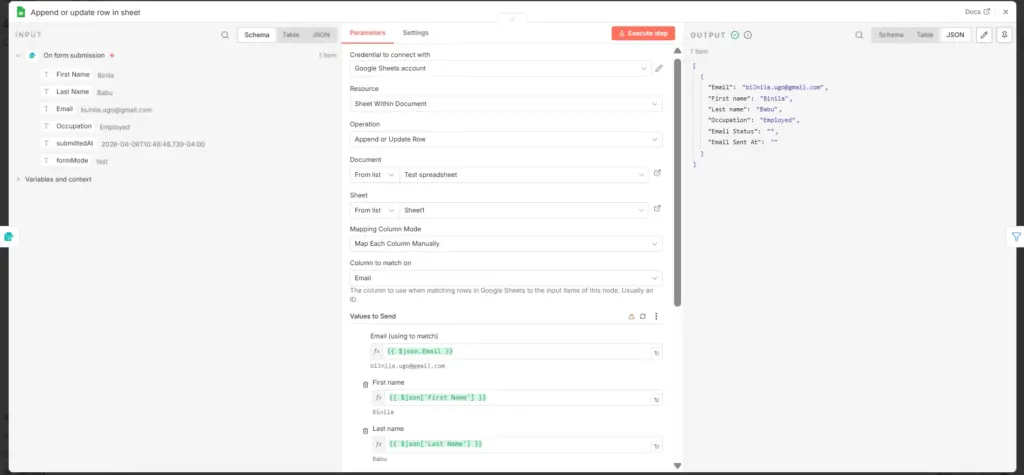
Step 2: Database Storage (Google Sheets Node)
This keeps your leads organized and prevents messy duplicates.
- Add Node: Search for “Google Sheets”.
- Operation: Choose “Append or Update”.
- Document: Connect your Google account (Credentials) and select your spreadsheet.
- Mapping: Drag and drop the data from the Form node into the corresponding Sheet columns.
- The “Anti-Duplicate” Hack: Under “Column to Match On,” select Email.
- Why? If the same person signs up again, n8n will simply update their existing row instead of creating a double entry.
- Authenticate: Click “Create New Credential” – Follow Google OAuth flow – Select your spreadsheet
- Map fields:
| Sheet Column | Value |
|---|---|
| First name | {{$json["first name"]}} |
| Last name | {{$json["last name"]}} |
{{$json.Email}} | |
| Occupation | {{$json.Occupation}} |
Set Column to Match On → Email. What this does:
- If email exists → updates row
- If not → creates new row.You don’t need a row number. This is where most beginners get confused.
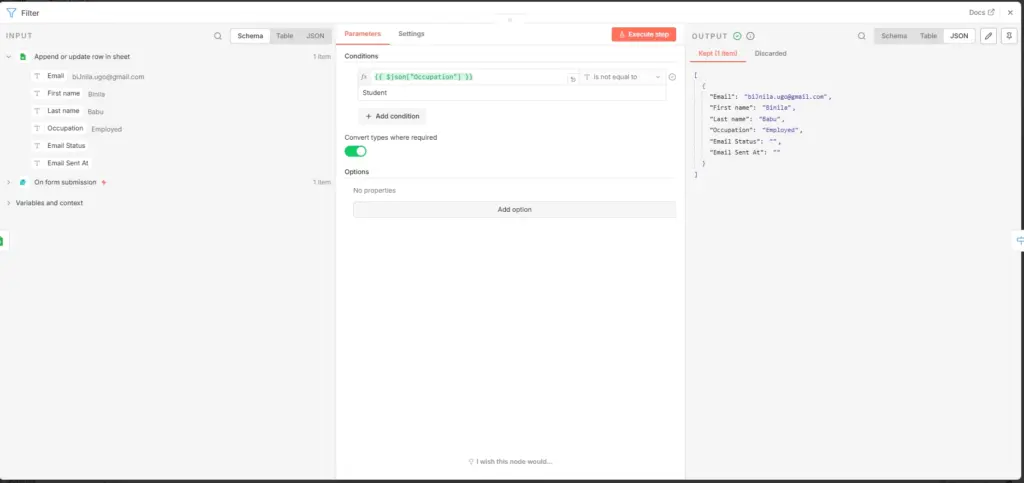
Step 3: Filter Out Unwanted Leads
Let’s say we don’t want “Unemployed”. Setup
- Add Node → Filter
- Condition:
{{$json.Occupation}} is not equal to "Unemployed"
When I added a filter an error occured like this:Comparison type expects a boolean but both fields are a string. In order to avoid that enable:
Convert types where required = true
OR ensure you are comparing string to string.
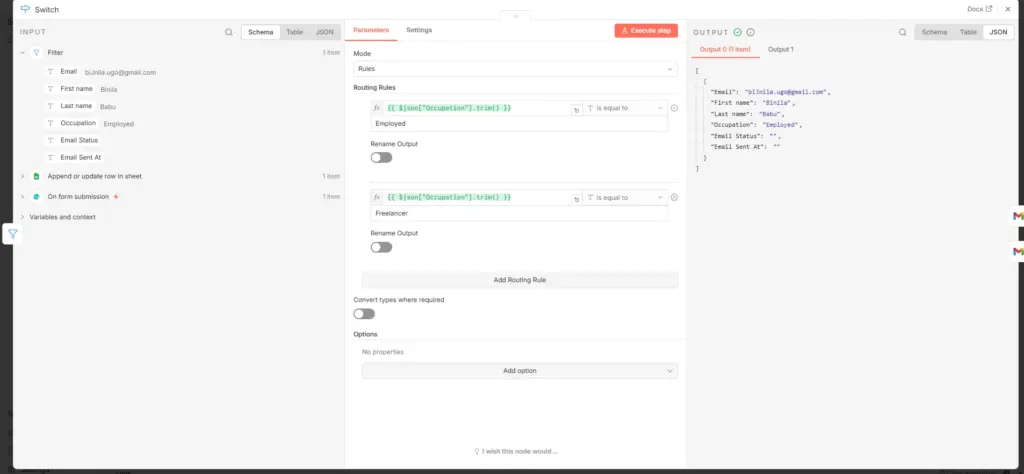
Step 4: Route Data Using Switch
Now split logic.
Setup
- Add Node → Switch
- Add 2 rules:
Output 1
{{$json.Occupation}} = "Employed"
Output 2
{{$json.Occupation}} = "Freelancer"
Step 5: Send Emails (Gmail Nodes)
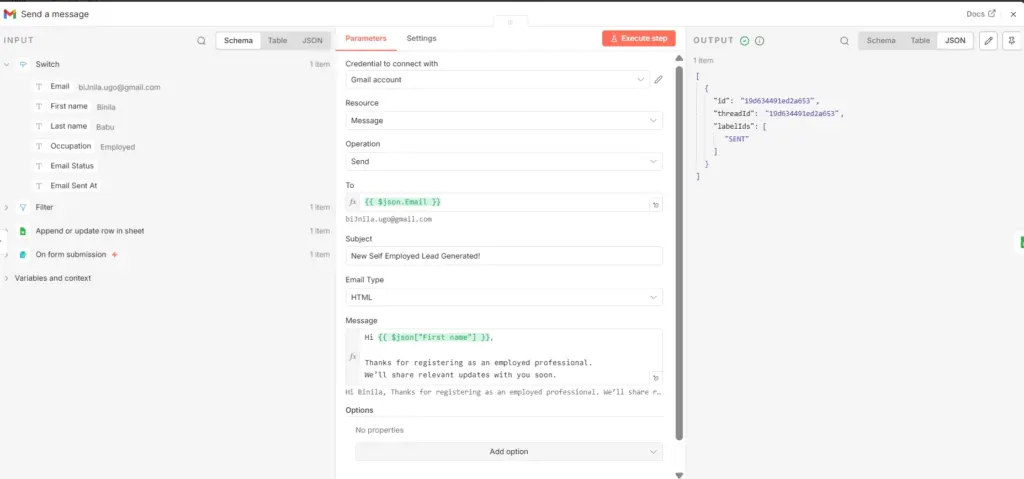
Now automation becomes real. Node A → Employed
- To:
{{$json.Email}} - Subject: Welcome Employed User
- Message:
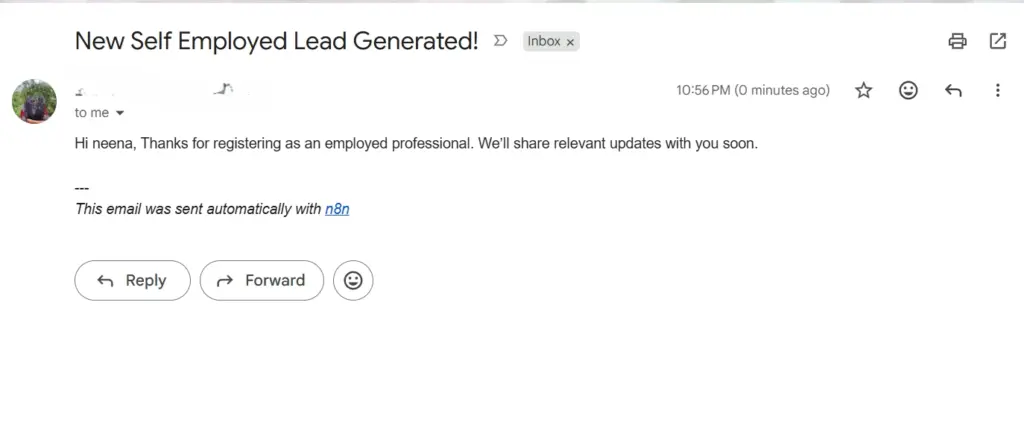
Hi {{$json["first name"]}},Thanks for signing up!
Node B → Freelancer
- To:
{{$json.Email}} - Subject: Freelancer Welcome
- Message:
Hi {{$json["first name"]}},Great to see freelancers joining!After Gmail nodes:
- Data changes
- You no longer get full original input
Instead you get:
id
threadId
labelIds
This becomes a major issue later.
STEP 6: Add Google Sheets → Update Row Node
1. Click + after your Gmail node
2. Search → Google Sheets
3. Select “Update Row”
Configure Google Sheets Credentials
If not already connected:
- Click Credentials
- Choose your Google account
- Allow access
(You already did this earlier for Append Row so it may auto-select)
STEP 3: Select Your Spreadsheet
Inside the Update Row node: Resource
Sheet
Operation
Update Row
Spreadsheet
Select the same Google Sheet you used earlier
Sheet Name
Sheet1 (or your actual sheet name)
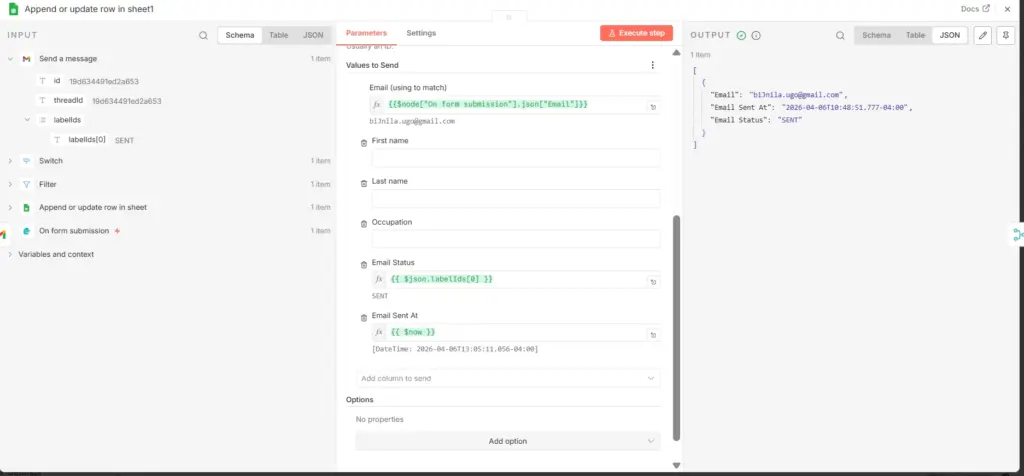
Tell n8n WHICH ROW to Update (Critical Step) .From your Append Row node.Use Email to match. Add {{$node["On form submission"].json["Email"]}} to email section. Add {{ $json.labelIds[0] }} to Email status. Add {{ $now }} for Email Sent at.

Step 7: Merge Both Paths
Now combine both Gmail outputs.
Setup
- Add Node → Merge
- Connect:
- Gmail A → Input 1
- Gmail B → Input 2
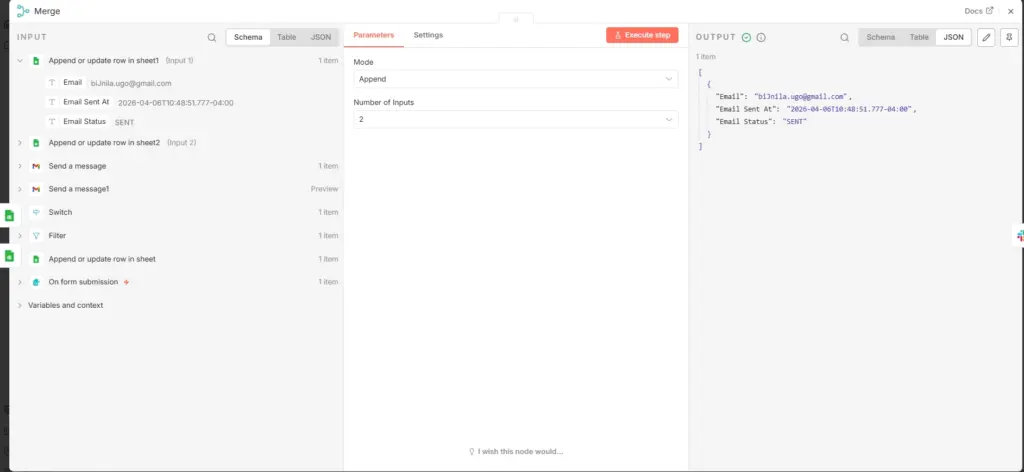
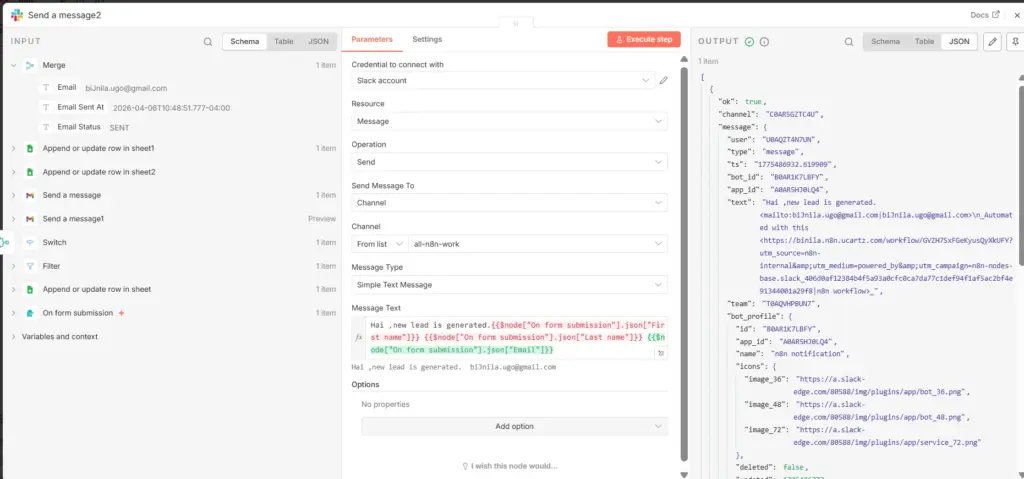
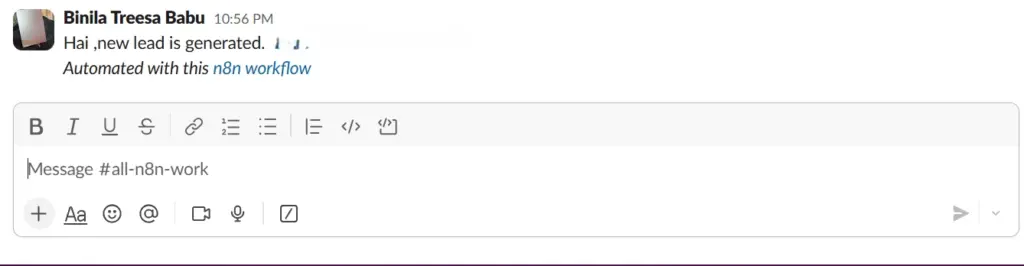
Step 7: Slack Notification
Now send internal alert. Setup
- Add Node → Slack
- Select Channel
- Message:
New Lead:Name: {{$node["Google Sheets"].json["first name"]}}
Email: {{$node["Google Sheets"].json["Email"]}}
Occupation: {{$node["Google Sheets"].json["Occupation"]}}
Common Mistakes Beginners Make (And How to Avoid Them)
Mistake 1: Trusting the Workflow Execution Status
What happens: Everything is green. You assume it worked. It didn’t.
Fix: Check the actual Slack message, email content, and sheet data.
Mistake 2: Not Understanding Merge Behavior
What happens: You merge Gmail outputs and wonder why Slack has no data.
Fix: Reference the original data node directly (Google Sheets).
Mistake 3: Using Row Numbers in Google Sheets
What happens: You calculate row numbers with complex logic.
Fix: Use “Column to Match On” instead. n8n finds the row automatically.
Mistake 4: Not Pinning Test Data
What happens: You resubmit the form 50 times while debugging.
Fix: Pin the first successful form submission and reuse it.
Mistake 5: Assuming Authentication = Access
What happens: You authenticate Slack but messages don’t send.
Fix: Explicitly invite the bot to each channel.
Mistake 6: Building Everything Before Testing
What happens: You build 10 nodes, run it, and have no idea which one broke.
Fix: Build → test → pin → build next node → repeat.
Building automation in n8n is not about connecting nodes it’s about controlling how data moves between them.
Conclusion
In this guide, you went beyond a basic workflow. You built a real lead automation system and handled the exact issues that show up in real usage:
- Data getting lost after Gmail nodes
- Merge node not behaving as expected
- Slack failing silently despite successful execution
- Confusion around Google Sheets updates
By fixing these, you learned what actually makes an automation reliable:
- Always verify node output, not just execution
- Use a stable data source (like Google Sheets) for downstream steps
- Understand how each node transforms data
- Handle multi-path workflows carefully with Merge
At this stage, you’re no longer just following tutorials you’re building systems that can work in real environments. If you need any support to install KVM VPS hosting, contact us for support.
FAQ
1. Is n8n really free?
Yes. The self-hosted version is completely free. You only pay for server costs.
2. Which tool is best for beginners?
Zapier is the easiest. Make is second. n8n requires technical knowledge.
3. Which platform is cheapest?
n8n is the cheapest at scale, especially when self-hosted.
4. Can I migrate later?
Yes, but manually. There are no direct migration tools.
5. Which tool is best for complex workflows?
n8n offers the highest flexibility. Make is best for visual complexity.
6. Which is best for data privacy?
n8n, because you can self-host and keep data on your own server.