
TL;DR You can connect your Centova Cast radio stream to a WordPress website in a few hours, not days. Build five pages (Home, Listen Live, Schedule, DJs, Contact), pull your Web Player widget from Centova Cast under Configuration → Widgets, paste it into a Custom HTML block on your Listen Live page, then test on desktop and mobile. Use Ucartz Radio Hosting for the stream and Ucartz Hosting for the website.
If you already run a station on Centova Cast radio hosting, you have the hardest part done. What most stations miss is a website that gives listeners a reason to stay: a Listen Live button that actually works, a schedule they can check, and DJ profiles that make the station feel like a real media brand instead of a stream URL.
This guide shows you how to connect your existing Centova Cast setup to a WordPress website. You do not need to build a full production website. You need a working demonstration of the complete signal path: AutoDJ or live broadcast, through Centova Cast, into a Web Player, on a WordPress website page builder a listener can open on their phone.
What You’ll Build
A minimum viable radio website with five pages:
- Home: station name, tagline, Listen Live button, short about section, today’s shows
- Listen Live: the actual Centova Cast Web Player and Now Playing info
- Schedule: a simple table of shows and hosts
- DJs: short profiles for your presenters
- Contact: a basic form for song requests, advertising, and guest inquiries
What You Need
Radio hosting. Your Centova Cast account should already have a station, streaming server, AutoDJ, stream URL, and Web Player widget. Centova Cast’s Quick Links section gives you public tune-in information you can reuse on the website.
WordPress hosting. A WordPress site is where the radio station will live. You do not need a heavy theme. A lightweight theme and the WordPress block editor are enough to build all five pages.
Step 1: Set Up WordPress
If you are starting from zero, go to Domain → WordPress Hosting → WordPress Installation. After installation, log into yourdomain.com/wp-admin. Pick a lightweight theme so the site loads fast, since page speed matters for a station that people check on mobile while driving or working.
If you’re starting from zero:
Domain → WordPress Hosting → WordPress Installation
After installation, log into:
yourdomain.com/wp-adminYou don’t need a complicated theme for this project.
Use a lightweight WordPress theme and build the pages with the WordPress block editor.
Step 2: Create the 5 Essential Pages
In WordPress, go to Pages → Add New and create: Home, Listen Live, Schedule, DJs, and Contact. Create all five as blank pages first, then build out the content page by page. This keeps your navigation menu structure clear from the start.
Step 3: Build the Homepage
Do not let the homepage just say “Welcome to XYZ Radio.” The first screen should tell visitors who you are and what they can do immediately. A working structure looks like this:
XYZ Radio Your Music. Your Community. Your Station. [ LISTEN LIVE ]
Now Playing: Artist, Song Name
Why Listen: live shows, music, interviews, local news, community programs
Put a highly visible Listen Live button near the top, linked to your /listen-live/ page. A visitor should never have to search the site to find the player.
Step 4: Create the About Page
Go to: WordPress → Pages → Add New
Title: About Us. Then explain:
- When the station started
- Why it was created
- What type of music/content you broadcast
- Who you serve
- What makes the station different
Step 5: Add the Centova Cast Web Player
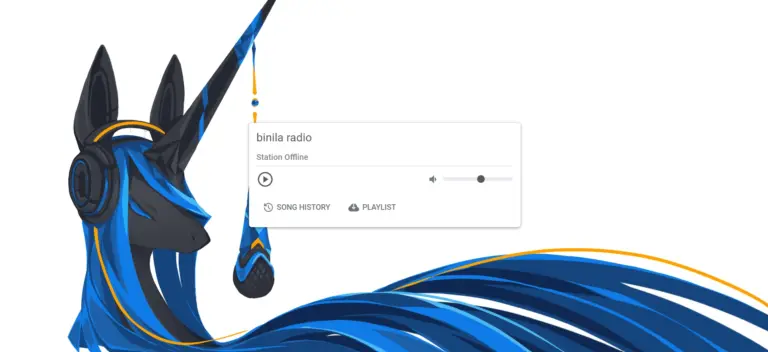
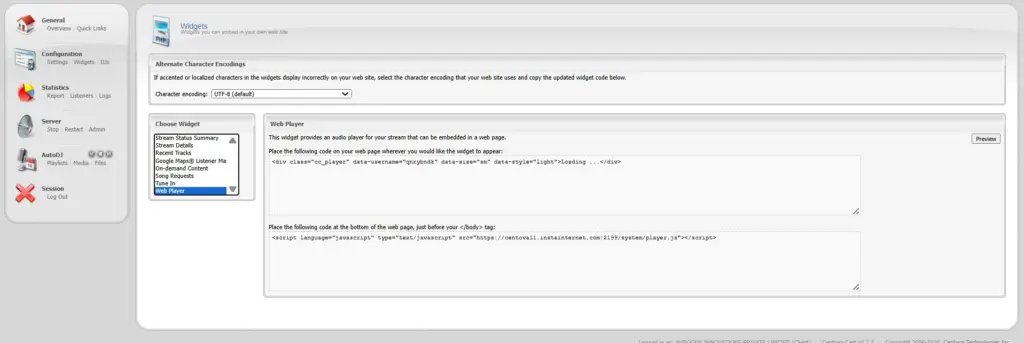
This is the core of the project. Go to your Centova Cast dashboard, then Configuration → Widgets. Centova Cast provides widgets built specifically for showing stream information and interactive features on external websites. Select Web Player and generate the widget code from your account.
Do not write your own player code. Centova Cast widgets are usually a placeholder plus a JavaScript snippet, and the exact structure depends on your installation, so use the code your dashboard generates.
Go back to WordPress and open your Listen Live page. Add a Custom HTML block (click the plus icon, search Custom HTML), and paste the widget code exactly as generated. Publish the page. On the Listen Live page, add short copy above the player:
“You’re listening to XYZ Radio. Click play below to listen live.”
🔴 LISTEN LIVE button. Link this to your dedicated:
/listen-live/ page.
If you want to show live song data, Centova Cast also has a Stream Details widget that can display current song, stream title, bitrate, listener count, server status, and AutoDJ status. Adding this makes the page feel like a real station dashboard instead of a plain audio embed.
Step 6: Create the Schedule Page
Create: Pages → Add New → Schedule
Use a table.
| Time | Program | Presenter |
|---|---|---|
| 7:00 AM | Morning Drive | Alex |
| 10:00 AM | Workday Music | Sarah |
| 1:00 PM | Afternoon Mix | David |
| 5:00 PM | Drive Time | Maya |
| 8:00 PM | Evening Talk | John |
This page answers one question listeners actually ask: when can I hear my favorite show. A basic WordPress table covers this for a first version. You can upgrade to a dedicated schedule plugin later.
Step 6: Add DJ Profiles
Go to Pages → DJs and add a short profile for each presenter, or combine them into one page with cards if you have a small team.
Example:
Alex Thomas Morning Drive Host Alex has presented morning radio shows since 2022, focused on music, local stories, and listener interaction. Show: Morning Drive Time: 7:00 AM to 10:00 AM
Include a photo, a short bio, the show name, the broadcast time, and social links where relevant. This step is what turns the station from a streaming URL into a media brand.
Step 7: Get Your Web Player From Centova Cast
Go to your Centova Cast dashboard.
Navigate to: Configuration → Widget. Centova Cast provides widgets specifically for displaying stream information and interactive station features on your website.
Select: Web Player
The Web Player allows visitors to listen to your station directly from your website without needing to open an external media player. Generate the widget code provided by your Centova Cast account.
Step 8: Add the Player to WordPress
In WordPress, edit your Listen Live page. Click: + → Custom HTML. WordPress’s Custom HTML block is designed for inserting HTML code into a page. Paste the Centova Cast widget code provided by your account. Don’t invent your own Centova Cast code. Use the code generated inside:
Centova Cast → Configuration → Widgets
Centova Cast widgets can consist of a placeholder plus a JavaScript snippet, so follow the exact code provided by your installation.
Step 9: Add a Contact Form
Go to Pages → Add New → Contact and build a simple form with Name, Email, Message, and a Send Message button. A WordPress contact form plugin handles this without custom code. Add a few specific prompts instead of a generic message box:
- Want to request a song?
- Want to advertise with us?
- Want to become a guest on our show?
This turns the contact page into a communication channel for the station, not just a fallback form.
Step 10: Add “Now Playing” Information
This is where your website can become much more interesting. Instead of simply displaying: Listen to our radio. You can show: NOW PLAYING
🎵 Artist
Song Title
Centova Cast has a Stream Details widget that can display information such as current song, stream title, bitrate, listener count, server status, AutoDJ status, current playlist and track information. So your Listen Live page could look like:
┌─────────────────────────────┐
│       XYZ RADIO             │
│                             │
│       ▶  LISTEN LIVE       │
│                             │
│       NOW PLAYING           │
│       Artist - Song         │
│                             │
│       128 Listeners         │
└─────────────────────────────┘
That feels much more like a professional radio station.
Step 11: Build the Navigation and Test the Website
Set your main menu to Home, About, Schedule, DJs, Listen Live, Contact, and place a Listen Live button in the header so it is reachable from any page.
Then test the site the way a first-time listener would, not just by checking that pages exist:
- Open the homepage. Can you find Listen Live immediately?
- Click Listen Live. Does the player load?
- Click Play. Does the station play?
- Open the site on your phone. Does everything fit the screen?
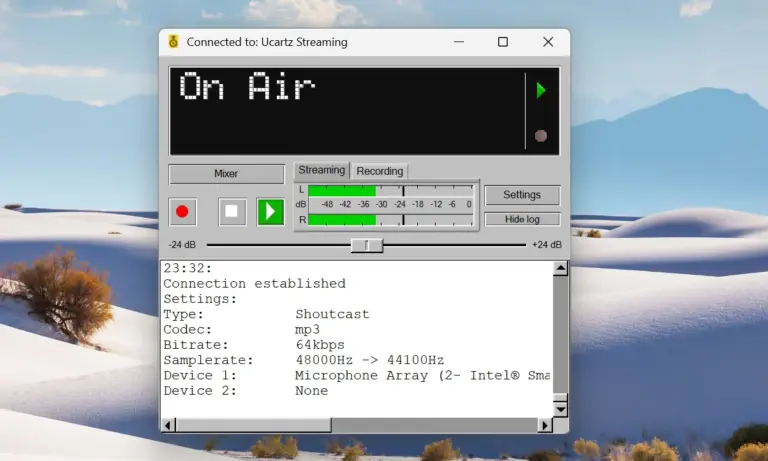
- Start a live broadcast through BUTT. Can you hear it through the website player?
- Disconnect BUTT. Does AutoDJ return automatically?
Step 12: Connect Everything
Your finished structure should look like this:
                    WORDPRESS
                       │
        ┌──────────────┼──────────────┐
        ↓              ↓              ↓
      HOME           ABOUT         SCHEDULE
        │                             │
        ↓                             ↓
  LISTEN LIVE                       SHOWS
        │
        ↓
  CENTOVA CAST
        │
        ↓
   RADIO STREAM
        │
        ↓
     LISTENER
Step 13: Test Live Broadcasting End to End
This step confirms your complete signal path: BUTT to SHOUTcast to Centova Cast to Web Player to WordPress to listener. If you already have a working Centova Cast station with AutoDJ, SHOUTcast, live broadcasting through BUTT, and a stream URL, you do not need to build a new station for this test. Use your existing setup and walk through the chain once, live.
BUTT → SHOUTcast → Centova Cast → Web Player → WordPress → Listener

Common Problems
Player does not load. Confirm the widget code was copied in full from Centova Cast, with no lines cut off, and that it was pasted into a Custom HTML block, not a paragraph block.
Player loads but no audio. Check that AutoDJ is running or that a live source is connected, and confirm the stream URL in Centova Cast matches what the widget references.
Works on desktop, breaks on mobile. Some embedded players do not resize well inside narrow WordPress themes. Test the Listen Live page directly on a phone, not just in a browser’s mobile preview.
Now Playing information does not update. This usually means the Stream Details widget is pulling from the wrong mount point or the AutoDJ metadata is not being passed correctly. Recheck the widget configuration inside Centova Cast.
Conclusion
You do not need days to connect a Centova Cast stream to a WordPress website. Five pages, one Web Player widget, and a proper end-to-end test cover the entire job in a few hours if you already have a working station. The technical part is straightforward: generate the widget from Centova Cast, paste it into a Custom HTML block, and confirm it plays on both desktop and mobile. The part that actually matters for listeners is making the Listen Live button impossible to miss and giving the station a real identity through the schedule and DJ pages.
Your radio station should not stop at the stream. With Ucartz Radio Hosting, you manage your online radio station through Centova Cast, while Ucartz web Hosting gives you the platform to build the website where listeners discover your shows, meet your DJs, and listen live.
FAQ
Do I need a new Centova Cast station to write about this?
No. If you already have AutoDJ, SHOUTcast, and live broadcasting through BUTT running, use that existing station as your practical example instead of building a new one.
What WordPress block do I use for the Centova Cast widget?
The Custom HTML block. It is built for pasting external HTML and JavaScript snippets directly into a page.
Will every Centova Cast installation have the same widget options?
Not necessarily. Widget availability and Web Player implementation can vary by configuration, so always use the exact code generated from your own Centova Cast dashboard under Configuration → Widgets.
How long does this actually take?
If you already have a working Centova Cast station, building and testing the five essential pages takes a few hours, not days.
Can I skip individual DJ pages?
Yes. One combined DJs page with short cards for each presenter is enough for a first version. You can split them into individual profiles later if the team grows.
What if AutoDJ does not resume after I stop a live broadcast?
Check your AutoDJ fallback settings in Centova Cast. It should be configured to take over automatically once the live source disconnects.