
TL:DR;
You can add an online radio player to your website by generating a Web Player widget in Centova Cast radio streaming, copying its code, and placing it in a WordPress Custom HTML block.
Want visitors to listen to your online radio station directly from your website, without needing to download a separate app or open an external media player? You can add a web-based radio player to a WordPress site using the Centova Cast Web Player widget.
Centova Cast provides this Web Player specifically so visitors can listen to your station without leaving your page. The player code is generated from the Widgets section of your Centova Cast panel, and once generated, you place that code into your website.
For a WordPress site, the overall process breaks down into this sequence:
Centova Cast → Widgets → Web Player → Copy widget code → WordPress HTML block → Publish → TestThis guide covers exactly how to add the player, where the code goes inside WordPress, and how to properly test it on both desktop and mobile before considering the job finished.
Step 1: Confirm Your Radio Station Is Actually Working First
Before embedding anything into your website, confirm your Centova Cast station is currently online and broadcasting. Skipping this step is the most common reason a newly embedded player appears to “not work” when the real problem has nothing to do with the website at all.
Log in to your Centova Cast account and check your station’s broadcasting status. Use the Play control inside Centova Cast itself to test the stream directly. Centova Cast also provides public tune-in links under Quick Links, which give you another way to verify the stream is live before you touch WordPress at all.
This matters because adding a player to your website will not fix a stream that is not actually running. Think of the dependency chain like this:
Radio station working
        ↓
Player connected to stream
        ↓
Website visitor listens
If the first link in that chain is broken, nothing downstream of it will work, regardless of how correctly you configure the website player itself.
Step 2: Open Widgets Inside Centova Cast
Inside your Centova Cast panel, navigate to:
Configuration → WidgetsCentova Cast offers several widgets designed for publishing station information on external websites. Depending on your specific configuration, these can include stream information displays, recent tracks lists, tune-in options, and the Web Player itself.
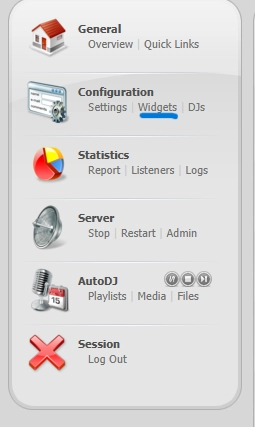
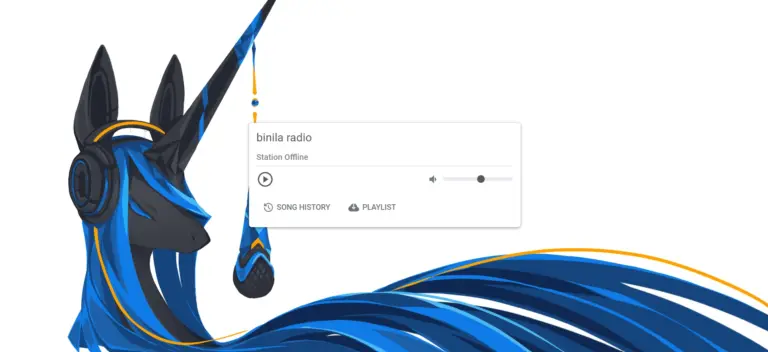
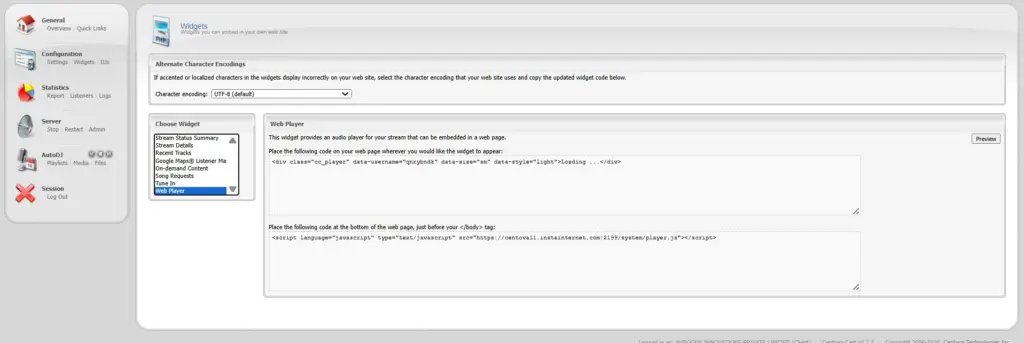
Select Web Player. This is the specific widget this entire guide is built around. Its purpose is straightforward: let your website visitors listen to your online radio station without ever leaving your website.
Step 3: Configure the Web Player Settings
Depending on your specific Centova Cast configuration, the Web Player section may let you select between different player types and customize various settings.
Centova Cast’s documentation references web-player options such as Muses, jPlayer, and Windows Media Player, with availability depending on your specific stream configuration. For a modern website, check which player options your account actually has available, and use whichever one your setup supports rather than assuming a specific player type will be present.
Do not copy a player code snippet from another website or from a generic tutorial example. Generate the code from your own Centova Cast account specifically. Widget code is tied to your station’s stream details, and using someone else’s generated code will not connect to your stream.
Step 4: Copy the Complete Widget Code
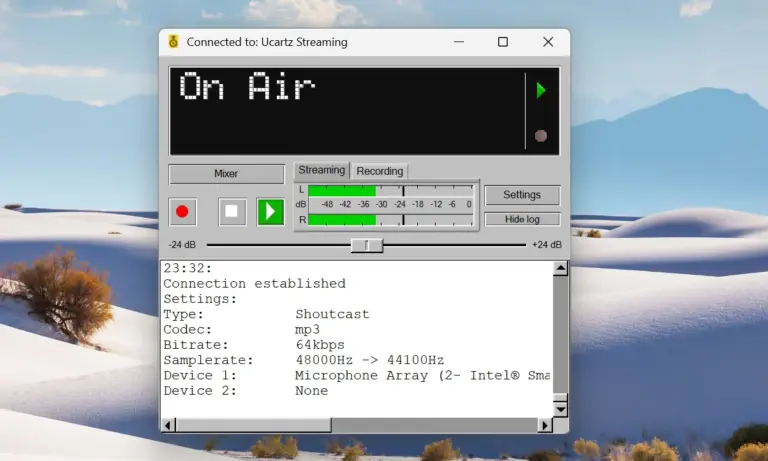
Before embedding your radio player, you need a working audio stream. If you’re using Centova Cast, learn how to broadcast audio tracks using Centova Cast and get your stream ready for embedding.
Once you select and configure the Web Player, Centova Cast generates the code you need to embed. This works slightly differently than simply copying a single iframe snippet, which is where a lot of beginner setups go wrong.
Centova Cast’s widgets are provided as two separate HTML snippets:
A placeholder snippet that marks where the widget should visually appear on your page.
A JavaScript snippet that provides the actual widget functionality, connecting that placeholder to your live stream.
Centova Cast’s own documentation specifically instructs users to copy both pieces of code. Do not copy only the first snippet and assume your setup is complete. A placeholder with no accompanying JavaScript will simply sit there doing nothing, since the placeholder alone has no functional connection to your stream.
Step 5: Open Your WordPress Website
Log in to your WordPress dashboard and navigate to the page where you want visitors to be able to listen. This could be your existing homepage:
Pages → Home → EditOr, and this is often the better approach, create a dedicated page specifically for this purpose:
Listen LiveA dedicated Listen Live page is particularly useful for radio stations because it lets you place the player prominently above the fold, without competing for space with other homepage content like navigation menus, hero images, or unrelated announcements.
Step 6: Add an HTML Block in WordPress
If you are using the standard WordPress block editor, add a new block by clicking:
+ → Custom HTMLThis gives you an HTML input field. Paste the placeholder portion of your Centova Cast Web Player code here.
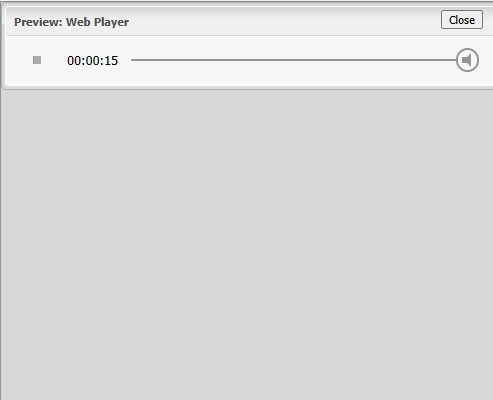
Your generated widget code might contain something structurally similar to:
<div class="cc_player">
    Loading ...
</div>
Do not manually type out or replace this with the example shown above. Use the actual, specific code generated by your own Centova Cast account, since the example here is illustrative only and will not connect to any real stream.
Centova Cast’s documentation explains that the first snippet determines where on the page the widget visually appears, while the second script snippet provides the actual JavaScript functionality that makes it work.
Step 7: What to Do With the Second Scrip
This is the part that many beginner tutorials skip entirely, and it is often the actual cause of a player that appears on the page but never plays anything.
Centova Cast widgets normally come as two separate pieces of HTML, not one. The first piece is placed exactly where you want the visible player to appear. The second piece, the JavaScript snippet, is normally placed near the very end of the HTML page, immediately before the closing </body> tag, according to Centova Cast’s own documentation for standard HTML implementations.
But WordPress works differently from a raw HTML file.
You are working inside a content management system rather than directly editing an HTML document, which means you cannot simply paste a script wherever you want and expect it to behave the same way it would in a plain HTML page. Do not blindly paste the JavaScript snippet into random parts of your WordPress page or post content.
If your widget does not function correctly after pasting the generated code into a Custom HTML block, your specific WordPress setup, theme, or security plugin configuration may be filtering or otherwise interfering with the JavaScript. Centova Cast itself explicitly warns that CMS platforms can interfere with widget functionality. For anyone following this as a beginner tutorial, this single point is one of the most important troubleshooting insights in the entire process, because it explains a failure mode that has nothing to do with your stream, your Centova Cast configuration, or the widget code itself being wrong.
Step 8: Publish and Test the Live Page
Once you have added the player code to your page, click Preview or Publish/Update, depending on where you are in your editing workflow.
Then open the actual, publicly accessible version of the page. You should see your radio player appear.
Critically, do not test only inside the WordPress editor’s preview mode. Test the genuinely published, live page. The WordPress editor environment can behave differently from how your live site renders content for real visitors, particularly with embedded scripts and third-party widgets, so a player that appears to work inside the editor is not a substitute for confirming it works on the actual published page.
Step 9: Click Play and Confirm the Stream Connects
With the published page open, click the Play button within your embedded player.
Your browser should connect to your radio stream and begin playing audio. If your AutoDJ is currently active, you should hear your AutoDJ content. If you happen to be broadcasting live at that moment, you should hear the live broadcast instead.
This behavior is expected and confirms something important: your website player is connected to the same underlying radio stream as everything else, rather than being some separate, disconnected audio system. There is only one actual stream. The website player, the Centova Cast internal player, and any tune-in links are all just different doors into that same single stream.
Step 10: Test on an Actual Mobile Device
This step should never be skipped, and it is worth calling out specifically because it is so commonly overlooked in beginner setups.
Open your published page on your actual phone, not just a browser window resized to look smaller on your desktop. Walk through the same flow a real mobile visitor would experience:
Website → Radio Player → Play → ListenWhile testing, specifically check each of the following. Does the player actually appear on the mobile layout? Is the Play button visible and large enough to tap comfortably? Does the stream actually start playing when tapped? Is the audio quality clear? Does the player fit correctly within the mobile screen width, rather than overflowing or getting cut off? Does the rest of the page remain usable and scrollable while the player is visible?
Do not assume that because your player works correctly on desktop, it automatically works the same way on mobile. Mobile browsers handle embedded scripts, autoplay restrictions, and layout rendering differently from desktop browsers, and a player that looks and functions perfectly on your laptop can still fail or display incorrectly on a phone.
The Complete Flow
     CENTOVA CAST
           ↓
      WEB PLAYER
           ↓
     WIDGET CODE
           ↓
       WORDPRESS
           ↓
      HTML BLOCK
           ↓
     YOUR WEBSITE
           ↓
        VISITOR
           ↓
      LISTENS
Centova Cast provides the underlying radio stream and generates the Web Player widget code. WordPress provides the website where you actually display that player to visitors. Your visitor’s role in this entire chain is simple: they land on your page, click Play, and listen, with none of the underlying complexity visible to them.
What If You Don’t Want to Use a Widget at All?
A web player embed is not the only option. You can instead provide visitors with a direct stream or tune-in link. Centova Cast makes these available through Quick Links, including formats such as .pls and .asx files depending on your specific streaming configuration.
That said, a dedicated web player embedded directly on your page is generally the better website experience for most visitors, because it lets them listen without ever leaving your page or needing to open a separate application. A raw tune-in link requires the visitor to have a compatible media player already installed and to understand what to do with the link, which introduces friction that a simple embedded Play button avoids entirely.
Troubleshooting Common Issues
The player doesn’t appear on the page at all. Check whether you actually copied both pieces of the widget code, not just the first placeholder snippet. Centova Cast widgets require both the placeholder and the accompanying JavaScript functionality snippet to work. Missing the second piece is one of the most common causes of a player that simply never shows up.
The player appears but clicking Play does nothing. First, go back and confirm that your Centova Cast station itself is actually online and broadcasting. Test the stream directly using Centova Cast’s own internal player or a tune-in link. If the underlying station is not currently broadcasting anything, your website player has nothing to connect to, regardless of how correctly it is embedded.
The widget code seems to disappear after saving in WordPress. This typically points to your WordPress setup, theme, or a security plugin filtering or stripping out script content automatically. As noted earlier, Centova Cast’s own documentation acknowledges that CMS platforms can interfere with widget code in exactly this way. Check your security plugin settings and consider testing with a different, more permissive HTML block configuration if this happens.
The player works fine on desktop but fails on mobile. Test directly on an actual physical phone, not just a resized desktop browser window. Also confirm you are using a genuinely browser-compatible web player option, since Centova Cast’s Web Player documentation covers multiple different player implementations, and not all of them behave identically across mobile browsers.
FAQ
Do I need to be a developer to add this player to my WordPress site?
No. The process relies on copying code generated automatically by Centova Cast and pasting it into a standard WordPress Custom HTML block. No custom coding knowledge is required, though basic comfort navigating the WordPress editor and your Centova Cast dashboard is helpful.
Why does my player show a placeholder but never actually loads the stream?
This almost always means only the first snippet of the widget code was copied and pasted, without the accompanying JavaScript snippet that Centova Cast generates alongside it. Go back to your Centova Cast Widgets section and make sure you copied both pieces of code, then verify both are present in your WordPress page.
Can I add more than one radio player widget to the same website?
Generally yes, though it depends on your specific Centova Cast plan and configuration. If you want the same stream accessible from multiple pages, such as both your homepage and a dedicated Listen Live page, you can typically embed the same widget code in multiple locations. Test each placement independently to confirm they all function correctly.
Why does Centova Cast say to place the JavaScript snippet before the closing body tag, but that doesn’t seem to apply to WordPress?
That specific instruction is written for standard, static HTML pages where you have direct access to edit the raw page structure. WordPress abstracts that structure away through its content management system, so you are working within a Custom HTML block inside the page content rather than editing the page’s actual HTML document structure directly. This is exactly why WordPress setups sometimes behave differently and why script filtering by themes or security plugins becomes a relevant troubleshooting factor that would not apply to a plain HTML page.
My radio station works fine when I test it inside Centova Cast, but the website player still doesn’t play. What’s wrong?
Since your Centova Cast internal player and your website’s embedded player pull from the exact same underlying stream, this discrepancy typically points to something in the widget code implementation itself, most commonly a missing second script snippet, or WordPress filtering the JavaScript. Walk through the troubleshooting steps above in order rather than assuming the stream itself is the problem, since you have already confirmed it works elsewhere.
Should I use the Web Player, a tune-in link, or both?
Most stations benefit from offering both. Use the embedded Web Player as the primary, frictionless listening option directly on your website, since it lets visitors listen without leaving the page. Offer tune-in links as a secondary option for visitors who prefer to use their own dedicated media player application instead of a browser-based widget.
Does the website player use extra bandwidth separate from my main stream?
No. Your website’s embedded player connects to the exact same live stream that Centova Cast is already serving, whether that stream is coming from AutoDJ or a live broadcast. It is not a separate, duplicate audio feed. Every listener, regardless of whether they connect through the website player, a tune-in link, or directly through Centova Cast, is drawing from the same single stream source.
How do I know if my WordPress security plugin is the thing blocking my player?
If you have confirmed both pieces of the widget code are correctly pasted into your Custom HTML block, and your Centova Cast station is confirmed online and broadcasting through independent testing, but the player still fails specifically within WordPress, a security plugin or theme-level script filtering is a reasonable next thing to investigate. Temporarily disabling security plugins one at a time while retesting the page can help isolate whether one of them is responsible.
Conclusion
Getting your stream running is the foundation, but a station is only as useful as the ease with which people can actually listen to it. With Ucartz Radio Hosting, you get everything needed to run a complete online radio station, including AutoDJ, live broadcasting capability, and full Centova Cast management, and from there you can bring that stream directly onto your website with a properly configured web player exactly as covered in this guide.
Ready to launch your own online radio station? Start your radio hosting with Ucartz today.