
Short answer: Google Antigravity is a free code editor from Google with an AI helper, called the agent, that writes the files for you. Install the standalone Antigravity IDE, sign in with your Google account, open an empty folder, pick a Gemini or Claude model, and describe the website you want in plain words. Check the result in your browser, save each good version with Git, then upload the files to your web hosting. You must be 18 or older to use Antigravity.
Before you start: what you need
- A personal Google account. Google says Antigravity works with personal accounts and suggests an @gmail.com address if a work or school account will not sign in. It is available in India and most other countries; the FAQ lists them.
- A computer that meets Google’s minimums: Windows 10 (64-bit) or newer; macOS 12 (Monterey) or newer, with downloads for Apple Silicon and Intel Macs; or Linux with glibc 2.28 or newer (for example Ubuntu 20, Debian 10, Fedora 36 or RHEL 8 and later).
- No money to start. The Individual plan costs nothing and comes with a quota that refreshes every week. Bigger jobs use more of it. Paid Google AI plans raise the limits (see Google’s plans page).
What Antigravity is, in plain words
Think of Antigravity as a notebook for code with a helper sitting next to you. The notebook is the editor, where your files open. The helper is the agent in the panel on the right: you tell it what you want, and it plans the work, creates and changes files, can run commands, and shows you exactly what it changed. If you have used Visual Studio Code, it will look familiar, because the standalone IDE is built on the same open-source base.
Google offers Antigravity in several forms. This guide uses the standalone IDE (version 2.5.5 at the time of writing), because you can see and edit every file yourself:
| Version | What it is | Pick it if |
|---|---|---|
| Antigravity IDE (standalone) | A full code editor with the agent panel built in | You want to see your files and learn as you go (this guide) |
| Antigravity 2.0 | A desktop app for running agents on projects | You mostly give tasks and review the results |
| Antigravity CLI | The agent in a terminal window (the agy command) | You are happy with the command line |
| IDE extensions | Antigravity inside VS Code, Visual Studio, JetBrains, Zed or Xcode | You already use one of those editors |
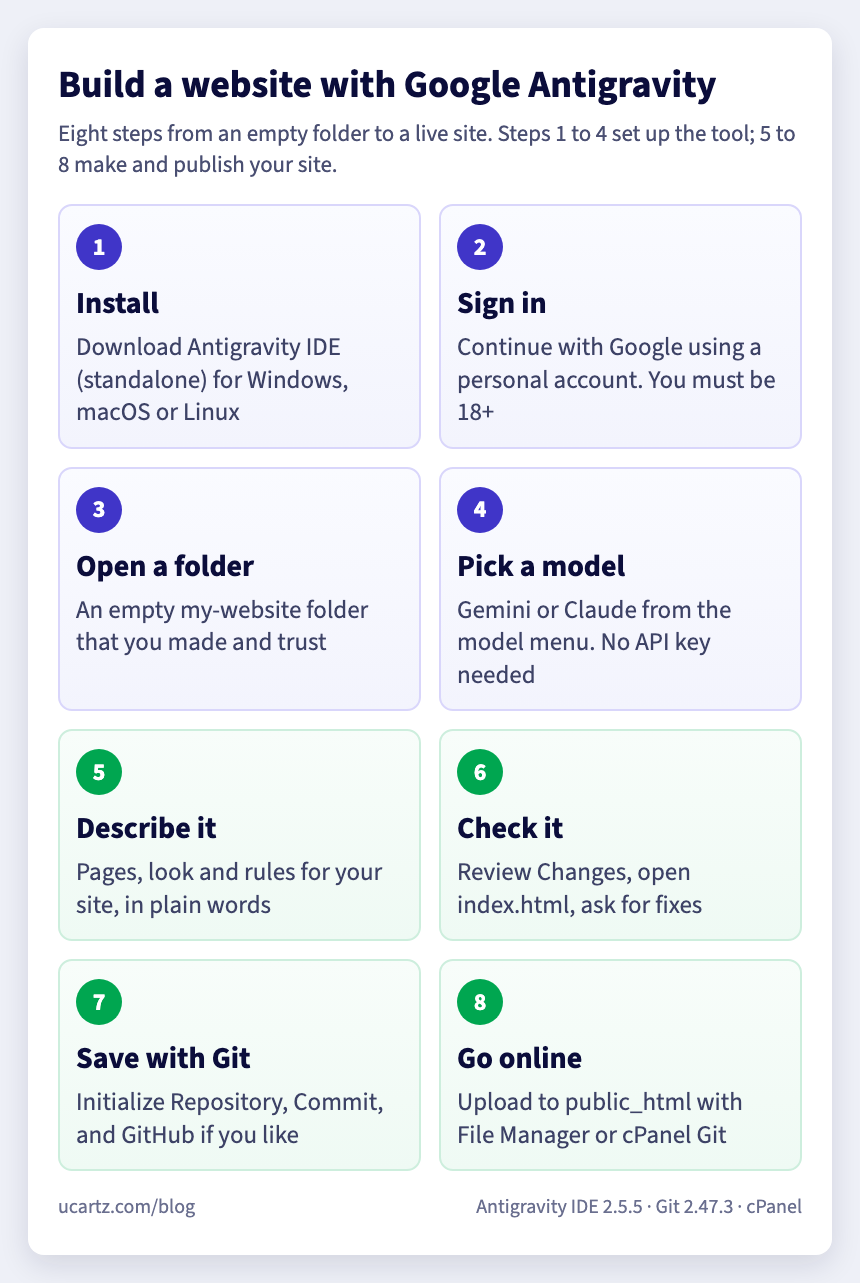
Step 1: Download and install Antigravity IDE
- Open antigravity.google/download, choose the macOS, Windows or Linux tab, and find Antigravity IDE (Standalone). Pick the download for your computer: x64 for most Windows PCs and Linux machines, Apple Silicon or Intel on a Mac.
- Windows: run the downloaded
Antigravity IDE.exeand follow the installer. macOS: open the downloaded.dmgfile and follow the steps on screen. Linux: extract the.tar.gzfile and startantigravity-idefrom thebinfolder inside it.
Step 2: Sign in with Google
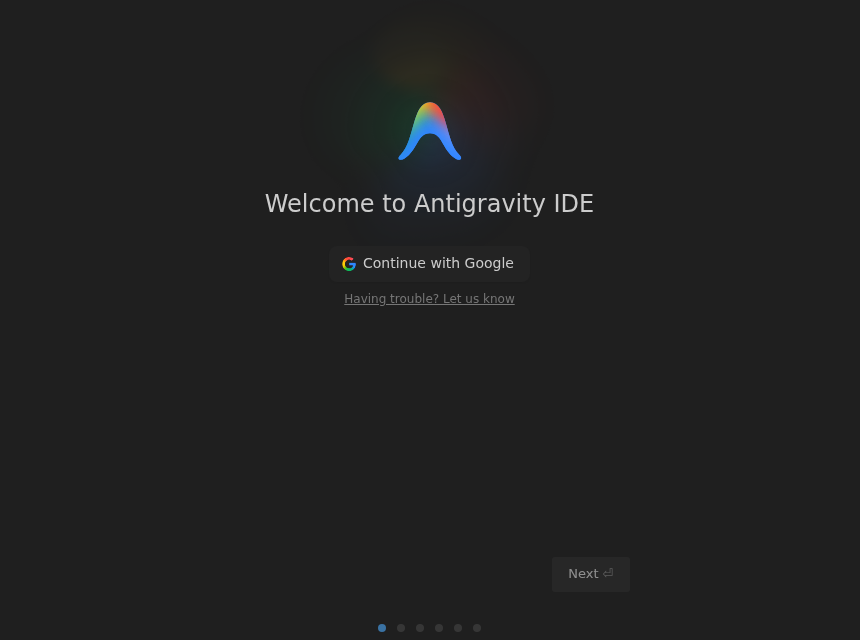
The first screen says Welcome to Antigravity IDE. Click Continue with Google and sign in with your personal Google account. If Google asks you to verify your age, follow its steps. A few short setup screens come next (the dots at the bottom show how many); read each one before you click Next.
Step 3: Make a folder for your website and open it
- Make a new, empty folder, for example
my-websitein your Documents folder. Use lowercase letters and no spaces. - In Antigravity IDE, choose Open Folder and select it.
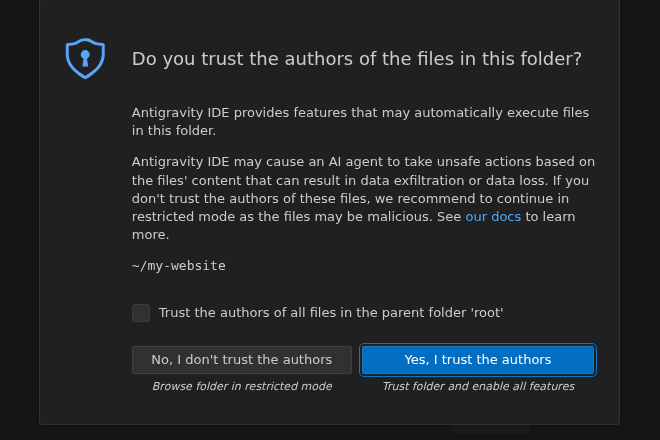
- Antigravity asks Do you trust the authors of the files in this folder? It asks because the agent may act on what the files say. For a new, empty folder that you made yourself, click Yes, I trust the authors. For code you downloaded from someone you do not know, click No, I don’t trust the authors: the folder then opens in restricted mode.
Keep each website in its own folder. It keeps your files tidy and the agent’s work in one place.
Step 4: Choose Gemini or Claude
The agent panel sits on the right side of the editor. Under the box where you type, open the model menu and pick the AI model that will do the work. You do not connect a separate Gemini or Claude account and you do not paste any API key: you signed in once with Google, and Antigravity does not support bring-your-own keys. According to Google’s models page, the free plan includes these:
| Model in the menu | Made by |
|---|---|
| Gemini 3.8 Flash, Gemini 3.7 Flash, Gemini 3.6 Flash | |
| Gemini 3.1 Pro | |
| Claude Sonnet 4.6 (Thinking), Claude Opus 4.6 (Thinking) | Anthropic |
| GPT-OSS 120B | OpenAI (open-weight model) |
Our suggestion: start with a Flash model. If you are not happy with the result, start a new conversation with the same request using Gemini 3.1 Pro or Claude Sonnet 4.6 and compare. The model you pick stays for the whole conversation. If you change it while the agent is busy, the new choice applies after the current step finishes.
Step 5: Describe your website
Type your request in the agent panel the way you would brief a person. Say what the site is for, which pages you need, and the rules you want it to follow. Here is a request you can copy and change:
Build a simple website for my bakery, "Asha's Bakery" in Kollam.

Pages: Home, Menu and Contact.
Use only HTML and CSS in this folder: index.html, menu.html, contact.html,
a styles folder with style.css, and an images folder. No frameworks.
Make it look good on phones and on computers.
Use lowercase file names without spaces.
Give every image a short alt text.
Use 00000 00000 as a placeholder phone number and 6 am to 8 pm as opening hours.
When you finish, list the files you made and explain each one in simple words.- Asking for plain HTML and CSS keeps the site simple: it runs on any web hosting, with nothing to install on the server.
- You can attach a picture to your message, such as a sketch on paper or a photo of your shop sign, and ask the agent to use it as a guide.
- The agent may write a plan first. Read it, and say so if something is wrong before it starts.
Step 6: Check the work and ask for changes
- Read before you allow. If the agent asks to run a command on your computer, read it first. If you do not understand it, ask: “What does this command do?”
- See what changed. When the agent starts writing code, a Review Changes item appears in the bottom bar of the agent panel. Click it to scroll through every change, and leave a comment on any part you want done differently.
- Open the site. Double-click
index.htmlin your folder to open it in your browser. Make the window narrow to see roughly how it looks on a phone. The agent can also open Chrome to test pages itself; it uses a separate Chrome profile, and it asks before it opens any site that is not on its allow list (which starts with only localhost). - Ask for changes in plain words, one or two at a time: “Make the header dark green”, “Move the opening hours to the top of the contact page”.
- Check the facts yourself. AI can get names, prices and phone numbers wrong. Replace every placeholder with your real details.
Step 7: Save your work with Git
Git saves a copy of your whole folder each time you ask it to. Each copy is called a commit. If a later change breaks the site, you can go back to the last good one. Antigravity IDE has Git buttons built in, but Git itself must be installed on your computer first.
- Install Git. On Windows, follow How to Install Git on Windows. On a Mac or Linux, use the instructions at git-scm.com. If Git is missing, the Source Control view in Antigravity shows a download link; after installing, reload the window.
- Tell Git who you are, once per computer. Open a terminal (in Antigravity, or your computer’s own terminal app) and run these two lines with your own name and email:
git config --global user.name "Your Name"
git config --global user.email "you@example.com"- Start the history. Open the Source Control view and click Initialize Repository.
- Make your first commit. Type a short message such as “First version of the bakery website” and click Commit. If it says “There are no staged changes to commit”, choose to stage all your changes and commit them.
- Commit again every time the site works the way you want. A commit takes seconds and is your undo button.
- Optional: keep a copy on GitHub. Click Publish to GitHub, sign in to your GitHub account, and choose Publish to GitHub private repository (only you can see it) or the public option. Private is the safer choice for a first site.
The buttons run ordinary Git commands. This is the same first commit done in a terminal; the output is from our test server:
git init -b main
git add .
git commit -m "First version of the bakery website"
git log --oneline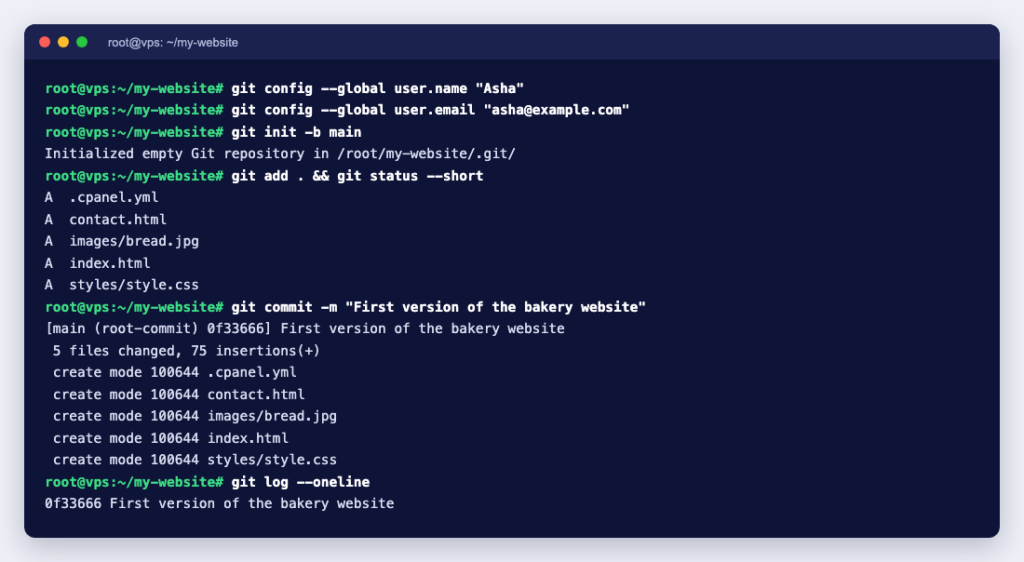
Step 8: Put the website online
To be online, the files need a home on a web server and a domain name that points to it. Pick a name with our domain search. On cPanel hosting, such as our Linux web hosting, the website folder is public_html. There are two ways to get your files there.
The easy way: upload with File Manager
- Make a zip file of what is inside your website folder (
index.html, the other pages,stylesandimages), not of the folder itself. Leave out the hidden.gitfolder. - In cPanel, open File Manager, go to
public_html, upload the zip and extract it there. Our guide How to upload files via the cPanel File Manager shows each click. - Check that
index.htmlsits directly insidepublic_html, then open your domain in a browser.
The Git way: deploy from GitHub with cPanel
If your cPanel has Git Version Control under Files, it can copy a GitHub repository to your account and then into public_html. First add a file called .cpanel.yml to your project. It tells cPanel which files to copy. Replace USERNAME with your cPanel username:
---
deployment:
  tasks:
    - export DEPLOYPATH=/home/USERNAME/public_html/
    - /bin/cp index.html $DEPLOYPATH
    - /bin/cp contact.html $DEPLOYPATH
    - /bin/cp -R styles $DEPLOYPATH
    - /bin/cp -R images $DEPLOYPATH
List each page you have (add a line for menu.html and any others). Do not use * to copy everything: cPanel’s deployment guide warns that it can copy the .git folder too. We ran these exact commands on a test server: they copied the pages, styles and images, and nothing else. Commit the file, push it to GitHub, then:
- In cPanel, open Git Version Control and click Create.
- Keep Clone a Repository switched on and paste your repository’s HTTPS address from GitHub into Clone URL.
- Enter a Repository Path such as
repositories/my-website(no spaces) and a Repository Name, then click Create. - Click Manage, open the Pull or Deploy tab and click Deploy HEAD Commit. Your site is now in
public_html. - After later changes, commit and push from Antigravity, then click Update from Remote and Deploy HEAD Commit again.
A public GitHub repository can be cloned straight away. A private one needs an SSH key first; cPanel explains this in its guide to private repositories. Full details are in cPanel’s Git Version Control documentation.
Keep it running on a VPS
A VPS (virtual private server) is your own server in a data centre. It stays switched on day and night, so it can host your website and, if you like, keep the Antigravity agent working while your own computer is off.
Why a small VPS is enough for your website
- A site like the bakery example is a handful of small files. Our smallest plan, VPS Lite, has 1 vCPU, 4 GB RAM and 50 GB NVMe storage, which is plenty for it.
- Your VPS is a separate virtual machine (KVM) with its own operating system, memory and storage, instead of sharing one setup with other websites. You get full root access, so you can add a database, Node.js or anything else later.
- Unmetered bandwidth, one IPv4 address and Free Basic Managed Support come with the plan.
- On a VPS you install the web server yourself, for example nginx or Apache. A cPanel plan does that part for you, so pick whichever suits you.
VPS Lite costs $10 a month, or $36 if you pay for a year. Order VPS Lite or compare all plans on our KVM VPS hosting page.
Run Antigravity on a Windows VPS while you are away
On your own computer, the agent works only while the computer is on; Google’s FAQ notes that Antigravity stops the computer from sleeping while an agent runs. On a Windows VPS, the agent can keep working after you close your laptop.
- Order VPS Pro or Elite from our Windows VPS page. VPS Pro costs $30 a month with 4 CPU cores, 16 GB RAM and 200 GB NVMe. Windows Server is offered on these two plans with the licence included, and our engineers install it and turn on Remote Desktop for you at no extra cost.
- Connect with Remote Desktop. On Windows, use the built-in Remote Desktop Connection. On a Mac, iPhone, iPad or Android device, use Microsoft’s Windows App. Enter the IP address and login details for your Windows VPS.
- Install Antigravity inside the VPS. Download Antigravity IDE for Windows from antigravity.google/download, sign in as in Step 2, open your project folder and give the agent its task.
- Close the window, do not sign out. Closing the Remote Desktop window disconnects you but keeps the session open. Microsoft explains that when a session is disconnected, all applications continue to run, while signing out closes them. Our guide to running MetaTrader around the clock on a Windows VPS uses the same routine.
- Come back from any device, connect again and look at Review Changes to see what the agent did.
Google lists Windows 10 (64-bit) or newer for Antigravity and does not mention Windows Server, so install it and try it in your first days. If the VPS does not suit you, your first VPS purchase at Ucartz comes with a 30-day money-back guarantee. Prefer Linux? Antigravity IDE has a Linux version too (we ran 2.5.5 on Debian 13); a Linux VPS needs a desktop and a remote desktop tool such as xrdp, as shown in How to Install xrdp on Ubuntu.
Stay safe while the AI works
- Never type passwords, cPanel logins, bank details or API keys into the chat or into your website files, and never commit them to GitHub.
- Read every command before you allow it. Ask the agent to explain anything you do not understand.
- Only trust folders you made yourself or got from someone you know.
- Use your Antigravity sign-in only in Google’s own Antigravity apps. Google’s FAQ says using it through third-party tools such as Claude Code breaks its terms and can get the account suspended.
- Make a Git commit before any big change, so the last good version is always one click away.
Common problems and fixes
| Problem | What to do |
|---|---|
| Antigravity says your age is unverified | It is only for people aged 18 or over. If you are, follow Google’s steps to verify your age. |
| A work or school account will not sign in | Use a personal @gmail.com account, as Google’s FAQ suggests. |
| The agent stops because your quota is used up | The free quota refreshes weekly. Smaller, clearer requests use less of it. |
| Source Control says Git is not installed | Install Git, then reload the Antigravity window. |
| A page works on your computer but shows 404 online | Web servers care about capital letters: Contact.html and contact.html are different files. Use lowercase names everywhere. |
| Your domain shows a list of files or a 403 error | index.html is not directly inside public_html. Move it there. |
The AI writes the code, but knowing a little HTML helps you spot mistakes and make small fixes yourself. Our HTML website guide explains every file the agent creates. When your site is ready, put it on Linux web hosting with cPanel, and if you get stuck at any step, hire an expert by the 15 minutes ($8), half hour ($15) or hour ($28).