WordPress powers 43% of all websites globally. Migrating WordPress incorrectly costs $5,600 per minute in downtime.
Zero-downtime migration is possible with proper planning. This guide walks through every step, from pre-migration checks to DNS propagation monitoring. Follow this checklist and your move will go smooth.
What Is Zero-Downtime WordPress Migration?
WordPress migration means moving your site from one hosting provider to another while keeping it online throughout the entire process.WordPress, the CMS powering over 43% of the web, is maintained at the official WordPress.org website, where you can find documentation, requirements, and developer resources.
How Zero-Downtime WordPress Migration Works
The process uses parallel systems. Your old WordPress host stays live while you prepare everything on the new host. You clone WordPress, test plugins and themes, verify the database. Only when all systems check out do you flip the DNS switch.
Result: No lost visitors, no lost posts, no downtime. Your WordPress site stays accessible the entire time
Understanding why you migrate helps plan better.
Performance upgrade:
Current host cannot handle traffic. Plugins slow down pages. Database queries timeout.
Security concerns:
Current provider has poor security. You need better firewall protection and automatic backups.
Cost reduction:
Find cheaper hosting without sacrificing speed or support.
Better support needs:
Current provider lacks WordPress expertise. You need 24/7 WordPress specialists.
Technology stack upgrade:
Current PHP version outdated. Need PHP 8+, newer MySQL version, or better caching options.
Geographic relocation:
Current data center too far from users. Need server closer to your audience.
How Long Does Website Migration Actually Take?
Migration duration varies based on site complexity and size.
Standard migration timelines:
Small sites (under 1GB, 5-10 pages) complete in 2-4 hours including DNS propagation.
Medium sites (1-10GB, 50-500 pages) require 4-8 hours for complete transfer.
Large sites (10-100GB, 500+ pages) need 12-24 hours with proper planning.
Enterprise sites (100GB+, complex infrastructure) take 2-7 days with staged migration.
Time breakdown for typical migration:
| Phase | Duration | Critical Path |
| Pre-migration backup | 30-60 minutes | Yes |
| File transfer | 1-4 hours | Yes |
| Database migration | 30-90 minutes | Yes |
| Testing on new server | 1-2 hours | Yes |
| DNS update initiation | 5 minutes | Yes |
| DNS propagation | 1-48 hours | Yes |
| Monitoring period | 24-72 hours | No |
Proper planning reduces actual downtime to under 5 minutes only during DNS cutover.
Pre-Migration: Planning Phase (7–14 Days Before)
Step 1: Audit Your WordPress Installation
Document everything before migration. You cannot move what you do not know exists.
Document these WordPress items:
- WordPress core version (Settings → General)
- Active themes and theme versions
- Active plugins and plugin versions
- WordPress database name and prefix
- Custom post types and taxonomies
- Multisite configuration (if applicable)
- WP-CLI configuration files
- Custom functions in functions.php
- Modified .htaccess rules
- SSL certificate details
- Email accounts tied to WordPress
- Cron jobs and scheduled tasks
- Custom database tables
- Third-party integrations (payment gateways, email services)
- API keys and external connections
Use this inventory as your migration roadmap
Step 2: Create a Complete WordPress Backup
Backup your entire WordPress installation. Database. Files. Uploads. Everything.
Backup options:
Plugin-based backup (easiest for WordPress):
- Duplicator: Creates single migration package
- All-in-One WP Migration: Exports site with one click
- UpdraftPlus: Scheduled backups, cloud storage
- BackupBuddy: Automated backups, restore points
Manual backup (more control):
- Export database via phpMyAdmin
- Download /wp-content/ folder (themes, plugins, uploads)
- Download /wp-config.php and .htaccess
- Export wp-cli configuration if using WP-CLI
Store backups locally and in cloud storage (Dropbox, Google Drive). Keep until migration confirms success.
Step 3: Choose the Right WordPress Hosting Provider
Your new host must support WordPress requirements. Check:
WordPress minimum requirements:
- PHP 7.4+ (PHP 8+ recommended)
- MySQL 5.7+ or MariaDB 10.2+
- 512MB RAM minimum (2GB+ recommended)
- HTTPS/SSL support
- Automatic WordPress backups
- One-click WordPress installation
- SSH/SFTP access
- cPanel or WordPress-specific control panel
Additional considerations:
- Free WordPress migration service (71% of hosts offer this)
- WordPress-optimized caching
- 24/7 WordPress support (not just general support)
- Staging environment included
- Automatic plugin updates available
Do not choose based on price alone. WordPress performance depends on server quality
Step 4: Inform Users of Upcoming Migration
Notify users 2–3 weeks in advance. Tell them:
- When migration happens (date and time in their timezone)
- Expected downtime (if any)
- What will improve (speed, reliability)
- Who to contact if issues arise
Use email, website banners, or social media. Transparency builds trust.
5–7 Days Before: Preparation Phase
Step 5: Reduce DNS TTL Values
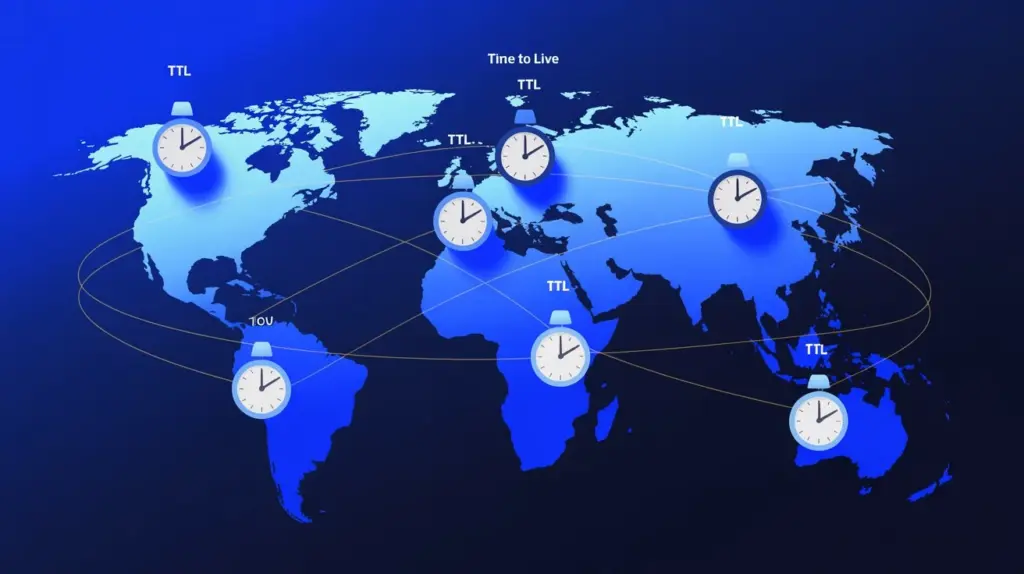
TTL (Time To Live) controls how long DNS changes stay cached. High TTL = slow propagation. Low TTL = fast propagation.
TTL reduction timeline:
- 7 days before: Lower TTL to 3600 seconds (1 hour) on all records.
- 48 hours before: Lower TTL to 300 seconds (5 minutes).
- This ensures DNS changes propagate globally in minutes, not hours.
Lowering TTL ahead of time prevents delay on migration day.
Test everything thoroughly. Broken links, missing pages, and database errors are common mistakes.
Step 6: Set Up WordPress on New Host
Install and fully configure WordPress on the new host before migration day.
Install WordPress:
- Use new host’s one-click installer, or
- Manually install WordPress files and run wp-config.php setup, or
- Use Duplicator to import your backup package directly
Configure WordPress:
- Install all themes matching current site
- Install all plugins matching current site
- Match WordPress settings (site title, tagline, timezone)
- Configure permalink structure identically
- Set up email notifications correctly
- Configure privacy and discussion settings
- Install SSL certificate (reuse current one or new one)
Do not skip any plugins or theme customizations. Small oversights cause broken features after going live
Step 7: Use a Staging Environment
Set up a staging site on the new host and test under real conditions.
Test WordPress completely on the new host before DNS changes.
Test these WordPress functions:
- All pages load and display correctly
- All posts display with correct formatting
- Navigation menus work properly
- Search functionality returns correct results
- Contact forms submit data successfully
- E-commerce checkout completes (if applicable)
- User login and account functions work
- Comments display and moderate properly
- Media (images, videos) display correctly
- Sidebar widgets render properly
- Theme customizations display correctly
- Plugin functionality works (forms, galleries, etc.)
- Mobile responsive design functions correctly
- Analytics and tracking pixels fire correctly
Use tools like Pingdom, GTmetrix, or WebPageTest to verify performance. This catches 90% of problems before going live.
24-48 Hours Before: Final Checks
Step 8: Verify DNS Records Are Ready
Your new host provides DNS records. Copy them exactly:
| Record Type | Example Value | Purpose |
|---|---|---|
| A Record | 192.168.1.1 | Points domain to new server IP |
| CNAME (www) | example.com | Routes www subdomain to main domain |
| MX Record | mail.example.com | Email routing |
| SPF Record | v=spf1 include:host.com | Email authentication |
| DKIM Record | Generated by host | Email security |
Having these ready prevents delays during the switch.
Step 9: Lower TTL Again (Critical)
Lower TTL values one more time, 24–48 hours before migration:
- All A records: 300 seconds (5 minutes)
- All CNAME records: 300 seconds
- All MX records: 300 seconds
This ensures nameserver changes propagate within minutes globally.
Step 10: Set Up Monitoring and Alerts
Monitoring during migration catches issues immediately.
Set up monitoring for:
- Website uptime (check every 1 minute)
- DNS propagation (use dnschecker.org)
- SSL certificate validity
- Email delivery (send test emails)
- Database connectivity
- WordPress admin dashboard access
- Plugin conflicts or errors
- Theme rendering issues
- Page load times
Create an incident response plan. Who responds if something breaks? What is the escalation path?
Step 11: Notify Support Teams
Inform hosting support, DNS providers, and any relevant third parties:
- Current hosting provider (may help troubleshoot)
- New hosting provider (alert them to incoming migration)
- Email service provider (if different from host)
- CDN provider (if used)
- SSL certificate provider
Having backup support accelerates problem resolution.During migration, disable automatic WordPress updates to prevent conflicts
Migration Day: The Switch
Step 13: Perform Final WordPress Database Sync
Before changing DNS, sync the database one last time.
Sync steps:
- Take a fresh backup of live database
- Export database from old host (use phpMyAdmin)
- Import to staging environment on new host
- Verify all posts, pages, and users match
- Check database size matches original
- Confirm no corruption or errors in debug logs
This ensures zero data loss during migration.
Step 13: Change Nameservers at Your Registrar
This is the critical step. At your domain registrar, change nameservers to point to the new host.
Steps:
- Log into registrar account.
- Find “Manage DNS” or “Nameservers” section
- Replace old nameservers with new host’s nameservers
- Save changes
- Document the exact time of change (for reference)
DNS propagation begins immediately. A and CNAME records propagate within 1-4 hours. MX records may take 12-48 hours.
Step 14: Monitor DNS Propagation in Real-Time
Use tools to track propagation across the globe:
Free tools:
- dnschecker.org (tracks A, CNAME, MX, TXT records)
- whatsmydns.net (shows propagation by region)
- mxtoolbox.com (verifies DNS and email setup)
Check these tools every 15 minutes for the first hour. Most propagation completes within 2-4 hours. Some ISPs take up to 48 hours.

Step 15: Test WordPress From Multiple Locations
Use VPNs or location-testing tools to verify the new site loads correctly from different regions.
Test from:
- Your local computer (no VPN)
- USA VPN
- Europe VPN
- Asia VPN
- Mobile devices
This confirms DNS changes are visible globally.
Step 16: Test WordPress Admin Panel Access
Verify WordPress admin login works on new server.
Admin tests:
- Log in to WordPress dashboard
- Check dashboard loads without errors
- Verify all posts display in editor
- Check plugins load in admin
- Confirm settings pages accessible
- Test media library access
Admin access failure indicates database or configuration issues.
Step 17: Test Email Delivery
Verify email functionality after migration:
- Send WordPress password reset email (test email delivery)
- Send WordPress comment notification
- Verify emails arrive in inbox (not spam)
- Check sender address correct
- Confirm email formatting looks correct
If email fails, MX propagation may not be complete. Wait and retest.
Post-Migration: Verification Phase (24–48 Hours After)
Step 18: Verify All WordPress Systems Function
After DNS fully propagates, run comprehensive WordPress tests:
WordPress functionality checklist:
- All pages load without 404 errors
- All posts display with correct metadata
- Database queries execute without timeouts
- WordPress forms submit and save data
- User logins work across multiple accounts
- File downloads complete successfully
- Images and media load correctly
- Plugin functionality works (caching, SEO, forms)
- Theme customizations display correctly
- Search returns correct results
- Comments display and moderation works
- Analytics and tracking pixels fire
- WordPress admin panel fully functional
Check WordPress error logs via SSH or FTP. Fix any errors immediately.After migration many site owners refresh their design. You can explore the best free WordPress themes for new websites to improve UI and performance.
Step 19: Check WordPress Performance Metrics
Compare old host vs new host performance:
| Metric | Old Host | New Host | Target |
|---|---|---|---|
| Page load time | 3.2s | 1.1s | <2s |
| Time to first byte (TTFB) | 800ms | 200ms | <500ms |
| Server response time | 600ms | 150ms | <300ms |
| WordPress admin load time | 2.5s | 0.8s | <1.5s |
| Uptime SLA | 99.8% | 99.99% | 99.99%+ |
New host should be faster and more reliable. If not, investigate caching, plugin conflicts, or database optimization.
Step 20: Reset TTL to Normal
After everything stabilizes, reset TTL values back to standard:
- Most A and CNAME records: 3600 seconds (1 hour)
- Some records: 86400 seconds (24 hours)
High TTL reduces DNS lookup overhead after migration completes.
Step 21: Enable WordPress Auto-Updates Again
Re-enable automatic WordPress updates on new host.
Re-enable in wp-config.php:
textdefine('WP_AUTO_UPDATE_CORE', true);
define('AUTOMATIC_UPDATER_DISABLED', false);
This ensures WordPress, themes, and plugins stay secure and updated.
Step 22: Update WordPress Settings for New Host
Verify WordPress settings match new hosting environment.
WordPress configuration check:
- Verify site URL correct in Settings → General
- Check permalink structure still functions
- Confirm file upload permissions correct
- Verify caching plugin configured for new host
- Check backup plugin set up correctly
- Confirm email settings point to new mail server
- Update WordPress security keys (optional but recommended)
Minor configuration issues cause 404 errors or broken uploads.
Step 23: Cancel Old Hosting Account
Wait at least 48 hours before cancelling old hosting.[web:327]
Before cancelling, verify:
- All DNS changes fully propagated (not cached elsewhere)
- All traffic goes to new host (check new host logs)
- No redirects point to old host
- Email fully transitioned to new host
- All backups downloaded to local storage
- WordPress migration confirmed complete
Then request cancellation and confirm old account is shut down.
WordPress-Specific Migration Tools
These plugins make WordPress migration easier:
Duplicator – Creates migration package (files + database) in one click. Simplest method.
All-in-One WP Migration – One-click export/import. Works with Dropbox, Google Drive, cloud storage.
UpdraftPlus – Scheduled backups. Restore to different host. WordPress-native approach.
Migrate Guru – Automated migration with database search/replace. Handles URL changes automatically.
WP Migrate DB Pro – Database-focused. Handles custom post types and relationships. Enterprise feature.
How to Handle Email During Website Migration
Email continuity requires special attention during migration.Email continuity requires correct DNS settings and proper configuration of your mail server. If you’re unfamiliar with email setup, refer to our business email setup guide to configure accounts, SPF/DKIM records, and secure delivery after migration.
Understanding Email Migration Challenges
Email migration differs from website migration fundamentally.
Email-specific concerns:
Active email cannot afford downtime. Business communication must continue uninterrupted.
Dual-server email creates split-brain problems. Messages arrive at different servers during transition.
Historical email requires complete transfer. Archives contain critical business information.
Email Migration Strategy
Follow these steps for seamless email transition.
Before DNS changes:
Set up email accounts on new server with identical addresses and passwords.
Configure email clients to access new server via IP address or temporary hostname.
Test email sending and receiving on new server before DNS changes.
Keep old email server active and monitoring during transition.
During DNS propagation:
Monitor email on both servers. Messages arrive at either location during propagation.
Manually check both servers for new messages. Prevents missed communications.
Inform team about dual-server period. Train staff to check both locations.
After DNS propagation:
Export email from old server after 72 hours. Ensures all delayed messages arrive.
Import archived messages to new server. Maintains complete email history.
Update email client settings for all users. Remove old server configurations.
Verify email sending authentication (SPF/DKIM) works correctly. Prevents deliverability issues.
Common WordPress Migration Mistakes to Avoid
Mistake 1: Not updating WordPress Search & Replace
Impact: Links point to old domain. Forms submit to wrong server.
Prevention: Update database search/replace after migration.
Mistake 2: Forgetting to update WordPress home and site URL
Impact: WordPress redirects break. Admin page inaccessible.
Prevention: Update Settings → General immediately after DNS propagates.
Mistake 3: Plugin conflicts on new host
Impact: WordPress page breaks or admin inaccessible.
Prevention: Test all plugins on staging environment first.
Mistake 4: Incorrect file permissions
Impact: WordPress cannot upload files. Theme editor breaks.
Prevention: Set /wp-content/ permissions to 755, files to 644.
Mistake 5: Missing SSL certificate on new host
Impact: Browser security warnings. Mixed content errors.
Prevention: Install SSL before DNS change or immediately after.
Mistake 6: Not testing database integrity
Impact: Posts disappear. Users cannot log in. Forms fail.
Prevention: Run wp db repair on new host before going live.
If you encounter problems after your migration, this guide to fixing common WordPress errors will help troubleshoot broken links, white screens, and database connection issues.
When to Use Professional Migration Services
71% of hosting providers offer free website migration.This is often the best choice if:
- Your WordPress site is complex (WooCommerce, custom code)
- You are unfamiliar with FTP, databases, or DNS
- You cannot afford downtime (business-critical site)
- Your WordPress site is high-traffic
- You need compliance verification (HIPAA, GDPR)
Professional WordPress migration reduces downtime by 60–80% and eliminates risks.
How Ucartz Handles Website Migration
A strong hosting provider like Ucartz should offer:
✓ Free website migration on all plans
✓ Expert technicians who manage the entire process
✓ Zero-downtime guarantees for properly planned migrations
✓ 24/7 support during and after migration
✓ DNS change coordination and monitoring
✓ Staging environment for pre-migration testing
✓ Backup management and rollback options
✓ Performance monitoring post-migration
Using provider migration services saves time, reduces risk, and ensures smooth transition.
WordPress Migration Checklist: Quick Reference
| Task | Timeline | Status |
|---|---|---|
| Audit WordPress installation | 7–14 days before | ☐ |
| Create complete backup | 7–14 days before | ☐ |
| Choose new WordPress host | 7–14 days before | ☐ |
| Notify users | 14 days before | ☐ |
| Reduce TTL (first time) | 7 days before | ☐ |
| Install WordPress on new host | 7 days before | ☐ |
| Test staging environment | 5 days before | ☐ |
| Verify DNS records ready | 2 days before | ☐ |
| Lower TTL (second time) | 24–48 hours before | ☐ |
| Set up monitoring | 24 hours before | ☐ |
| Disable WP auto-updates | 24 hours before | ☐ |
| Sync database | Migration day | ☐ |
| Change nameservers | Migration day | ☐ |
| Monitor DNS propagation | Migration day | ☐ |
| Test WordPress from multiple locations | 2–4 hours after | ☐ |
| Test WordPress admin access | 4–8 hours after | ☐ |
| Test email delivery | 4–8 hours after | ☐ |
| Verify all WordPress systems | 24 hours after | ☐ |
| Check performance metrics | 24 hours after | ☐ |
| Reset TTL to normal | 48 hours after | ☐ |
| Enable WP auto-updates | 48 hours after | ☐ |
| Cancel old hosting | 48+ hours after | ☐ |
Conclusion
Moving WordPress without downtime requires planning, testing, and careful execution.
Follow this checklist. Document everything. Test thoroughly. Monitor carefully.
Your WordPress migration will succeed. Your users will not notice any downtime. Your site will be faster and more reliable on the new host.
Start planning today. Execute perfectly. Sleep soundly knowing your website moved without a hitch.