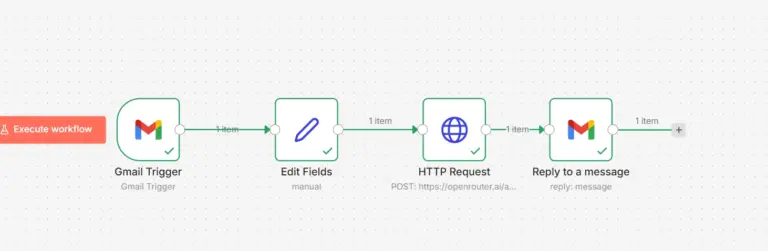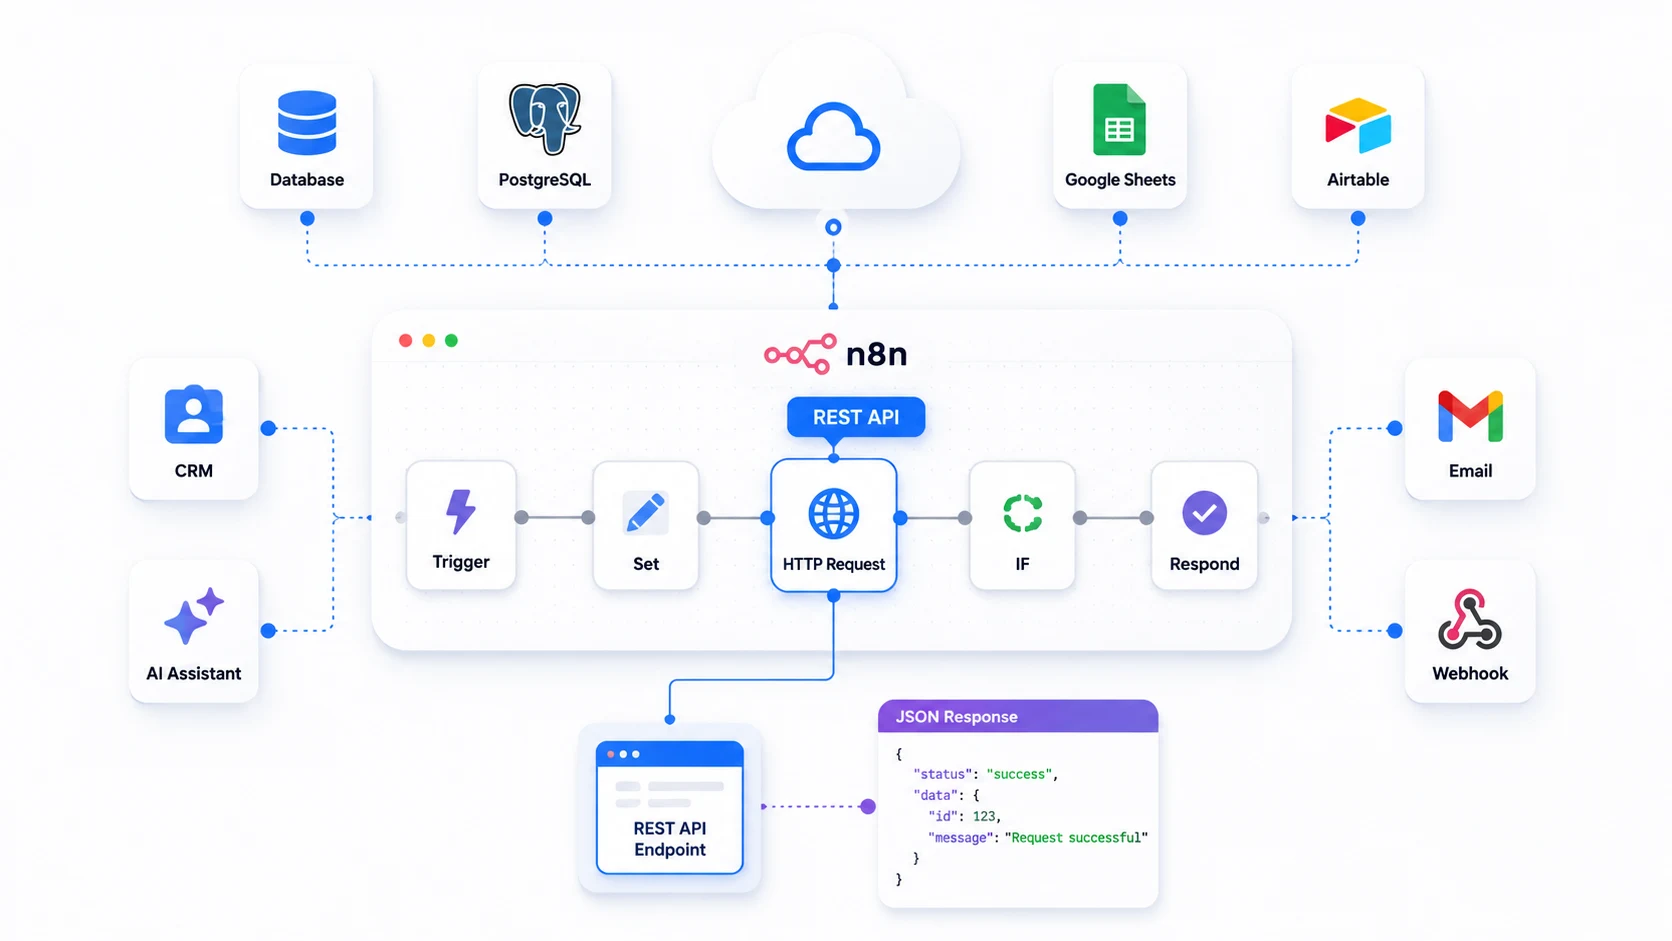

APIs are the backbone of modern automation. While many popular services have dedicated integrations in n8n workflow automation, not every application does. That’s where the HTTP Request node becomes one of the most powerful tools in your automation toolkit. It allows you to connect virtually any REST API, giving you the flexibility to automate workflows far beyond pre-built integrations.
If you’re new to APIs, don’t worry. You don’t need to be an experienced developer to get started. Once you understand a few core concepts such as endpoints, HTTP methods, authentication, and JSON responses, you’ll be able to integrate thousands of services with n8n.
In this guide, you’ll learn how to connect REST APIs in n8n step by step. We’ll cover everything from making your first GET request to handling authentication, sending POST requests, working with JSON data, troubleshooting common errors, and following best practices for building reliable workflows.
What Is a REST API?
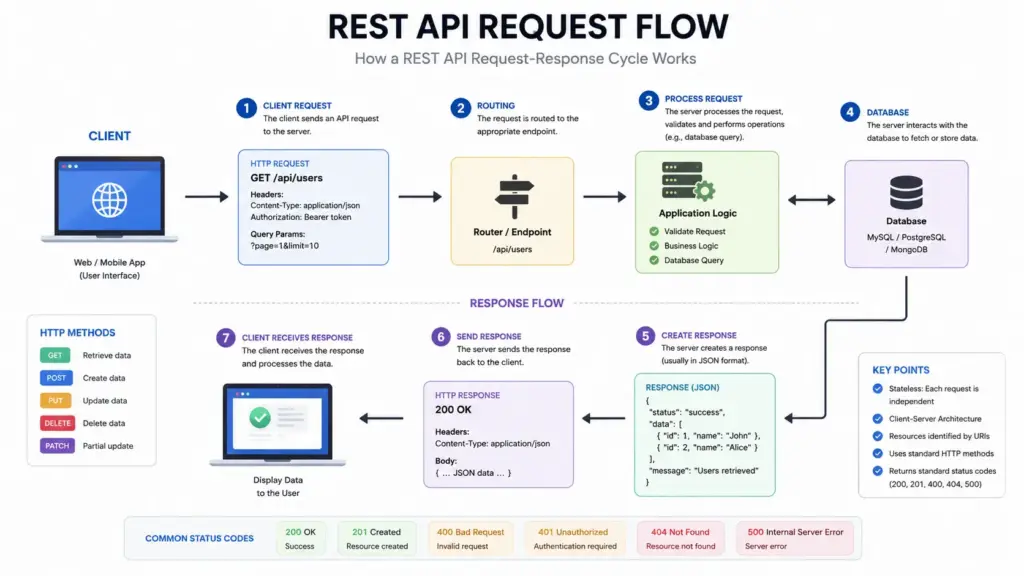
A REST API call is a standardized way for software systems to communicate over the internet using HTTP. When your application needs data from another service, or needs to send data to one, it makes a request to that service’s API endpoint and receives a response.
Every REST API interaction involves four things.
An endpoint is a URL that represents a specific resource or action. https://api.example.com/users is an endpoint that might return a list of users. https://api.example.com/users/123 is an endpoint that returns a specific user.
A method is the type of action the request performs. GET retrieves data. POST creates new data. PUT or PATCH updates existing data. DELETE removes data.
Headers are metadata attached to the request. They carry authentication tokens, specify the content type of the request body, and communicate other instructions to the server.
A response is what the server sends back. Most REST APIs return data in JSON format, which is a structured text format that represents objects, arrays, strings, numbers, and booleans.
A typical JSON response from a user API looks like this:
{
  "id": 123,
  "name": "Alex Johnson",
  "email": "alex@example.com",
  "plan": "pro",
  "created_at": "2026-01-15T10:30:00Z"
}
Every field in this object is accessible in n8n using expressions after the HTTP Request node runs.
Why Connect REST APIs in n8n?
n8n has 400+ native integrations. For everything outside that list, the HTTP Request node connects to any service that exposes a REST API. This matters for several practical reasons.
Most SaaS tools that do not have a native n8n integration still have a REST API. If the service has an API, n8n can talk to it. You are not limited to the integrations the n8n team has built.
Automation removes the manual work of moving data between systems. Instead of copying customer data from one platform into another, an n8n workflow makes an API call, receives the data, transforms it, and writes it somewhere else automatically.
Custom workflows built on direct API calls give you control that pre-built integrations sometimes do not. You access endpoints, fields, and API behaviors that a simplified native integration might abstract away.
Cost reduction follows naturally from automation. Tasks that previously required human time to execute manually run unattended in n8n workflows.
REST API vs HTTP API
| REST API | HTTP API |
|---|---|
| Architectural style | Communication protocol |
| Uses HTTP | HTTP can exist without REST |
| Resource-based | General web communication |
| Stateless | May or may not be stateless |
Prerequisites Before You Start
Before building your first API workflow in n8n, have these ready.
n8n installed and running, either self-hosted on a VPS or through n8n Cloud. The examples in this guide work on both.
API documentation for the service you want to connect. Every REST API has documentation that lists its endpoints, required headers, authentication method, request formats, and response structures. Read it before building.
Authentication credentials. Most APIs require an API key, a Bearer token, or OAuth2 credentials. Locate these in your service provider’s account settings before you start.
A test endpoint. For learning, the free public API at jsonplaceholder.typicode.com requires no authentication and returns predictable responses. The examples in this guide use it.
Understanding the HTTP Request Node
The HTTP Request node is the core tool for connecting any REST API in n8n. Every configuration option in the node corresponds to a component of a standard HTTP request.
URL is the endpoint you are calling. It can be a static URL or a dynamic one built with expressions that insert data from previous nodes.
Method is the HTTP method: GET, POST, PUT, PATCH, or DELETE.
Headers are key-value pairs sent with the request. Common headers include Authorization for authentication tokens and Content-Type: application/json for POST requests that send JSON data.
Query Parameters are key-value pairs appended to the URL as a query string. For example, adding a parameter userId with value 5 turns https://api.example.com/posts into https://api.example.com/posts?userId=5. Use the Query Parameters section in the node rather than appending parameters manually to the URL.
Body is the data sent with POST, PUT, and PATCH requests. You specify the body format (JSON, form data, raw text) and the content.
Authentication in the HTTP Request node supports several methods natively: Header Auth for API keys and Bearer tokens, Basic Auth for username and password combinations, and OAuth2 for services that use token refresh flows. Configured credentials are stored encrypted in n8n and reused across workflows.
Response is what the node returns after the request completes. By default, n8n parses JSON responses automatically and makes every field accessible via expressions in downstream nodes.
Step 1: Create the Workflow Structure
Create a new workflow in n8n. Add these nodes in sequence:
Manual Trigger
      ↓
HTTP Request
      ↓
Edit Fields
      ↓
Respond to Webhook (optional)
The Manual Trigger lets you run the workflow with a button click during development. Replace it with a Schedule Trigger, Webhook node, or any other trigger when you move the workflow to production.
Step 2: Make a GET Request
A GET request retrieves data from an API without sending any data to it.
Add an HTTP Request node. Configure it:
Method: GET
URL:    https://jsonplaceholder.typicode.com/posts
No authentication or body is needed for this public endpoint. Run the workflow by clicking Execute Workflow.
The node returns 100 post objects. Each post has this structure:
{
  "userId": 1,
  "id": 1,
  "title": "sunt aut facere repellat provident",
  "body": "quia et suscipit..."
}
To retrieve a single post, change the URL:
https://jsonplaceholder.typicode.com/posts/1To filter posts by user, use a query parameter instead of manually appending to the URL. In the Query Parameters section of the node, add:
Name:  userId
Value: 1
n8n appends this to the URL automatically: https://jsonplaceholder.typicode.com/posts?userId=1
Make the userId dynamic by referencing a previous node’s output:
Value: {{ $('Previous Node').item.json.user_id }}Step 3: Send a POST Request
A POST request sends data to an API to create a new resource.
Configure the HTTP Request node:
Method: POST
URL:    https://jsonplaceholder.typicode.com/posts
In the Headers section, add:
Content-Type: application/jsonIn the Body section, select JSON and enter.
{
  "title": "My New Post",
  "body": "This is the content of the post.",
  "userId": 1
}
To build the body dynamically from previous node data, use expressions:
{
  "title": "{{ $json.post_title }}",
  "body": "{{ $json.post_content }}",
  "userId": "{{ $json.user_id }}"
}
The JSONPlaceholder API responds with the created object including a generated ID:
{
  "id": 101,
  "title": "My New Post",
  "body": "This is the content of the post.",
  "userId": 1
}
Real APIs that create resources work the same way. The response contains the created object which you can reference in downstream nodes to update other systems with the new ID.
Step 4: Authentication
Most production APIs require authentication. n8n handles four common authentication methods.
API Key Authentication
Many APIs accept an API key as a header value. In the HTTP Request node, select Header Auth as the credential type. Create a new Header Auth credential:
Name:  Authorization
Value: Bearer YOUR_API_KEY
Or for APIs that use a different header name:
Name:  X-API-Key
Value: YOUR_API_KEY
Store this as an n8n credential. Never paste API keys directly into node URL or body fields where they appear in execution logs.
Bearer Token
Bearer tokens follow the same pattern as API key header authentication. The standard format:
Authorization: Bearer eyJhbGciOiJIUzI1NiIsInR5cCI...Create a Header Auth credential with name Authorization and value Bearer YOUR_TOKEN.
Basic Authentication
APIs using Basic Auth accept a base64-encoded username and password combination. In the HTTP Request node, select Basic Auth as the authentication type. Create a Basic Auth credential with your username and password. n8n handles the base64 encoding automatically.
OAuth2
OAuth2 is more complex and involves token refresh flows. n8n has built-in OAuth2 credential support. In the HTTP Request node, select OAuth2 API as the authentication type. Create an OAuth2 credential with the client ID, client secret, authorization URL, token URL, and scopes from your API provider’s documentation. n8n handles token refresh automatically when tokens expire.
Step 5: Working with JSON Responses
After the HTTP Request node runs, every field in the JSON response is accessible in downstream nodes using expressions.
For a response like this:
{
  "user": {
    "id": 456,
    "name": "Sarah Chen",
    "email": "sarah@example.com",
    "subscription": {
      "plan": "enterprise",
      "expires": "2027-03-01"
    }
  }
}
Access fields in downstream nodes using dot notation:
User ID:    {{ $json.user.id }}
Name:       {{ $json.user.name }}
Email:      {{ $json.user.email }}
Plan:       {{ $json.user.subscription.plan }}
Expires:    {{ $json.user.subscription.expires }}
For array responses where the API returns a list of objects, n8n’s SplitInBatches node or the native array handling in expressions lets you process each item:
// Access first item in an array
{{ $json[0].name }}

// Access a field from all items using a Code node
const items = $input.all();
return items.map(item => ({
  json: {
    id:    item.json.id,
    name:  item.json.name,
    email: item.json.email
  }
}));
Use the Edit Fields node to extract and rename the fields you need from a large response before passing data to downstream nodes. This keeps your workflow clean and makes expression references in later nodes shorter and clearer.
Step 6: Error Handling
REST APIs communicate failures through HTTP status codes. Understanding what each code means is essential for building reliable workflows.
| Code | Meaning | Action |
|---|---|---|
| 200 | Success | Continue workflow |
| 201 | Created | Use returned resource |
| 400 | Bad Request | Check request body |
| 401 | Unauthorized | Verify credentials |
| 403 | Forbidden | Check permissions |
| 404 | Not Found | Verify endpoint |
| 429 | Rate Limited | Retry later |
| 500 | Server Error | Retry or log |
// Rate limit handling in a Code node
const statusCode = $json.statusCode || $json.error?.status;

if (statusCode === 429) {
  return [{
    json: {
      should_retry: true,
      wait_seconds: 30,
      original_prompt: $json.request_data
    }
  }];
}

return [{ json: { should_retry: false, data: $json } }];
500 Server Error means the API itself has an error. This is the remote server’s problem, not yours. Log the error, wait a few minutes, and retry. If 500 errors persist, check the API provider’s status page.
Add error handling to HTTP Request nodes by enabling the Continue on Fail option and adding an IF node after the HTTP Request that checks for error responses:
Value 1:   {{ $json.error }}
Operation: Is Not Empty
Route the TRUE branch to a notification node that alerts you. Route the FALSE branch to continue normal processing.
Chaining API Calls
Chaining API calls is one of the most common patterns in production n8n workflows. Data from one HTTP Request feeds the next, building a pipeline where each step enriches or transforms data before passing it forward.
A typical pattern: fetch a list of IDs from one endpoint, then call a detail endpoint for each ID to get complete records.
HTTP Request (GET /orders)
         ↓
SplitInBatches (process 10 at a time)
         ↓
HTTP Request (GET /orders/{{ $json.id }})
         ↓
HTTP Request (GET /customers/{{ $json.customer_id }})
         ↓
Edit Fields (extract needed fields)
         ↓
Google Sheets (write combined data)
Each HTTP Request in the chain uses expressions to reference data from the previous node. The order endpoint returns an order with a customer_id. The customer endpoint takes that customer_id and returns customer details. The Edit Fields node combines fields from both responses into a clean record.
Reference data from a specific named node in the chain:
Order ID:      {{ $('Fetch Orders').item.json.id }}
Customer name: {{ $('Fetch Customer').item.json.name }}
Order total:   {{ $('Fetch Orders').item.json.total }}
This cross-node referencing using $('Node Name') is what makes chained API workflows possible. You are not limited to data from the immediately previous node.
CRM to Slack to Email Workflow
This workflow fetches a new customer from a CRM API, posts a notification to Slack, and sends a welcome email:
Schedule Trigger (every 15 minutes)
          ↓
HTTP Request
GET https://api.yourcrm.com/customers?status=new&limit=10
Authorization: Bearer {{ $credentials.crm_token }}
          ↓
SplitInBatches (process one at a time)
          ↓
IF Node (check if customer was created in last 15 minutes)
          ↓
HTTP Request
POST https://slack.com/api/chat.postMessage
Body: {
  "channel": "#new-customers",
  "text": "New customer: {{ $json.name }} ({{ $json.email }}) signed up for {{ $json.plan }}"
}
          ↓
HTTP Request
POST https://api.emailprovider.com/send
Body: {
  "to": "{{ $json.email }}",
  "subject": "Welcome to our platform",
  "template": "welcome",
  "variables": {
    "name": "{{ $json.name }}",
    "plan": "{{ $json.plan }}"
  }
}
          ↓
HTTP Request
PATCH https://api.yourcrm.com/customers/{{ $json.id }}
Body: { "status": "welcomed", "welcomed_at": "{{ $now }}" }
Each HTTP Request in this chain uses data from the CRM response. The final PATCH call updates the CRM to mark the customer as welcomed, preventing the same customer from triggering notifications on the next run.
Best Practices for REST API Workflows in n8n
Store credentials securely. Always create n8n credentials for API keys and tokens rather than pasting them into URL or body fields. Credentials are encrypted at rest and do not appear in execution logs. Keys in body or header fields appear in plain text in execution history.
Use environment variables for base URLs. When you have separate staging and production API endpoints, store the base URL as an n8n environment variable. Set API_BASE_URL=https://api.staging.example.com for development and API_BASE_URL=https://api.example.com for production. Reference it in workflows with {{ $env.API_BASE_URL }}.
Validate responses before using them. After every HTTP Request node, add a check that confirms the response contains the expected data before downstream nodes try to use it. An empty response or an unexpected structure causes expression evaluation errors in later nodes that are harder to debug than a clear validation failure at the source.
Log errors with context. When an API call fails, log enough information to diagnose and retry it: the endpoint, the request payload, the status code, the error message, and the timestamp. Write these to a Google Sheet or database table so you have an audit trail.
Implement retry logic for transient failures. Wrap HTTP Request nodes in a retry loop using a SplitInBatches node set to one item at a time with a Wait node and an error counter. For 429 and 500 errors, retry up to three times with increasing wait intervals before failing definitively.
Respect API rate limits proactively. Add a Wait node with a short delay between requests in any loop that calls an API repeatedly. A 500ms wait between calls significantly reduces the chance of hitting rate limits without meaningfully slowing down the workflow.
Troubleshooting Common Beginner Mistakes
Wrong endpoint URL. The most common mistake is a URL with a typo, a missing path segment, or a mismatch between the documented URL and the one in the node. Copy the URL directly from the API documentation and test it in a tool like Postman or curl before putting it in n8n.
Missing required headers. Many APIs require specific headers beyond Authorization. A Content-Type: application/json header is required for most POST requests. Some APIs require Accept: application/json to return JSON rather than XML. Check the documentation for all required headers.
Wrong authentication format. Bearer token authentication requires the word “Bearer” followed by a space before the token. Authorization: BearerYOURTOKEN without the space fails. Authorization: Bearer YOURTOKEN with the space works. This is a very common source of 401 errors.
Incorrect JSON body structure. When a POST request returns a 400 or 422 error, the request body does not match what the API expects. Compare your body structure field by field against the API documentation. Pay attention to nested objects, array formatting, and required versus optional fields.
Using test webhook URL instead of production URL. If your n8n workflow includes a Webhook trigger and you are using the test URL in another system, the n8n webhook url only responds while the workflow editor is open. Use the production URL for any integration that needs to work continuously.
Expression errors from null fields. When an API response does not include a field you reference in an expression, n8n returns null and downstream nodes fail. Add null checks in Code nodes before referencing fields that might not always be present in the response.
Conclusion
The HTTP Request node is the gateway to connecting any REST API in n8n. Once you understand the core components of a REST API, GET and POST requests, authentication methods, JSON parsing, and error handling, you can integrate virtually any service that exposes an HTTP endpoint.
Each workflow you build teaches you something about how that specific API behaves, what error patterns to handle, and how to structure the data flow. That knowledge compounds across workflows and makes each new API integration faster to build and more reliable to run.
FAQ
1. Can I automate multiple API calls in a single workflow?
Absolutely. You can chain multiple HTTP Request nodes, pass data between them, use loops, conditional logic, and merge responses to build complex end-to-end automations.
2. Can n8n connect to any REST API?
Yes. As long as the API is accessible over HTTP or HTTPS and provides proper documentation, you can connect it using the HTTP Request node in n8n.
3. Which node should I use to connect a REST API in n8n?
The HTTP Request node is the primary node for interacting with REST APIs. It supports multiple authentication methods, custom headers, query parameters, request bodies, and various response formats.