A Linux activity monitoring tool similar to Windows task manager was written in Python and released under GPL-3.0 License is Sysmon. This is a Graphical visualization tool that visualizes the following data.
By default distribution like Ubuntu occurs with a system monitor tool, but the drawback with the default monitor tool is it does not present HDD, SSD, and GPU loads.
Sysmon adds all the features to a single place alike to the Windows Task Manager.
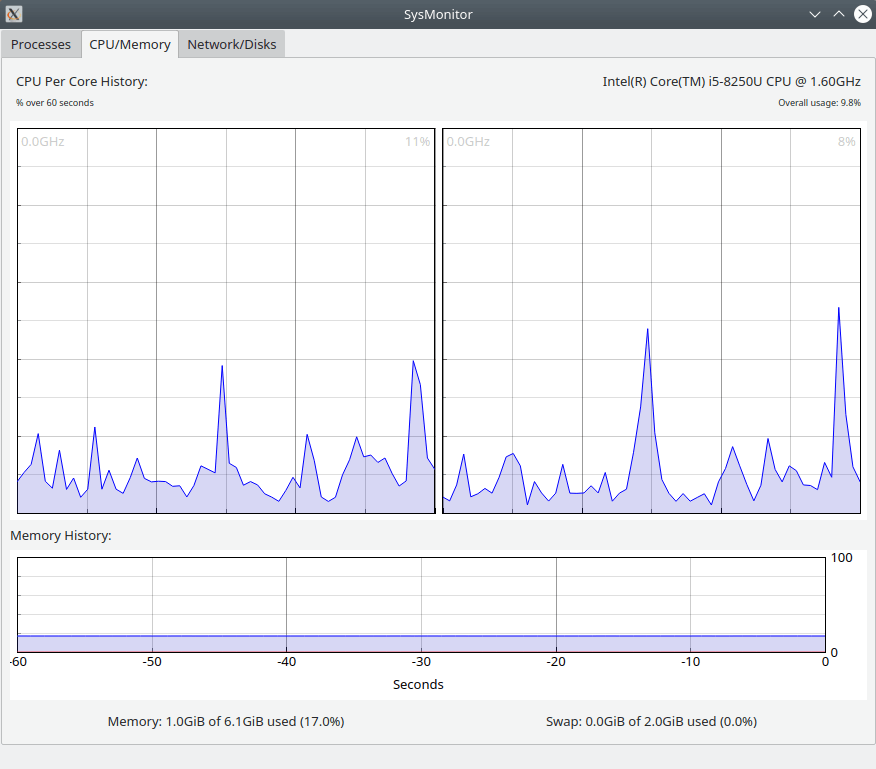
- CPU/GPU utilization and per-core clock speed.
- Memory and Swap utilization.
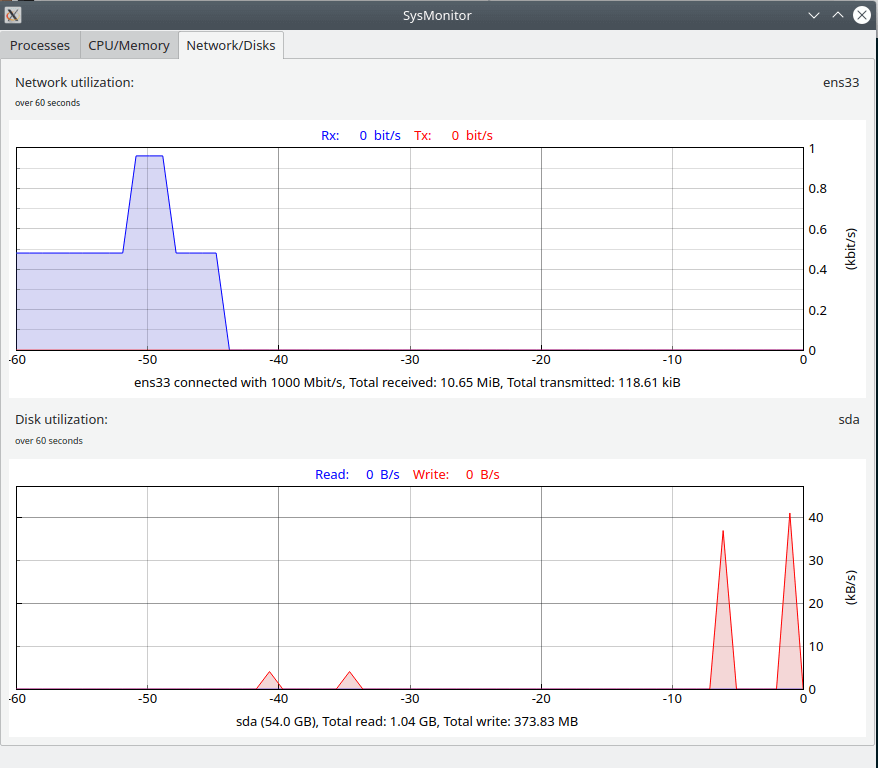
- Network utilization (Wlan and Ethernet). WLAN link bandwidth is continuously updated.
- SSD/HDD utilization.
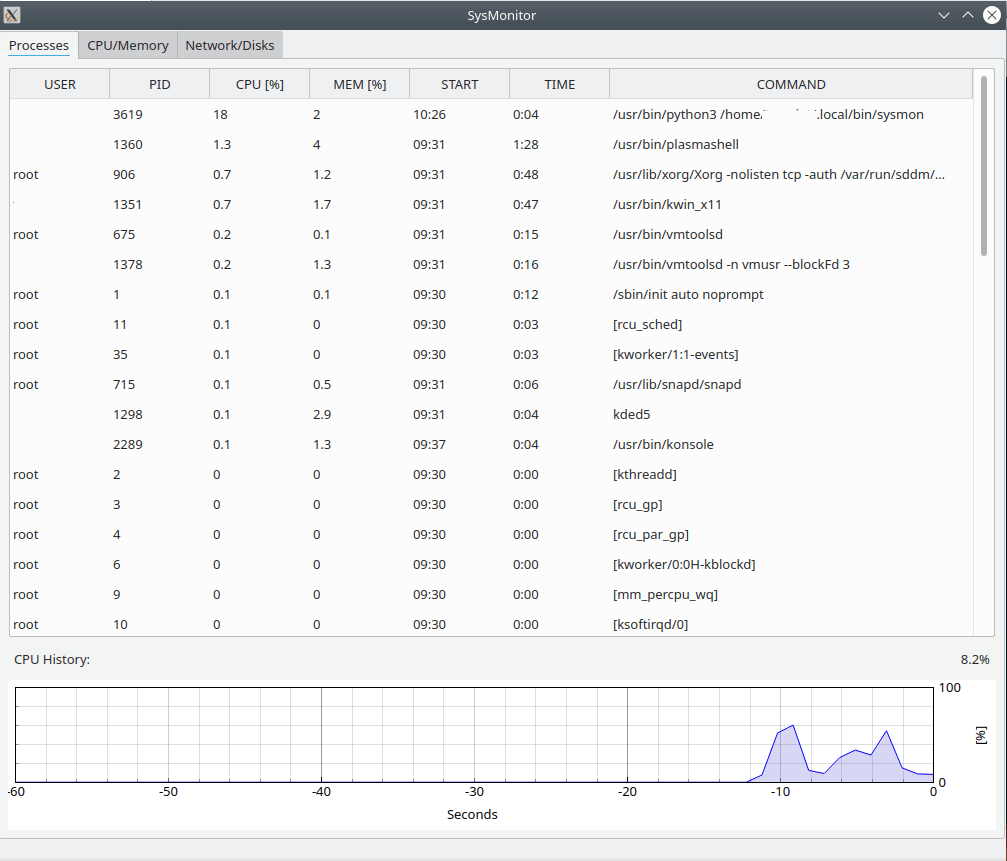
- Overview of a running process.
This article will help you to learn "how to install and use the Sysmon monitoring tool in Linux desktop systems".
Installing Sysmon Linux Monitor Tool
Since sysmon is written in python, you require to have a python package manager PIP setup in your machine. Sysmon depends on the following packages pyqtgraph, numpy, and pyqt5.
Install Sysmon Using PIP
When you install, the sysmon using PIP dependencies are automatically installed.
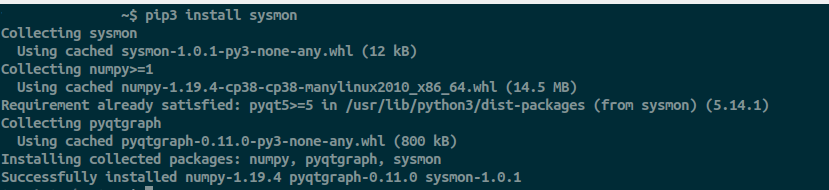
$ pip install sysmon [for Python2]
$ pip3 install sysmon [for Python3]
If you have an Nvidia GPU, nvidia-smi has to be installed to monitor it.
Install Sysmon Using GitHub Repo
Alternatively, you can pull the repository from Github and install the package. But when following this method, you have to make sure the dependent package (numpy, pyqtgraph, pyqt5) is installed individually.
$ pip install pyqtgraph pyqt5 numpy [for Python2]
$ pip3 install pyqtgraph pyqt5 numpy [for Python3]
You can verify the list of installed packages from pip using the following commands.
---------- Python 2 ----------
$ pip list # List installed package
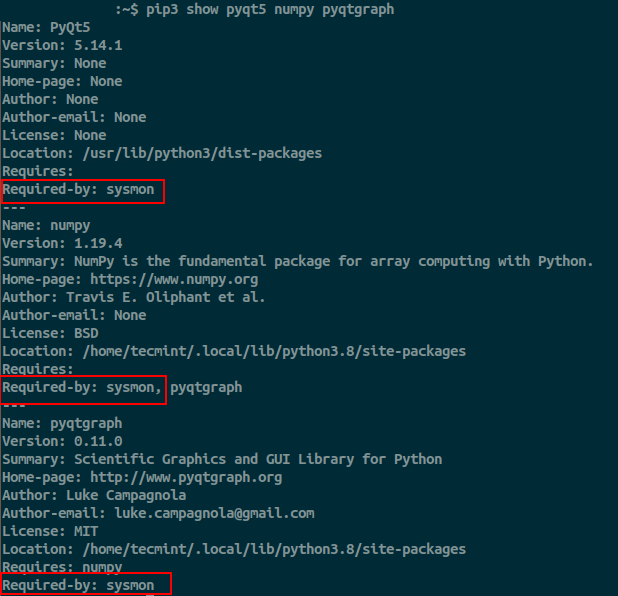
$ pip show pyqt5 numpy pyqtgraph # show detailed information about packages. ---------- Python 3 ----------
$ pip3 list # List installed package
$ pip3 show pyqt5 numpy pyqtgraph # show detailed information about packages.
Now the dependency is fulfilled and good to install sysmon by cloning the repo from GitHub.
$ git clone https://github.com/MatthiasSchinzel/sysmon.git
$ cd /sysmon/src/sysmon
$ python3 sysmon.py
The preferable method is to install packages using PIP, as PIP manages all the dependency and keeps the installation simple.
How to Use Sysmon in Linux
To launch sysmon, simply type sysmon at the terminal.
$ sysmon
All the data points are grabbed from the /proc directory.
- CPU data are grabbed from /proc/cpuinfo and /proc/stat.
- Memory data are grabbed from /proc/meminfo.
- Disks data are grabbed from /proc/diskstats.
- Network data are grabbed from /proc/net/dev and iwconfig (Wlan).
- Processes data are grabbed from the ‘ps -aux’ command.