
Upload music to AzuraCast through Media Manager or SFTP, then assign the files to a playlist so AutoDJ can play them automatically.
You have 500 songs ready. Your AzuraCast radio station is set up. Now you need to move those files into your station so they can actually play. If you’re looking at the AzuraCast radio hosting dashboard for the first time, the number of menu options can make the process feel complicated. But uploading music is straightforward once you know where to look. Let me walk you through exactly where to go and what to do.
Can You Upload Music to AzuraCast?
Yes. AzuraCast has a built-in Media Manager that allows you to upload audio files directly through the web interface. You can also use SFTP for bulk uploads of large music libraries. Once uploaded, files need to be assigned to a playlist before AutoDJ can play them automatically.
Why Music Upload Matters for Your Radio Station
Your radio station needs music to play. That music has to live somewhere. AzuraCast’s Media Manager is where you organize, manage, and prepare your music library for broadcast.
Without properly uploaded and organized music, your AutoDJ won’t have content to stream. This means silence on your radio station. For an online radio business, silence is death.
Uploading music correctly also means: Your song metadata (artist, title, album) displays correctly on your stream. Listeners see what’s playing. Your music stays organized as your library grows. You can create playlists and automated programming schedules. You catch problematic files before they crash during a broadcast.
What You Need Before Uploading Music to AzuraCast
Before starting the upload process, make sure you have: An active AzuraCast installation with at least one radio station configured. Audio files in a supported format (MP3, OGG, FLAC, etc.). A file manager or SFTP client if uploading very large libraries. Basic understanding of your file organization. Realistic expectations about upload time (500 songs may take 20 minutes to several hours depending on file size and server).
How to Upload Music Through AzuraCast Web Interface
Step 1: Log Into Your AzuraCast Dashboard
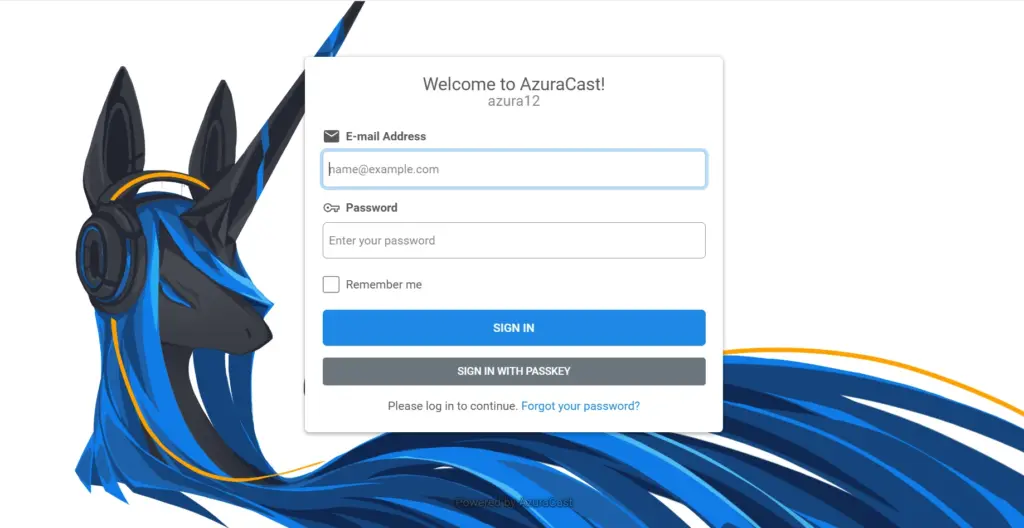
Open your AzuraCast control panel using your administrator credentials. You should see your radio station dashboard. This is your main hub for managing the station.
Step 2: Navigate to Media Section
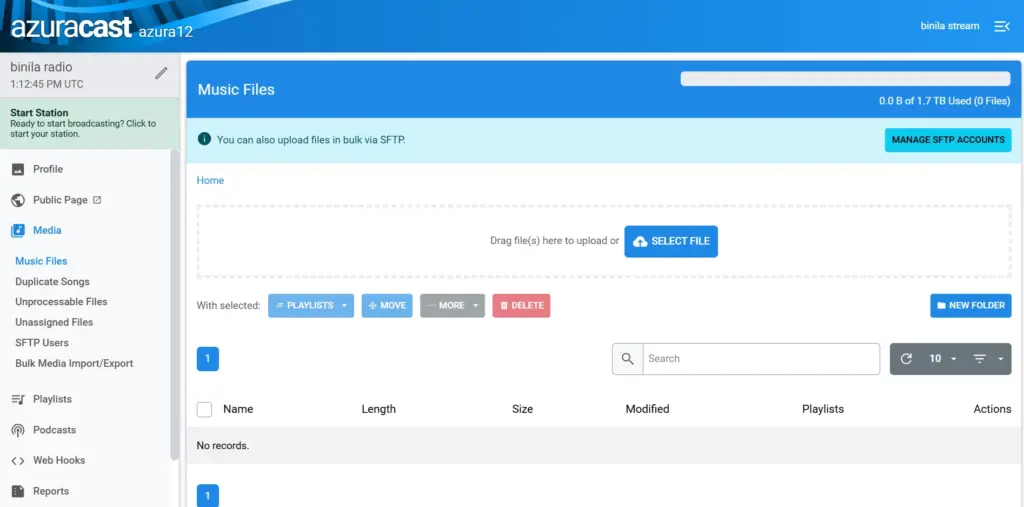
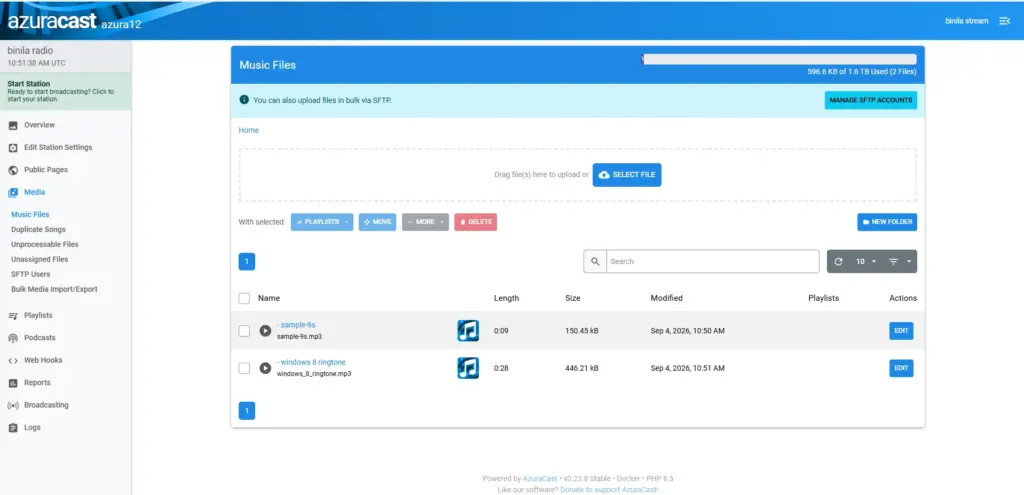
On the left-hand menu, look for “Media.” Click it. You’ll see several options under Media:
Music Files (where you upload songs) Duplicate Songs (identifies duplicate tracks) Unprocessable Files (shows files that couldn’t be processed) Unassigned Files (files not yet added to playlists) SFTP Users (for bulk transfers via SFTP) Bulk Media Import/Export (advanced import/export options)
For a standard music upload, start with “Music Files.”
Step 3: Click Music Files
Select: Media > Music Files
This opens the Media Manager. This is the main interface for uploading and organizing your station’s audio files. If your station is new, the Music Files area may be empty. That’s normal. You’re about to fill it.
Step 4: Locate the Upload Area
At the top of the Music Files page, you’ll find the upload section. AzuraCast supports two upload methods:
Method 1: Click the upload area and browse your computer for files. Method 2: Drag and drop files directly from your computer into the upload area.
Choose whichever feels more natural. Both work equally well.
Step 5: Select Your Music Files
Open the folder on your computer containing your music. Select the files you want to upload.
If you have 500 songs organized in one folder, you can select all 500 at once. AzuraCast will accept the batch upload.
However, I recommend a different approach for large libraries: Upload 10 to 20 songs first. Verify they appear correctly in AzuraCast. Check that metadata (artist, title, album) imported properly. Listen to a test song to confirm audio quality. Then upload the remaining songs in batches.
This approach prevents one massive upload from becoming a troubleshooting nightmare. If something goes wrong during a small upload, you isolate the problem quickly. If 500 songs fail to upload, diagnosing what went wrong becomes exponentially harder.
Step 6: Start the Upload
Once you’ve selected your files, initiate the upload. AzuraCast begins transferring files to your station’s media storage on the server.
Do not close the browser tab or refresh the page during upload. The upload needs the connection to stay active. Depending on file sizes and your server’s speed, this can take minutes to hours for a large batch.
Step 7: Wait for Processing
After files transfer, AzuraCast processes each one. Processing includes:
Reading audio metadata (artist name, song title, album, genre, duration). Generating waveform data for visualization. Creating thumbnails for album artwork. Verifying the file is playable.
For a small upload of 10 to 20 files, processing usually completes in under a minute. A batch of 500 songs may take 10 to 30 minutes depending on your server resources.
The progress bar should show completion status. Once you see all files listed in Music Files, processing is complete.
Step 8: Verify Your Uploaded Songs
Check your Music Files list. You should see your uploaded tracks displayed with columns for:
Artist name Song title Album name Genre Duration Date added
Click on a few songs to view full details. Verify the information is correct. Check whether album artwork (if included in your files) displays properly.
If you notice incorrect or missing metadata, AzuraCast’s Media Manager allows you to edit details manually. Click on a song and update any information that needs correction.
Step 9: Organize Your Music Into Folders
If you’re managing a library of 500 songs, organization prevents chaos later.
Create folders within the Media Manager to group songs logically. Example folder structures:
By Language: English, Malayalam, Hindi, Classics, New Releases. By Category: Main Music, Jingles, Promos, Station IDs. By Mood: Upbeat, Calm, Energetic, Late Night. By Era: 70s, 80s, 90s, 2000s, Current.
Choose an organization scheme you’ll actually maintain. Simple structures work better than complex systems nobody remembers.
You don’t need elaborate folder hierarchies. A clean, logical structure that takes 10 seconds to understand is better than a convoluted system that confuses you after three months.
Uploading Large Music Libraries: Use SFTP
If you have 500 songs or more, the web interface upload works but becomes tedious. AzuraCast offers a faster method for bulk uploads.
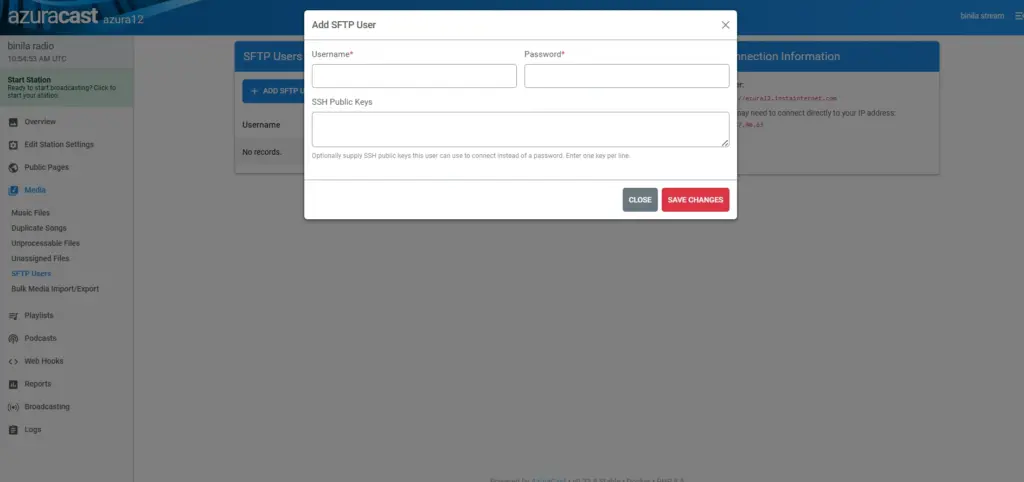
Look for “Media > SFTP Users” in your menu.
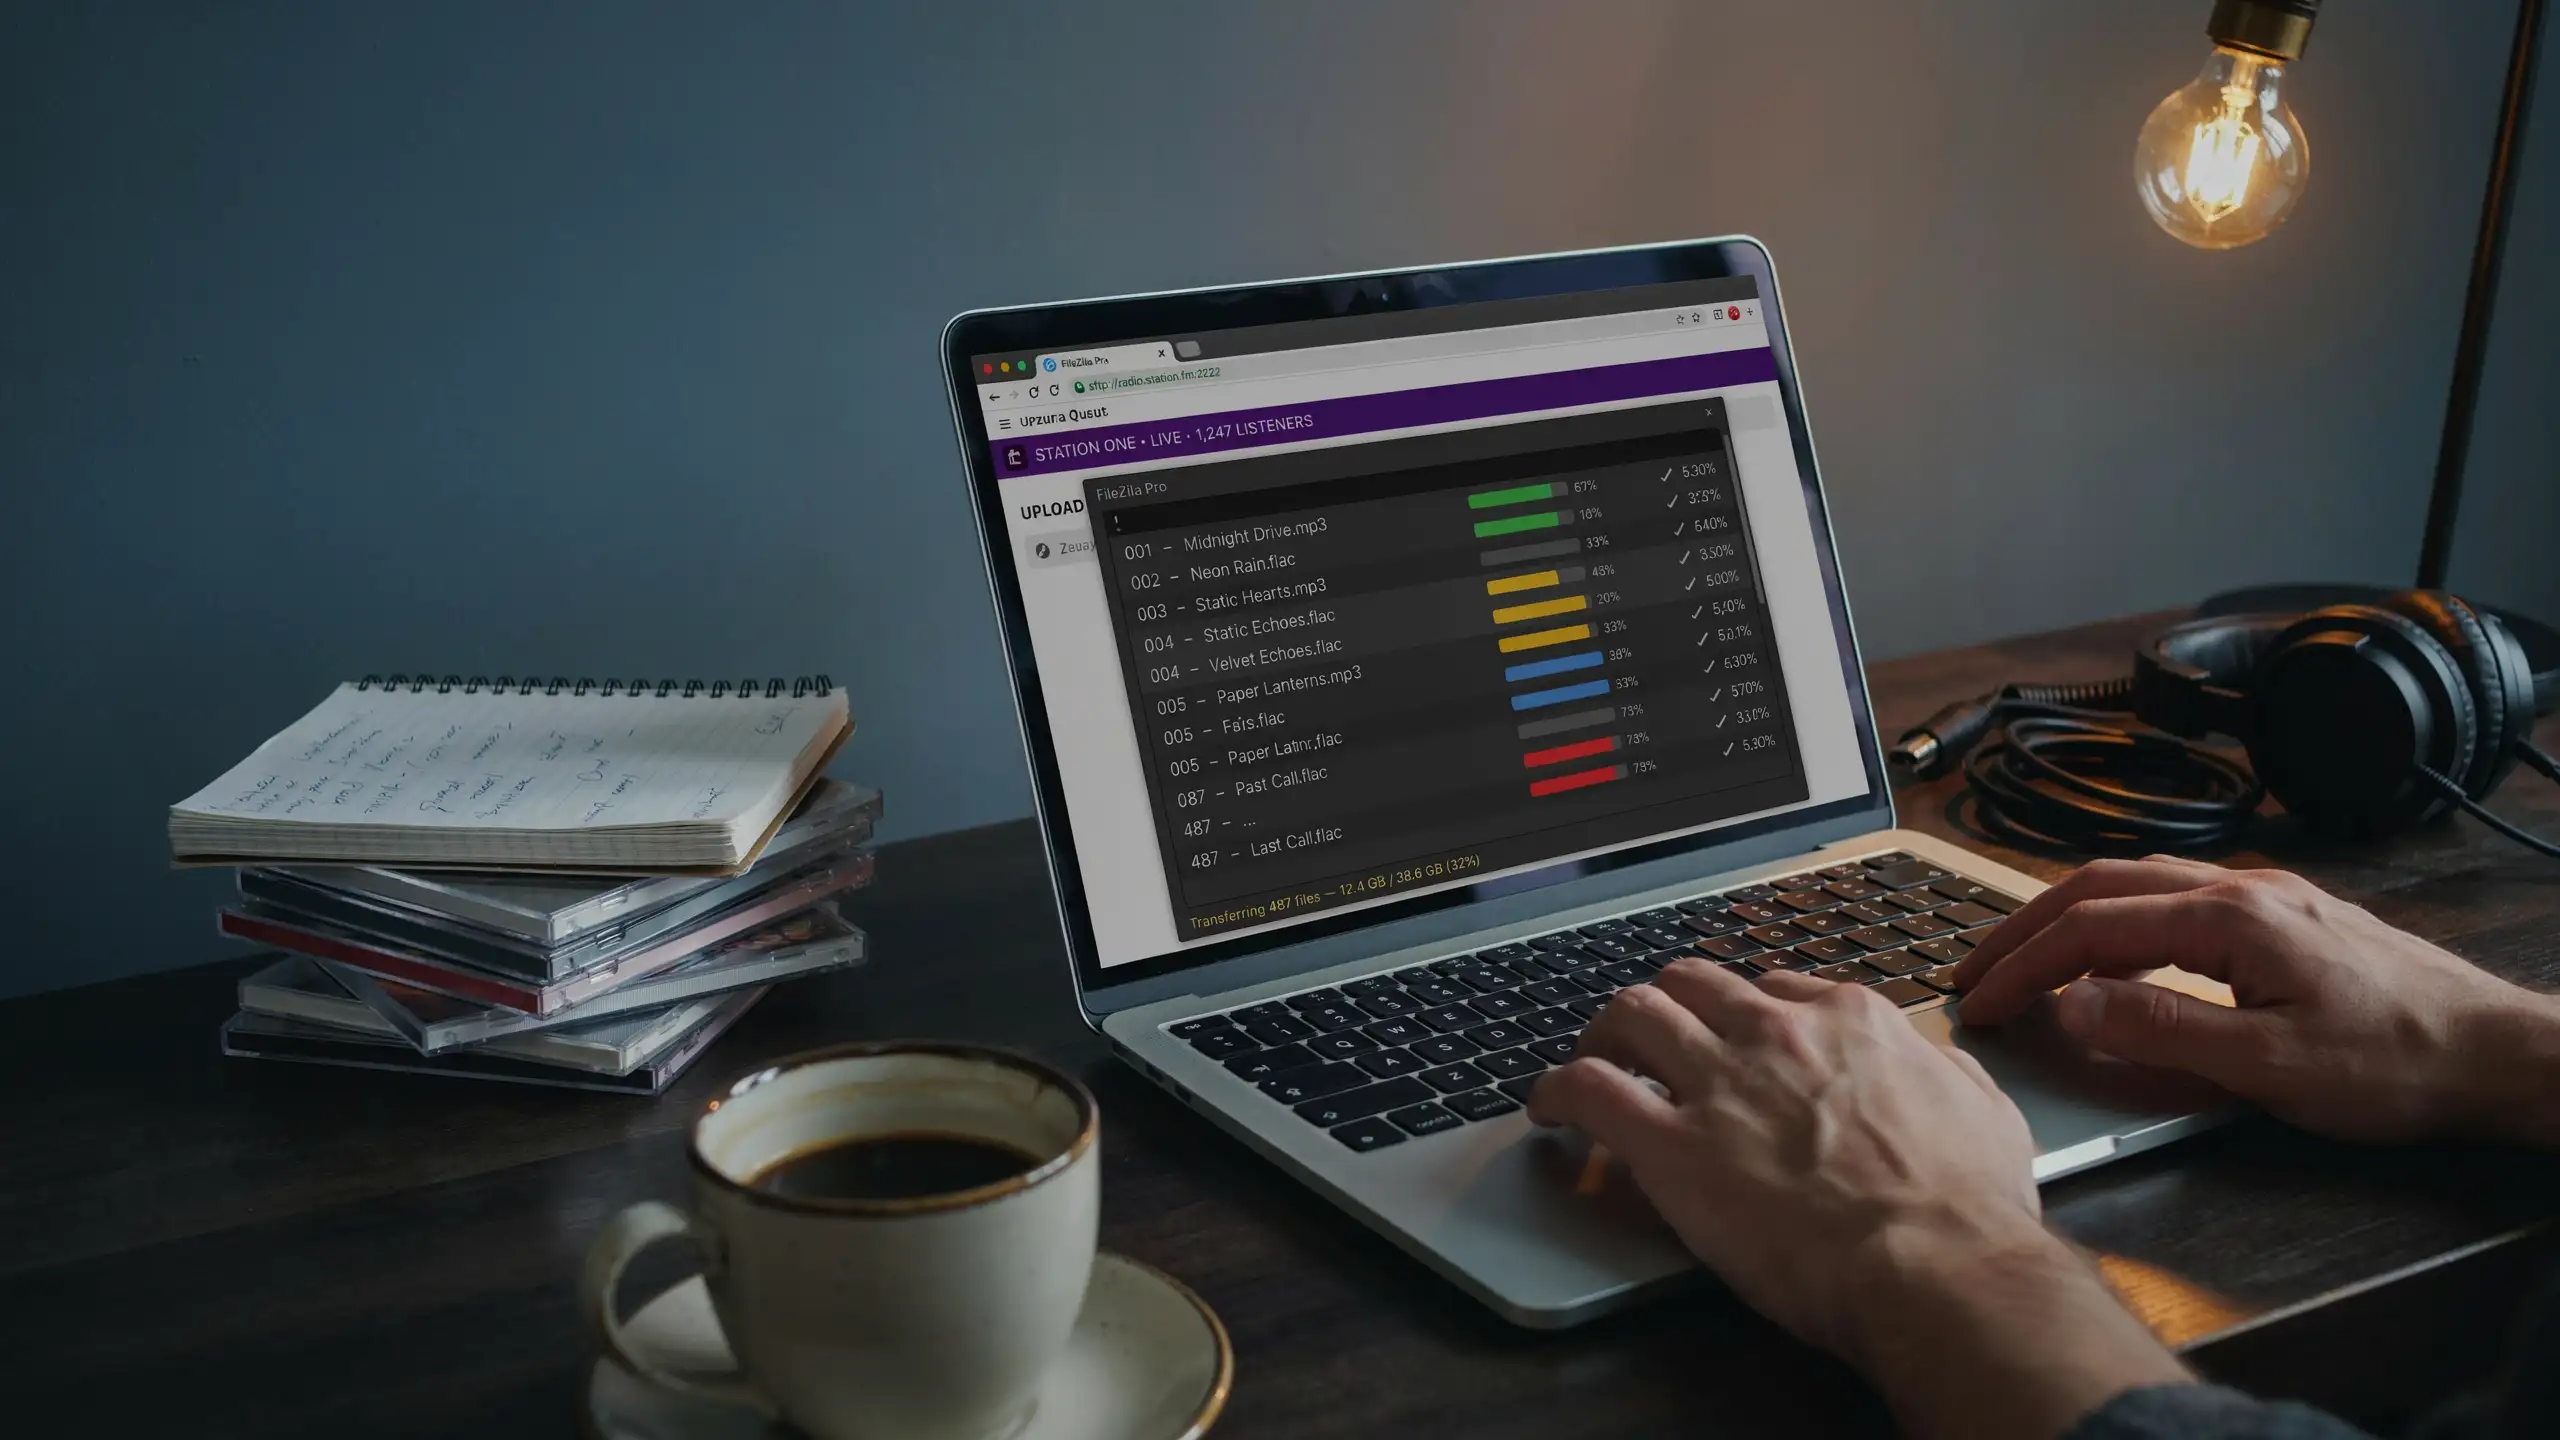
SFTP (SSH File Transfer Protocol) is a secure file transfer method. You connect to your AzuraCast server using an SFTP client application on your computer, then transfer files directly like you would with a cloud storage service.
The workflow looks like this:
500 songs on your computer > SFTP client application > AzuraCast server > Music Files
SFTP applications include FileZilla (free), WinSCP (free), Cyberduck (free), or similar tools.
To use SFTP for bulk upload:
Create an SFTP user in AzuraCast. Download an SFTP client application. Enter your AzuraCast server details (hostname, username, password). Connect and navigate to your media directory. Drag your 500 songs into the remote folder. Wait for transfer to complete. Return to AzuraCast to verify files and process them.
For someone managing a large existing music library, SFTP is considerably faster than repeated web browser uploads.
However, if you’re new to AzuraCast, start with the Music Files web uploader. You don’t need SFTP complexity just to upload a few songs.
Understanding Unprocessable Files
After uploading, check the “Unprocessable Files” section under Media.
If some files appear here, it means AzuraCast couldn’t process them. Common reasons include:
Corrupted audio file. Unsupported audio format. Missing audio stream (file is too small or incomplete). Severely damaged metadata that causes parsing errors.
If you have unprocessable files, options include:
Re-export the file from your original source (re-encoding MP3 files often fixes corruption). Convert to a different format if the original format isn’t supported. Delete the file if it’s not critical to your station.
Understanding Unassigned Files
The “Unassigned Files” section shows uploaded audio that isn’t yet assigned to any playlist.
This is important: A song appearing in Music Files does not automatically mean it will play on your radio station.
For AutoDJ to play a song automatically, the file must belong to at least one playlist.
This means your workflow actually looks like:
Log into AzuraCast > Open Media > Click Music Files > Upload your songs > Wait for processing > Check metadata > Organize into folders (if needed) > Assign files to a playlist > AutoDJ can now play them
The playlist configuration is a separate process covered in your next article.
Bulk Media Import/Export
Your Media menu also shows “Bulk Media Import/Export.” This is an advanced feature separate from standard uploading.
Use Bulk Media Import/Export when:
You need to import metadata from external sources. You’re managing multiple stations and transferring libraries between them. You’re creating backup exports of your entire music library. You need to import music in a standardized format from another system.
For a basic “upload my music” workflow, the Music Files method is clearer and simpler.
Checking Your Upload Progress
During upload, AzuraCast provides feedback through:
Progress bar showing percentage uploaded. File count display (e.g., “45 of 500 files uploaded”). Status messages indicating processing status. Error notifications if files fail to upload.
If an upload stalls or fails:
Check your internet connection. Refresh the page and retry the upload. Upload a smaller batch instead of all 500 songs. Contact your hosting provider if the upload continues to fail.
File Format Considerations
AzuraCast supports multiple audio formats:
MP3 (most common, widely compatible) OGG Vorbis (open format, good compression) FLAC (lossless, larger file sizes) AAC (iTunes compatible) WAV (uncompressed, very large files) Opus (modern, excellent quality)
For most radio stations, MP3 is the safest choice. All players understand MP3. File sizes are reasonable. Bitrates range from 128 Kbps (acceptable quality) to 320 Kbps (excellent quality).
If your music library contains mixed formats, AzuraCast handles them all simultaneously.
Metadata: The Often-Overlooked Detail
Your uploaded songs carry metadata (artist, title, album, genre, duration). This information comes from:
ID3 tags embedded in the MP3 file. Metadata you add manually in AzuraCast. Information AzuraCast extracts during processing.
Clean metadata matters because:
Listeners see correct song information on their player. Broadcast logs show accurate track records. Your station appears professional. Playlists and scheduling features work correctly.
Before uploading your full 500-song library, check 5 to 10 files to verify metadata is correct. If most files have wrong or missing artist names, you might want to fix them before uploading rather than correcting 500 files after upload.
Testing Your Uploaded Music
After uploading and before using songs in AutoDJ:
Click on a few songs and play them in AzuraCast. Listen to ensure audio quality is acceptable. Verify there are no clicks, pops, or distortion. Check that volume levels are consistent. Confirm that the entire song plays without cutting off.
This testing catches bad files before they crash your broadcast.
Best Practices for Music Upload
Upload in batches if managing large libraries (more stable than single massive uploads). Verify metadata before uploading (saves correction work later). Use consistent file naming (helps during troubleshooting). Keep original files on your computer as backup. Organize music into logical folders from the start. Test playback after uploading (catches problems early). Remove duplicate files before uploading (saves storage space). Maintain a master list of your music library (useful for reference).
What Happens After You Upload
Once music is uploaded and verified:
Organize songs into playlists. Create automated scheduling rules for AutoDJ. Set rotation settings (how often each song plays). Configure fallback rules (what plays if playlists run out of songs).
All of these steps come after music upload. You can’t build playlists until you have music uploaded.
FAQ
Can I upload protected/copyright music?
You can upload any audio format AzuraCast supports. For a public radio station, ensure you have proper licensing for broadcast rights. Fair use doesn’t apply to commercial radio broadcasting.
Can I delete songs after uploading?
Yes. Select songs in Music Files and delete them. They’ll be removed from AzuraCast.
How do I update song information?
Click on a song and edit its metadata directly in AzuraCast’s Media Manager.
Can I upload directly from a phone?
The web interface works on phones, but uploading via browser is slower. SFTP from a computer is recommended for bulk uploads.
What bitrate should I use?
128 Kbps is acceptable. 192 Kbps is good. 256 Kbps or higher is excellent. Most listeners can’t hear the difference above 192 Kbps.
Conclusion
Your uploaded music is ready. Create playlists in AzuraCast. Assign your uploaded songs to playlists. Configure AutoDJ playback settings. Set up broadcast scheduling. Test your complete broadcast chain.Ready to Upload Music to Your Radio Station?
With Ucartz Radio Hosting, you get AzuraCast with plenty of storage for your music library. Upload your songs, organize them into playlists, and let AutoDJ handle playback automatically. Start uploading your music today and take another step toward launching your fully functional online radio station.