One of the most valuable features of an out-of-band-management is the option to interact with your server. This way, you can always make network changes or access the server when you want a custom reinstall.
Let's see how to start with Console Redirection of an out-of-band-management using Fujitsu iRMC.
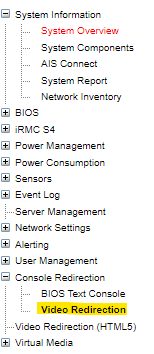
1. Assume you already have access to the OOBM. So, first, log on to your iRMC console. Upon login, If you use iRMC S4 you will see the following list on the left side. Locate ‘Video Redirection’:
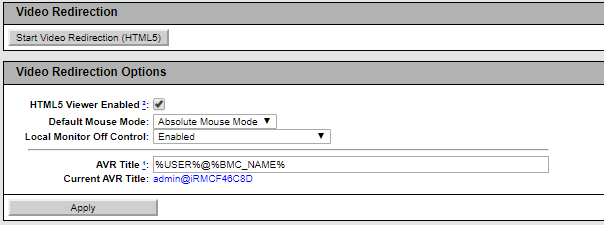
2. Then check the box for ‘HTML5 Viewer Enabled’ and click ‘Start Video Redirection’.
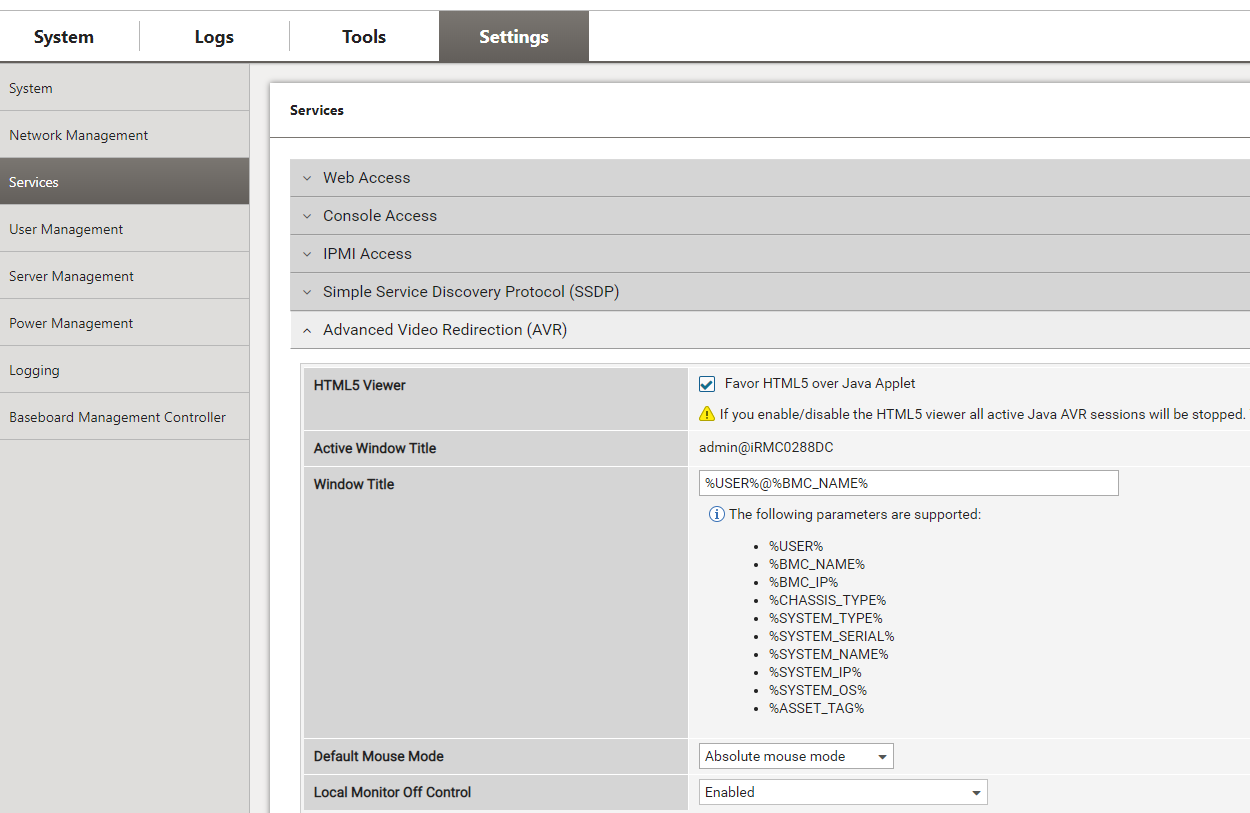
3. If your server uses iRMC S5, the screen is a little different. In the top right corner, you’ll see the following:
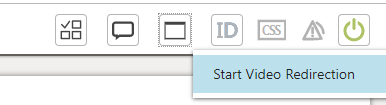
4. To start, simply press ‘Start Video Redirection’. To change the Console to HTML5, go to ‘Settings, followed by ‘Service’ and check the ‘Favor HMTL5 over Java Applet’ box at ‘Advanced Video Redirection’:
Mounting an ISO with iRMC
1. When you start the console redirection, you’ll see a CD-ROM icon in the top right corner.
![]()
2. Click on ‘Browse File’ and select the ISO that you want to use.
3. Then click on ‘Start Media’.
4. When you reboot the server, press F12 to enter the boot options, select ‘Fujitsu Virtual CD-ROM’ to start.
You can now start installing the software that you prefer and know how to open the Console redirection on TSM.
Note:
- If you can’t connect with Java, check the settings of this program.
- At the Java Control Panel, go to ‘Security and set the security level to ‘High’ instead of ‘Very High’.
- Add the address of the out-of-band-management to the ‘Exception Site List.
Done!


