Assume you already have a reseller or admin-privileged account to start. To begin, let's first log in to your Centovacast account. Once logged in, please follow the steps below to create a new stream account in Centovacast.
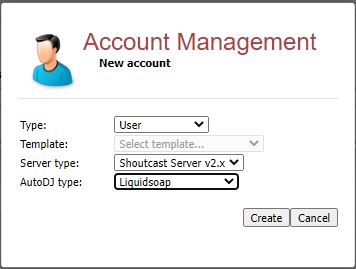
Step 1: Upon login, on your Centovacast Dashboard, you will see an option "New account". To create a new streaming account, press that option.

Step 2: A new window pops up once you press the option. Here you can see the options Type, Templates, Server type, AutoDJ Type etc. Choose the required for your radio account.
Step 3: Once you pick the suitable options, a new page is opened according to your choice. Please refer to the screenshot attached.
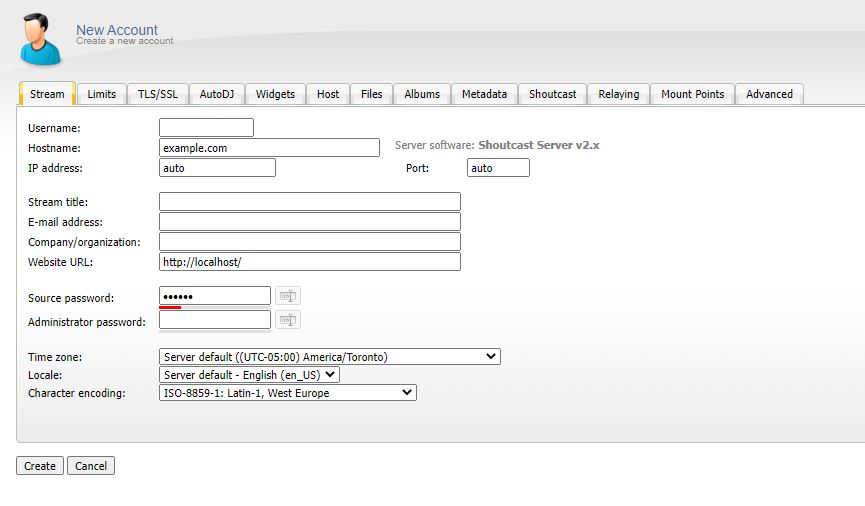
You can see many tabs (such as Stream, Limits, TLS/SSL, AutoDJ, Widgets, Host, Files, Albums, Metadata, Shoutcast, Relaying, Mount Points, and Advanced) while setting up a new account.
Step 4: Let's fill in the first tab, named Stream. Here you can see the following options:
- Username:
- Hostname:
- IP address: auto
- Port: auto
- Stream title:
- E-mail address:
- Company/organization:
- Website URL: http://localhost/
- Source password:
- Administrator password:
IMPORTANT: Don't make changes to the options IP address, Port and Website URL as there are auto-filled by the system.
Step 4: Moving to the next tab, namely Limits. You will see the options as follows:
- Maximum listeners:
- Maximum bit rate:
- Transfer limit:
- Disk quota:
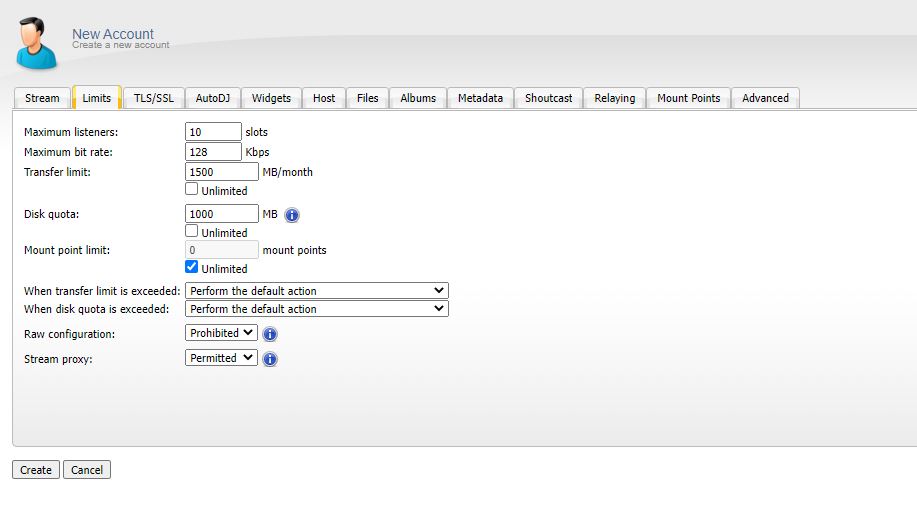
Here, you can set the limits as per your concerns.
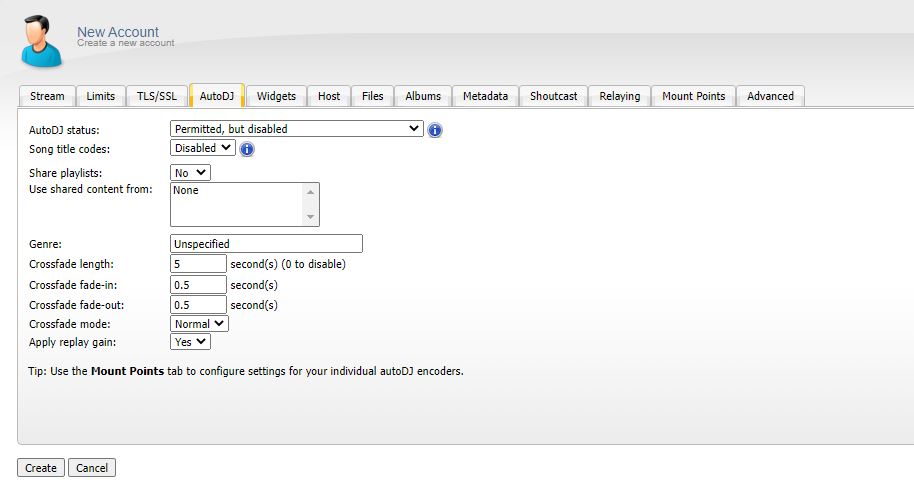
Step 5: Now, let us proceed to the next tab, AutoDJ. You can stream your radio using AutoDJ or go Live with Broadcasting Software(such as BUTT, Rocket Broadcaster etc.).
Step 6: Press "Create" to complete the account creation process.
Please note that these are just the basic steps for creating a new account in Centovacast. The platform offers many advanced features and settings that can be configured as needed.


